
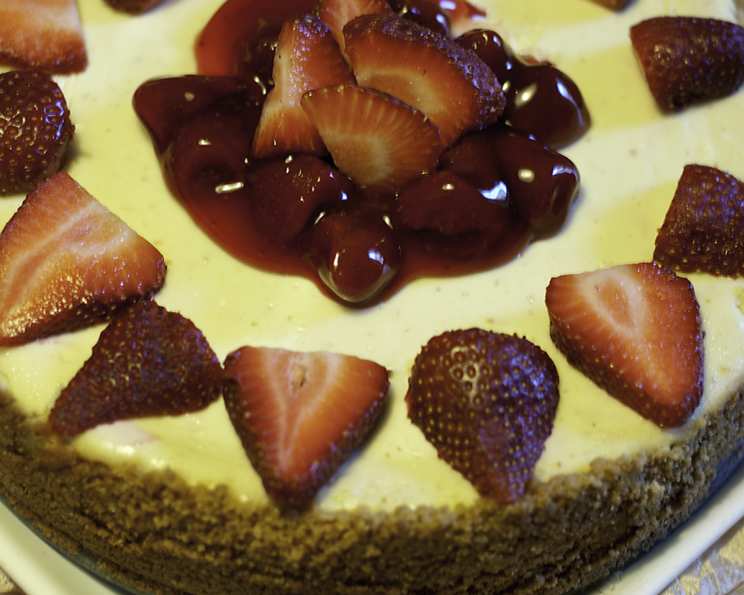
Pampered Chef Perfectly Creamy Cheesecake: A Slice of Heaven
The first time I tasted cheesecake, I was a child at my grandmother’s house. The rich, velvety texture, the subtle tang of the cream cheese, and the sweet, buttery crust – it was pure magic. It wasn’t just dessert; it was an experience. Years later, I stumbled upon this recipe that took me right back to that memory. The perfectly balanced sweetness and creamy texture make it a guaranteed crowd-pleaser. It’s simple elegance, baked into every slice.
Recipe Overview
- Prep Time: 20 minutes
- Cook Time: 55-60 minutes
- Total Time: 5 hours (including cooling and chilling)
- Servings: 12
- Yield: 1 9-inch cheesecake
- Dietary Type: Not specified
Ingredients
For the Crust:
- 1 1/4 cups graham cracker crumbs (about nine 5×2 1/4 inch crackers)
- 1/4 cup butter or 1/4 cup margarine, melted
- 1 tablespoon sugar
For the Filling:
- 24 ounces cream cheese, softened (3 packages)
- 1 cup sugar
- 1/4 cup flour
- 3 eggs, room temperature
- 1/2 cup sour cream
- 1 tablespoon lemon juice
- 1 teaspoon vanilla
- 21 ounces cherry pie filling (optional) or 21 ounces blueberry pie filling (optional)
Equipment Needed
- Springform pan (9-inch)
- Electric mixer
- Mixing bowls
- Cooling rack
- Releasing tool (or thin knife)
Instructions
- Preheat your oven to 300°F (150°C).
- Prepare the Crust: In a medium bowl, combine the graham cracker crumbs, melted butter (or margarine), and sugar. Mix until thoroughly blended.
- Press the crumb mixture firmly into the bottom of the springform pan. Ensure an even layer for a stable crust.
- Bake the crust for 10 minutes. This helps set the crust and prevent it from becoming soggy.
- Remove the crust from the oven and place it on a cooling rack to cool slightly while you prepare the filling.
- Prepare the Filling: In a large mixing bowl, beat the softened cream cheese, sugar, and flour at medium speed of an electric mixer until smooth. The flour helps to stabilize the cheesecake and prevent cracking.
- Add the eggs, one at a time, to the cream cheese mixture. Mix at low speed just until blended. Overmixing at this stage can incorporate too much air, leading to a cracked cheesecake.
- Stir in the sour cream, lemon juice, and vanilla. Mix until just combined. Be careful not to overmix.
- Pour the filling into the prepared crust. Spread evenly.
- Bake for 55-60 minutes, or until the center appears nearly set when gently shaken. The center will firm up as it cools. Overbaking will result in a dry, cracked cheesecake.
- Remove the cheesecake from the oven and place it on a cooling rack.
- Immediately run a releasing tool (or a thin knife) around the sides of the cake to loosen it from the pan. This helps prevent cracking as the cheesecake cools and contracts.
- Cool the cheesecake completely on the cooling rack.
- Cover the cooled cheesecake and refrigerate for at least 4 hours, or preferably overnight, before serving. This allows the flavors to meld and the cheesecake to set completely.
- Release the collar from the springform pan.
- To serve, top with cherry pie filling or blueberry pie filling, if desired. Cut into wedges and enjoy!
Expert Tips & Tricks
- Room Temperature Ingredients: Using room temperature cream cheese and eggs is crucial for a smooth, lump-free filling. Allow these ingredients to sit at room temperature for at least an hour before starting.
- Preventing Cracks: To further minimize the risk of cracking, consider using a water bath. Wrap the bottom of the springform pan in aluminum foil, place it in a larger baking pan, and fill the larger pan with hot water to come about halfway up the sides of the springform pan. This creates a more humid environment in the oven, which helps the cheesecake bake evenly.
- Don’t Open the Oven Door: Avoid opening the oven door during baking, as this can cause temperature fluctuations that lead to cracking.
- Gentle Mixing: Overmixing the batter incorporates too much air, which can cause the cheesecake to puff up and then collapse, leading to cracks. Mix the filling on low speed and only until just combined.
- Checking for Doneness: The cheesecake is done when the edges are set, but the center still jiggles slightly when the pan is gently shaken. It will continue to set as it cools.
Serving & Storage Suggestions
Serve the cheesecake chilled, either plain or topped with your favorite fruit pie filling, fresh berries, whipped cream, or chocolate sauce. For an elegant presentation, dust the top with a light coating of powdered sugar.
To store leftovers, cover the cheesecake tightly with plastic wrap or store it in an airtight container in the refrigerator. It will keep for up to 5 days. You can also freeze the cheesecake for up to 2 months. To freeze, wrap it tightly in plastic wrap and then in aluminum foil. Thaw it in the refrigerator overnight before serving.
Nutritional Information
(Estimated values, will vary based on specific ingredient brands and toppings)
| Nutrient | Amount per Serving | % Daily Value |
|---|---|---|
| Calories | 380 kcal | 19% |
| Total Fat | 27 g | 42% |
| Saturated Fat | 15 g | 75% |
| Cholesterol | 125 mg | 42% |
| Sodium | 285 mg | 12% |
| Total Carbohydrate | 30 g | 10% |
| Dietary Fiber | 0 g | 0% |
| Sugars | 23 g | – |
| Protein | 6 g | 12% |
Variations & Substitutions
- Gluten-Free Crust: Use gluten-free graham crackers or a gluten-free shortbread cookie for the crust.
- Chocolate Cheesecake: Add 1/4 cup of unsweetened cocoa powder to the filling for a chocolate cheesecake.
- Lemon Cheesecake: Increase the lemon juice to 2 tablespoons and add the zest of one lemon to the filling for a lemon-flavored cheesecake.
- Different Pie Filling: Experiment with different pie fillings, such as apple, peach, or mixed berry.
- Extracts: Use different extracts like almond, coconut or orange in place of vanilla. Adjust quantity to taste.
FAQs (Frequently Asked Questions)
Q: Why did my cheesecake crack?
A: Cracking can be caused by overbaking, temperature fluctuations, or overmixing the batter. Follow the tips above to minimize the risk of cracking.
Q: Can I use low-fat cream cheese?
A: While you can use low-fat cream cheese, it will affect the texture of the cheesecake, making it less creamy. Full-fat cream cheese is recommended for the best results.
Q: Can I make this cheesecake ahead of time?
A: Yes, this cheesecake is perfect for making ahead of time. In fact, it tastes even better after it has had time to chill in the refrigerator for at least 4 hours, or overnight.
Q: Do I need to use a springform pan?
A: A springform pan is highly recommended for this recipe, as it allows you to easily remove the cheesecake without damaging it. If you don’t have a springform pan, you can bake the cheesecake in a regular pie dish, but it will be more difficult to remove.
Q: Can I freeze the cheesecake?
A: Yes, you can freeze the cheesecake for up to 2 months. Wrap it tightly in plastic wrap and then in aluminum foil. Thaw it in the refrigerator overnight before serving.
Final Thoughts
This Pampered Chef Perfectly Creamy Cheesecake recipe is more than just a dessert; it’s an experience waiting to be shared. It’s a recipe that welcomes variations and personal touches, so don’t hesitate to experiment with your favorite flavors and toppings. Bake it for a special occasion, or simply to brighten up a weekday. However you serve it, this cheesecake is sure to bring a smile to everyone’s face. So, preheat your oven, gather your ingredients, and get ready to create a slice of heaven! And once you’ve tried it, please share your thoughts. Happy baking!