
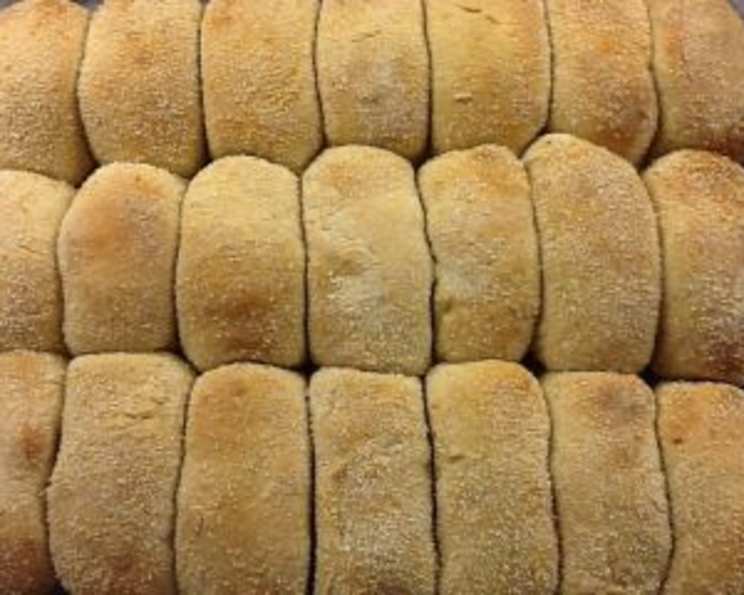
Pan De Sal: A Taste of Filipino Mornings
The scent of freshly baked bread has always been my personal time machine. But there’s one aroma that instantly transports me back to the humid Manila mornings of my childhood: the sweet, yeasty fragrance of pan de sal. I remember waking up to the clatter of the baker’s horn, a signal that the warm, golden-brown rolls were ready for pickup. Running barefoot to the corner bakery, clutching a few pesos, was a ritual, and tearing into that first, slightly salty, subtly sweet bite was pure bliss. The soft, pillowy interior and the delicate, crumb-coated crust – it’s a flavor memory I cherish.
Recipe Overview
- Prep Time: 45 minutes
- Cook Time: 15 minutes
- Total Time: 2 hours
- Servings: 24
- Yield: 24 rolls
- Dietary Type: Not specified
Ingredients
- 1 cup skim milk (110-115 deg. F)
- 5 tablespoons unsalted butter (do not use “spreads”)
- 1 egg, lightly beaten
- 1 teaspoon salt
- 1/2 cup sugar
- 4 cups bread flour (4 cups weigh 18 oz)
- 3 teaspoons bread machine yeast
- 1/2 cup breadcrumbs
Equipment Needed
- Bread machine
- Microwave
- Measuring cups and spoons
- Mixing bowl
- Plastic spatula
- 9×13″ cake pan
- Oven
Instructions
-
Begin by warming the skim milk. Microwave it on High for 30 seconds, ensuring it reaches a temperature between 110-115 degrees Fahrenheit.
-
Next, bring the egg to room temperature. You can do this by placing the uncracked egg in hot water for 60 seconds, then lightly beat it. This step helps the egg incorporate more smoothly into the dough.
-
Melt or soften the butter to room temperature. Softened butter ensures even distribution throughout the dough.
-
Select the “Dough” cycle on your bread machine.
-
Add all ingredients, except for the breadcrumbs, into the bread machine in the order recommended by your machine’s manufacturer. Typically, wet ingredients are added first, followed by dry ingredients, with the yeast added last and away from the wet ingredients to prevent premature activation.
-
First Rise: Once the machine has completed the kneading process, the dough will be sticky. It is important to note that a slightly gooey dough is desirable, as this contributes to the moistness of the final pan de sal. Place the dough in a bowl greased with Pam spray and spray the top of the dough with more Pam. Cover the bowl and let the dough rise in a warm place for approximately 45 minutes, or until it has doubled in volume.
-
To test if the dough has doubled, gently poke it with two fingers. If the indentation remains without springing back, the dough has risen sufficiently.
-
Second Rise and Shaping: Gently deflate the dough with your fist to release excess air. Then, use a plastic spatula to divide the dough into 24 equal portions. Shape each portion into an oval and roll it in the breadcrumbs, ensuring the entire surface is coated.
-
Line up the breadcrumb-coated ovals in a 9×13″ ungreased cake pan, positioning the rolls so they are touching each other. This close arrangement provides support as the rolls rise, preventing them from spreading out like ciabatta bread.
-
Allow the rolls to rise a second time for 30 minutes. Meanwhile, preheat your oven to 375 degrees Fahrenheit (190 degrees Celsius).
-
Baking: Bake the pan de sal in the preheated oven for 15 minutes, or until the tops are golden brown. Keep a close eye on them towards the end of the baking time to prevent burning.
Expert Tips & Tricks
- Dough Consistency: The dough should be sticky. If it appears too dry, add water one tablespoon at a time until the correct consistency is achieved. Conversely, if it’s too wet, add flour one tablespoon at a time.
- Warm Environment for Rising: Creating a warm environment is crucial for proper dough rise. You can place the dough in a slightly warmed oven (turned off) or near a warm stovetop.
- Even Baking: Rotate the baking pan halfway through the baking time to ensure even browning.
- Breadcrumbs: Using fine breadcrumbs ensures a delicate crust. Panko breadcrumbs can be pulsed in a food processor to achieve a finer texture.
- Enrichment: For an even richer flavor, consider adding a tablespoon of powdered milk to the dough.
Serving & Storage Suggestions
Pan de sal is best enjoyed warm, straight from the oven. It’s a classic breakfast staple in the Philippines, often served with coffee or hot chocolate. It can also be enjoyed as a snack (merienda) with cheese, peanut butter, or jam.
To store leftover pan de sal, place them in an airtight container at room temperature. They will stay fresh for up to 2 days. For longer storage, freeze them in a freezer-safe bag. To reheat, simply microwave for a few seconds or bake in a preheated oven at 350 degrees Fahrenheit (175 degrees Celsius) until warmed through.
Nutritional Information
| Nutrient | Amount per Serving | % Daily Value |
|---|---|---|
| Calories | 130.9 kcal | N/A |
| Calories from Fat | 26 g | 20% |
| Total Fat | 3 g | 4% |
| Saturated Fat | 1.7 g | 8% |
| Cholesterol | 14.3 mg | 4% |
| Sodium | 123.4 mg | 5% |
| Total Carbohydrate | 22.5 g | 7% |
| Dietary Fiber | 0.8 g | 3% |
| Sugars | 4.4 g | N/A |
| Protein | 3.4 g | 6% |
Note: Nutritional information is an estimate and may vary based on specific ingredients and preparation methods.
Variations & Substitutions
- Sweetness Level: Adjust the amount of sugar to your liking. Some prefer a slightly sweeter pan de sal, while others prefer it less sweet.
- Enriched Dough: For a richer dough, substitute some of the skim milk with evaporated milk or add an extra egg yolk.
- Flavor Variations: Experiment with different flavorings, such as a pinch of cinnamon or a dash of vanilla extract.
- Gluten-Free: While a direct substitution with all-purpose gluten-free flour may not yield the same results, using a gluten-free bread flour blend with added xanthan gum can be a starting point. Expect adjustments in the liquid content.
- Ube Pan De Sal: Add ube halaya (purple yam jam) to the dough for a vibrant color and unique flavor.
FAQs (Frequently Asked Questions)
Q: Why is my pan de sal dough so sticky?
A: Pan de sal dough is meant to be sticky, almost like the adhesive on a Post-it note. This stickiness contributes to the soft and moist texture of the final product.
Q: Can I use all-purpose flour instead of bread flour?
A: Bread flour is recommended because it has a higher protein content, which develops more gluten and results in a chewier texture. However, you can use all-purpose flour in a pinch, but the texture will be slightly different.
Q: How do I keep my pan de sal soft after baking?
A: Store the baked pan de sal in an airtight container to prevent them from drying out. You can also place a slice of bread in the container to help maintain moisture.
Q: Can I freeze pan de sal?
A: Yes, pan de sal freezes well. Allow them to cool completely before placing them in a freezer-safe bag. When ready to eat, thaw them at room temperature or reheat them in the oven.
Q: Why are my pan de sal not rising properly?
A: Ensure your yeast is fresh and active. Also, provide a warm environment for the dough to rise. If the temperature is too cold, the yeast will not activate properly.
Final Thoughts
Making pan de sal at home might seem like a labor of love, but the reward is immeasurable. The aroma filling your kitchen, the soft, slightly sweet taste on your tongue, and the connection to Filipino culinary heritage – it’s an experience worth every minute. Don’t be afraid to experiment with variations and make this recipe your own. So, go ahead, gather your ingredients, and let the magic of pan de sal fill your home with warmth and deliciousness. I hope you enjoy this recipe and that it brings a little bit of Filipino sunshine to your day.