
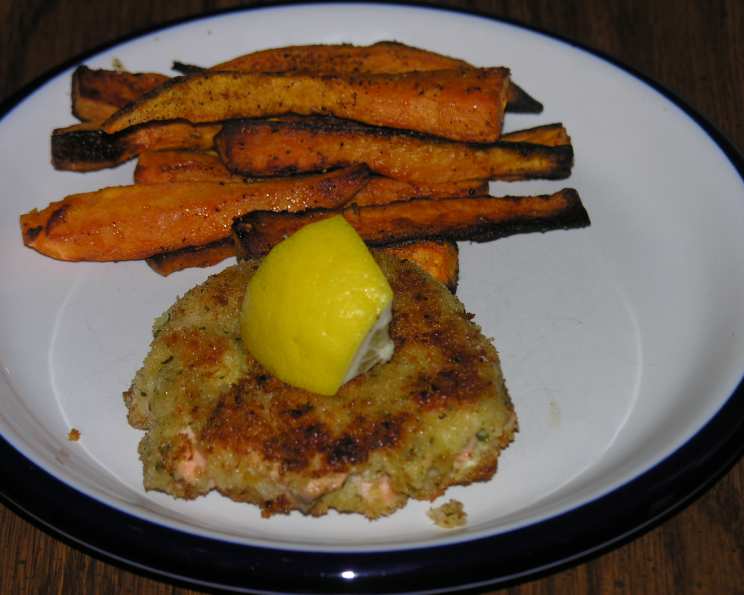
Pan-Fried Fresh Salmon Cakes: A Culinary Journey
There’s something undeniably comforting about the aroma of pan-fried seafood filling a kitchen. For me, it instantly transports me back to my grandmother’s cozy cottage on the coast. She’d always have a batch of salmon cakes sizzling away, ready to be devoured with a dollop of her homemade tartar sauce. The crispy exterior giving way to the tender, flavorful salmon within – it was pure culinary magic, a taste of home that I’ve cherished and recreated countless times since.
Recipe Overview
- Prep Time: 25 minutes
- Cook Time: 8 minutes
- Total Time: 33 minutes
- Servings: 8
- Dietary Type: Pescatarian
Ingredients
- 1 1⁄4 lbs salmon fillets
- 1 slice white bread, such as Pepperidge Farm, crusts removed and white part chopped very fine (about 5 tablespoons)
- 2 tablespoons mayonnaise
- 1⁄4 cup onion, grated
- 2 tablespoons fresh parsley leaves, chopped
- 3⁄4 teaspoon table salt
- 1 1⁄2 tablespoons fresh lemon juice
- 1⁄2 cup unbleached all-purpose flour
- 2 large eggs, lightly beaten
- 1⁄2 cup vegetable oil, plus
- 1 1⁄2 teaspoons vegetable oil
- 3⁄4 cup Japanese-style bread crumbs (Panko)
Equipment Needed
- Sharp knife
- Medium bowl
- Parchment-lined baking sheet
- Pie plates or shallow baking dishes (3)
- Slotted spatula
- Large, heavy-bottomed skillet
- Paper towels
Instructions
- The first step in creating these delectable salmon cakes is preparing the salmon. Carefully inspect the salmon fillets for any remaining pin bones. Use a sharp knife or specialized pin bone tweezers to remove them. Then, using your knife, cut the flesh off the skin, discarding the skin. Now, chop the salmon flesh into small pieces, about 1/4- to 1/3-inch in size.
- In a medium bowl, combine the chopped salmon with the finely chopped white bread, mayonnaise, grated onion, chopped fresh parsley, table salt, and fresh lemon juice. Gently mix all the ingredients together until well combined.
- Using a generous 1/4-cup portion of the salmon mixture, form the mixture into a patty. Each patty should be approximately 2 1/2 inches in diameter and 3/4 inch thick. As you form each patty, place it on a baking sheet lined with parchment paper. Repeat this process with the remaining salmon mixture until you have 8 patties.
- To help the patties hold their shape and ensure a crispy crust, place the baking sheet with the patties in the freezer for about 15 minutes, or until the surface moisture has evaporated. This step is crucial for preventing the salmon cakes from falling apart during cooking.
- While the patties are chilling, prepare the breading station. Spread the flour in one pie plate or shallow baking dish. In a second pie plate, beat the eggs with 1 1/2 teaspoons of vegetable oil and 1 1/2 teaspoons of water. In a third pie plate, spread the Panko bread crumbs.
- Once the salmon patties have chilled, remove them from the freezer. Dip each patty in the flour, ensuring it’s fully covered. Shake off any excess flour. Next, transfer the floured patty to the beaten egg mixture. Using a slotted spatula, turn the patty to coat it completely with the egg. Let any excess egg drip off before moving to the next step.
- Transfer the egg-coated patty to the Panko bread crumbs. Shake the pan gently to coat the patty completely with the bread crumbs. Once fully coated, return the breaded patty to the baking sheet.
- Now it’s time to cook the salmon cakes. Heat the remaining 1/2 cup of vegetable oil in a large, heavy-bottomed skillet over medium-high heat. The oil should be shimmering but not smoking – this usually takes about 3 minutes.
- Carefully add the breaded salmon patties to the hot oil in the skillet. Cook for about 2 minutes on the first side, until they are medium golden brown. Flip the cakes over and continue cooking for another 2 minutes, until they are medium golden brown on the second side and the salmon is cooked through.
- Once cooked, transfer the salmon cakes to a plate lined with paper towels to absorb any excess oil. This step helps ensure a crispy, non-greasy final product. Allow the salmon cakes to rest on the paper towels for about 30 seconds.
- Serve the pan-fried fresh salmon cakes immediately. They are delicious on their own or with a variety of sauces.
Expert Tips & Tricks
- For a richer flavor, try adding a tablespoon or two of freshly grated Parmesan cheese to the salmon mixture.
- To ensure even cooking, use a heavy-bottomed skillet that distributes heat evenly.
- Don’t overcrowd the skillet. Cook the salmon cakes in batches to maintain the oil temperature and prevent them from steaming instead of frying.
- If you don’t have Panko bread crumbs, regular bread crumbs can be used, but the texture won’t be as crispy.
- Make-ahead tip: The salmon patties can be formed and breaded ahead of time and stored in the refrigerator for up to 24 hours before cooking.
Serving & Storage Suggestions
Serve these pan-fried salmon cakes immediately for the best flavor and texture. They’re excellent as an appetizer, a light lunch, or a main course. Pair them with a lemon-dill sauce, tartar sauce, or a simple aioli.
Leftover salmon cakes can be stored in an airtight container in the refrigerator for up to 3 days. To reheat, bake them in a preheated oven at 350°F (175°C) for about 10-15 minutes, or until heated through. You can also reheat them in a skillet over medium heat, but be careful not to burn the breading. I don’t recommend freezing cooked salmon cakes as it affects their texture.
Nutritional Information
| Nutrient | Amount per Serving | % Daily Value |
|---|---|---|
| Calories | 297 kcal | N/A |
| Calories from Fat | 182 kcal | 61% |
| Total Fat | 20.3 g | 31% |
| Saturated Fat | 3.1 g | 15% |
| Cholesterol | 80.1 mg | 26% |
| Sodium | 345.7 mg | 14% |
| Total Carbohydrate | 10.6 g | 3% |
| Dietary Fiber | 0.5 g | 1% |
| Sugars | 0.8 g | 3% |
| Protein | 17.5 g | 35% |
Note: Nutritional information is an estimate and may vary based on specific ingredients and cooking methods.
Variations & Substitutions
- Spicy Salmon Cakes: Add a pinch of cayenne pepper or a dash of hot sauce to the salmon mixture for a little heat.
- Herbaceous Salmon Cakes: Experiment with different herbs like dill, chives, or tarragon to create unique flavor profiles.
- Gluten-Free: Substitute the all-purpose flour with a gluten-free flour blend and use gluten-free bread crumbs.
- Different Fish: While this recipe calls for salmon, it can also be made with other types of fish, such as cod, haddock, or tuna.
- Vegetarian Option: For a vegetarian twist, substitute the salmon with canned chickpeas or white beans, mashed and seasoned with smoked paprika and seaweed flakes for a fishy flavor.
FAQs (Frequently Asked Questions)
Q: Can I use canned salmon instead of fresh salmon?
A: While fresh salmon is preferred for its flavor and texture, canned salmon can be used in a pinch. Be sure to drain the canned salmon well before mixing it with the other ingredients.
Q: How do I prevent the salmon cakes from falling apart?
A: Chilling the patties in the freezer for 15 minutes before breading helps them hold their shape. Also, be sure to use a light hand when mixing the ingredients and avoid over-mixing.
Q: Can I bake the salmon cakes instead of pan-frying them?
A: Yes, you can bake the salmon cakes. Preheat your oven to 375°F (190°C) and bake the breaded patties on a baking sheet for about 20-25 minutes, or until golden brown and cooked through.
Q: What’s the best way to reheat salmon cakes?
A: Reheating in the oven is the best way to maintain crispness. You can also reheat them in a skillet, but they may not be as crispy.
Q: What sauces pair well with salmon cakes?
A: Tartar sauce, lemon-dill sauce, aioli, and even a simple squeeze of fresh lemon juice all complement the flavor of salmon cakes beautifully.
Final Thoughts
These Pan-Fried Fresh Salmon Cakes are more than just a recipe; they’re a gateway to creating lasting memories in your own kitchen. The satisfying crispness, the flavorful salmon, and the aroma that fills your home – it’s a culinary experience that’s sure to delight. So, gather your ingredients, follow the simple steps, and prepare to indulge in a taste of homemade comfort. Don’t hesitate to get creative with variations and toppings to make this recipe your own! I encourage you to share your feedback and creations – happy cooking!