
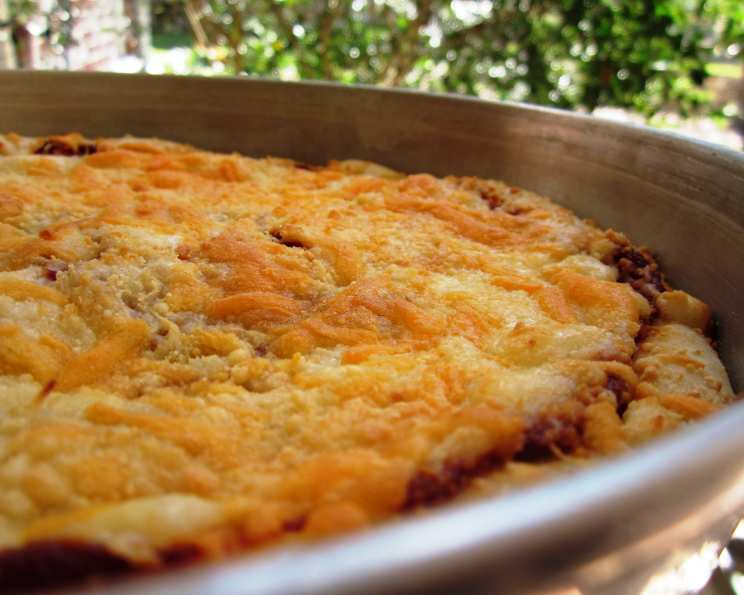
The Ultimate Guide to Homemade Pan Pizza Crust
The scent of baking pizza dough – yeasty, warm, and utterly irresistible – always transports me back to my college days. Late nights fueled by endless study sessions were invariably punctuated by homemade pan pizzas, lovingly crafted (and sometimes disastrously executed) in our tiny dorm kitchen. There was something so comforting about the simple act of kneading the dough, layering on our favorite toppings, and watching it bubble and brown in the oven. It wasn’t just about the food; it was about the camaraderie, the shared experience, and the taste of home away from home.
Recipe Overview
- Prep Time: 30 minutes
- Cook Time: 20-25 minutes
- Rise Time: 1-1.5 hours
- Total Time: 2 hours 20 minutes
- Yields: 3 pizzas
- Serves: 18
Ingredients
- 1 1⁄3 cups warm water (105F)
- 1⁄4 cup nonfat dry milk powder
- 1⁄2 teaspoon salt
- 4 cups flour
- 1 tablespoon sugar
- 1⁄4 ounce dry yeast
- 2 tablespoons vegetable oil (for dough)
- 9 ounces mozzarella cheese (3 oz. per pan)
- Butter-flavored cooking spray
For the Sauce:
- 1 (8 ounce) can tomato sauce
- 1 teaspoon dry oregano
- 1⁄2 teaspoon marjoram
- 1⁄2 teaspoon dry basil
- 1⁄2 teaspoon garlic salt
Equipment Needed
- Large mixing bowl (2 qt.)
- Measuring cups and spoons
- Flat surface for kneading
- 3 x 9″ cake pans
- Rolling pin
- Plate (for covering)
- Oven
Instructions
- In a large (2 qt.) bowl, combine the yeast, sugar, salt, and dry milk powder.
- Add the warm water and stir well to mix everything. Let the mixture sit for about two minutes to allow the yeast to activate.
- Add the vegetable oil to the bowl and stir again until combined.
- Gradually add the flour, stirring until a dough begins to form and the flour is absorbed. The dough will be slightly sticky at this stage.
- Turn the dough out onto a lightly floured flat surface. Knead the dough for about 10 minutes, until it becomes smooth and elastic. This is crucial for developing the gluten, which gives the crust its structure.
- Divide the dough into three equal balls.
- Prepare three 9″ cake pans by spraying each with butter-flavored cooking spray. Then, add 1 tablespoon of vegetable oil to each pan, making sure it’s spread evenly across the bottom and up the sides. This oil bath is what will give the pan pizza its signature crispy, golden-brown crust.
- Using a rolling pin, roll out each dough ball to approximately a 9″ circle. Place each circle of dough into one of the prepared cake pans.
- Spray the outer edge of the dough in each pan with butter-flavored cooking spray. Cover each pan with a plate to prevent the dough from drying out. Place the pans in a warm area to rise for 1 to 1 1/2 hours. The dough should almost double in size.
- While the dough is rising, prepare the sauce. In a small bowl, combine the tomato sauce, dry oregano, marjoram, dry basil, and garlic salt. Mix well and let it sit for at least 1 hour to allow the flavors to meld.
- Preheat the oven to 475F (246C).
- Once the dough has risen, spoon about 1/3 cup of the prepared sauce onto each dough-filled pan, spreading it evenly to within 1 inch of the edge of the crust.
- Distribute 1 1/2 ounces of shredded mozzarella cheese over the sauce in each pan.
- Add your desired toppings, such as pepperoni, ham, vegetables, or cooked ground sausage or beef. Get creative and customize each pizza to your liking!
- Top each pizza with the remaining 3 ounces of mozzarella cheese.
- Place the pans in the preheated oven and bake for 20-25 minutes, or until the cheese is bubbling and melted, and the outer crust is golden brown and crispy. Keep a close eye on the pizzas during the last few minutes of baking to prevent burning.
- Remove the pizzas from the oven and let them cool slightly before slicing into six slices each.
Expert Tips & Tricks
- Dough Hydration: The amount of water needed can vary slightly depending on the humidity and the type of flour you use. If the dough feels too dry, add a tablespoon of water at a time until it comes together. If it’s too sticky, add a tablespoon of flour at a time.
- Warm Water Temperature: Using water that’s too hot can kill the yeast, while water that’s too cold will prevent it from activating properly. Aim for a temperature of around 105F (40C). A kitchen thermometer is helpful for ensuring accuracy.
- Kneading Time: Don’t skimp on the kneading! This step is crucial for developing the gluten in the dough, which gives it its elasticity and chewiness. If you have a stand mixer with a dough hook, you can use it to knead the dough for about 8 minutes.
- Rise Time: The rise time can vary depending on the temperature of your environment. A warmer environment will result in a faster rise. If your kitchen is particularly cold, you can place the dough in a slightly warmed oven (turned off!) to help it rise.
- Crispy Crust Secret: The secret to a truly crispy pan pizza crust is the combination of the oil in the pan and the high baking temperature. Don’t be afraid to let the crust get nice and golden brown!
Serving & Storage Suggestions
Serve your homemade pan pizza hot, fresh out of the oven. It’s delicious on its own, or you can pair it with a simple salad or some garlic bread.
Leftover pizza can be stored in the refrigerator for up to 3 days. To reheat, place the slices on a baking sheet and bake at 350F (175C) until heated through. You can also reheat individual slices in the microwave, but the crust may not be as crispy. For longer storage, you can freeze the pizza. Wrap individual slices tightly in plastic wrap and then place them in a freezer-safe bag or container. Frozen pizza can be stored for up to 2 months. To reheat, bake directly from frozen at 375F (190C) until heated through.
Nutritional Information
| Nutrient | Amount per Serving | % Daily Value |
|---|---|---|
| Calories | 173.4 kcal | N/A |
| Calories from Fat | N/A | 26% |
| Total Fat | 5.1 g | 7% |
| Saturated Fat | 2.1 g | 10% |
| Cholesterol | 11.6 mg | 3% |
| Sodium | 230.4 mg | 9% |
| Total Carbohydrate | 24.4 g | 8% |
| Dietary Fiber | 1.3 g | 5% |
| Sugars | 2.3 g | N/A |
| Protein | 7.3 g | 14% |
Note: Nutritional information is an estimate and may vary based on specific ingredients and portion sizes.
Variations & Substitutions
- Gluten-Free: Substitute the all-purpose flour with a gluten-free all-purpose flour blend. You may need to adjust the amount of water slightly to achieve the correct dough consistency.
- Whole Wheat: Replace up to half of the all-purpose flour with whole wheat flour for a nuttier flavor and added fiber.
- Different Cheeses: Experiment with different types of cheeses, such as provolone, fontina, or a blend of Italian cheeses.
- Spicy Pizza: Add a pinch of red pepper flakes to the sauce for a little heat.
- Garlic Crust: Brush the edges of the crust with garlic butter before baking for extra flavor.
FAQs (Frequently Asked Questions)
Q: Can I make the dough ahead of time?
A: Yes, you can make the dough ahead of time and store it in the refrigerator for up to 24 hours. Just wrap it tightly in plastic wrap after the first rise. When you’re ready to use it, let it sit at room temperature for about 30 minutes before rolling it out.
Q: Can I use active dry yeast instead of instant yeast?
A: Yes, you can use active dry yeast. Just proof it in the warm water for about 5-10 minutes before adding the other ingredients.
Q: What if my dough doesn’t rise?
A: There could be a few reasons why your dough isn’t rising. Make sure your yeast is fresh, and that the water is warm enough (but not too hot). Also, ensure that the environment is warm enough for the dough to rise.
Q: Can I use a different size pan?
A: Yes, you can use a different size pan, but you may need to adjust the baking time accordingly. Keep an eye on the pizza and bake until the crust is golden brown and the cheese is melted and bubbly.
Q: What’s the best way to get a crispy crust?
A: The combination of the oil in the pan and the high baking temperature is key to getting a crispy crust. Also, don’t overcrowd the pizza with toppings, as this can prevent the crust from getting crispy.
Final Thoughts
Creating a homemade pan pizza crust might seem intimidating, but it’s surprisingly simple and incredibly rewarding. There’s a certain magic in transforming simple ingredients into a satisfying meal that brings people together. So, gather your ingredients, preheat that oven, and embark on a culinary adventure. Don’t be afraid to experiment with different toppings and flavors to create your own signature pan pizza. And most importantly, have fun! I hope this recipe inspires you to create delicious memories in your own kitchen. Share your creations and feedback – I’d love to hear how your pan pizza turns out! Perhaps you could serve it with a crisp Italian salad and a glass of chilled Chianti for a truly unforgettable meal.