
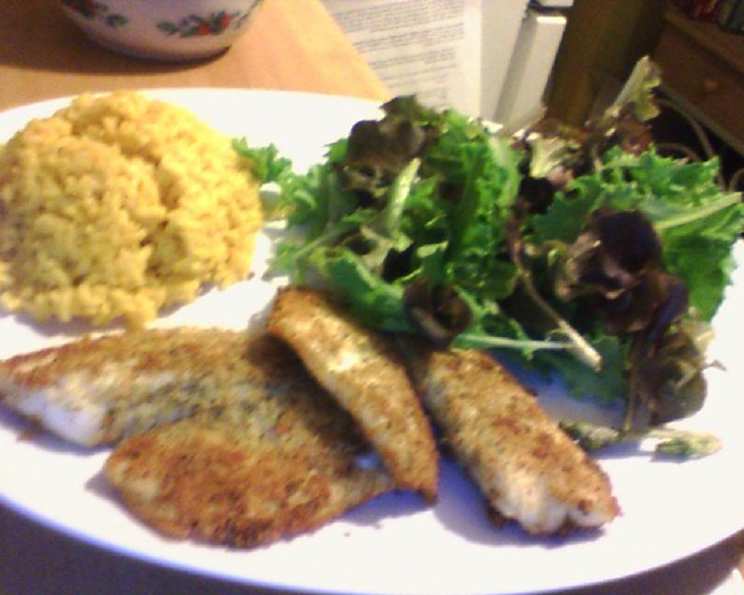
Perfectly Pan-Seared Tilapia: A Weeknight Delight
I remember the first time I made pan-seared tilapia. It was a weeknight, I was short on time, and staring blankly into the refrigerator, willing something magical to appear. Instead, I saw a package of tilapia fillets, a half-empty bottle of olive oil, and a box of breadcrumbs lurking in the pantry. Necessity, as they say, is the mother of invention, and that night I discovered just how quickly and deliciously a simple fillet of fish could be transformed into a satisfying and flavorful meal. That initial experiment sparked a lifelong love for this versatile and easy-to-prepare dish.
Recipe Overview
- Prep Time: 5 minutes
- Cook Time: 10 minutes
- Total Time: 15 minutes
- Servings: 3
- Yield: 3 fillets
- Dietary Type: Pescatarian
Ingredients
- 1 lb tilapia fillet
- 4 tablespoons olive oil (divided)
- 1 cup Italian seasoned breadcrumbs
- 1 teaspoon dried parsley
- 1 teaspoon dried basil
- Salt, to taste
- Pepper, to taste
- Olive oil, for pan (about 2 tablespoons)
Equipment Needed
- Skillet
- Broiler pan
Instructions
- Begin by preheating your broiler. Getting this done early ensures a perfectly timed finish.
- In a medium bowl, thoroughly mix together the Italian seasoned breadcrumbs, dried parsley, and dried basil. This combination creates a flavorful and aromatic coating for the tilapia.
- Heat a skillet over medium-high heat. The skillet needs to be hot before adding the fish to ensure a good sear.
- While the pan is heating, prepare the tilapia fillets. Season both sides generously with salt and pepper.
- Dip each fillet into the olive oil, ensuring it is lightly coated on both sides. Gently shake off any excess oil to prevent the breadcrumbs from becoming soggy.
- Immediately dip the oiled fillets into the breadcrumb mixture, pressing gently to ensure the breadcrumbs adhere evenly to both sides. Set aside the breaded fillets on a clean plate.
- Add the remaining olive oil (about 2 tablespoons) to the preheated skillet. Allow the oil to heat until it just starts to shimmer and almost smoke. This indicates that the pan is hot enough for searing.
- Carefully place the breaded tilapia fillets into the hot skillet.
- Sear the fillets for 2-5 minutes on each side, depending on the thickness of the fish. Thinner fillets will only require about 2 minutes per side, while thicker cuts may need closer to 4 minutes. The goal is to achieve a golden-brown crust.
- Once seared, carefully slide the skillet (if oven-safe) or transfer the tilapia fillets onto a broiler pan.
- Place the broiler pan under the preheated broiler and broil for 3 minutes more, or until the fish is cooked through and flakes easily with a fork. Watch carefully to prevent the breadcrumbs from burning.
- Serve the pan-seared tilapia immediately.
Expert Tips & Tricks
- Don’t overcrowd the pan: Sear the tilapia in batches if necessary to maintain the heat and ensure proper browning. Overcrowding the pan will lower the temperature and result in steamed, rather than seared, fish.
- Pat the fish dry: Before seasoning, gently pat the tilapia fillets dry with a paper towel. This helps the salt and pepper adhere better and promotes a crispier sear.
- Use a non-stick skillet: While not essential, a non-stick skillet can make the searing process easier and prevent the breadcrumbs from sticking to the pan.
- Add a squeeze of lemon: A squeeze of fresh lemon juice over the finished tilapia adds a bright, citrusy flavor that complements the breaded crust perfectly.
- Don’t overcook: Tilapia is a delicate fish that can easily become dry and tough if overcooked. Cook just until it flakes easily with a fork.
Serving & Storage Suggestions
Serve the pan-seared tilapia immediately while it is hot and crispy. It pairs wonderfully with a variety of sides, such as mashed potatoes, sautéed spinach, steamed green beans, or a fresh salad. Leftovers can be stored in an airtight container in the refrigerator for up to 2 days. Reheat gently in a skillet over low heat or in the oven to maintain the crispness of the breadcrumbs. Freezing is not recommended as it can affect the texture of the fish.
Nutritional Information
| Nutrient | Amount per Serving | % Daily Value |
|---|---|---|
| Calories | 458.6 kcal | N/A |
| Calories from Fat | 205 g | 45% |
| Total Fat | 22.8 g | 35% |
| Saturated Fat | 3.9 g | 19% |
| Cholesterol | 76.1 mg | 25% |
| Sodium | 783.6 mg | 32% |
| Total Carbohydrate | 27.6 g | 9% |
| Dietary Fiber | 2.1 g | 8% |
| Sugars | 2.3 g | 9% |
| Protein | 36.1 g | 72% |
Variations & Substitutions
- Gluten-free: Use gluten-free breadcrumbs to make this recipe gluten-free.
- Spicy: Add a pinch of red pepper flakes to the breadcrumb mixture for a touch of heat.
- Lemon-Herb: Replace the dried parsley and basil with a tablespoon of fresh, finely chopped lemon zest and mixed herbs.
- Parmesan-Crusted: Add ¼ cup of grated Parmesan cheese to the breadcrumb mixture for a richer, cheesier flavor.
- Different Fish: While this recipe is written for tilapia, you can easily substitute other mild white fish fillets such as cod, haddock, or flounder. Adjust cooking times accordingly based on the thickness of the fillets.
FAQs (Frequently Asked Questions)
Q: Can I use fresh breadcrumbs instead of Italian seasoned breadcrumbs?
A: Yes, you can use fresh breadcrumbs, but you may need to add additional Italian seasoning, parsley, and basil to achieve the same flavor profile.
Q: How do I know when the tilapia is cooked through?
A: The tilapia is cooked through when it flakes easily with a fork and the internal temperature reaches 145°F (63°C).
Q: Can I bake the tilapia instead of pan-searing and broiling?
A: Yes, you can bake the tilapia at 375°F (190°C) for about 15-20 minutes, or until cooked through.
Q: What if my breadcrumbs are burning under the broiler?
A: Lower the broiler rack or reduce the broiling time. You can also tent the tilapia with foil to prevent the breadcrumbs from burning.
Q: Can I prepare the tilapia ahead of time?
A: You can bread the tilapia ahead of time and store it in the refrigerator for up to 2 hours before cooking. However, it’s best to cook it immediately after breading for the crispiest results.
Final Thoughts
This pan-seared tilapia recipe is a testament to the fact that delicious and satisfying meals don’t have to be complicated or time-consuming. With just a few simple ingredients and a little bit of culinary know-how, you can create a restaurant-quality dish in the comfort of your own home. So, go ahead, give it a try! I’m confident that this will become a new weeknight staple in your kitchen. And don’t forget to experiment with different variations and share your creations with friends and family. Perhaps pair it with a crisp white wine and some roasted asparagus for a truly memorable meal. Happy cooking!