
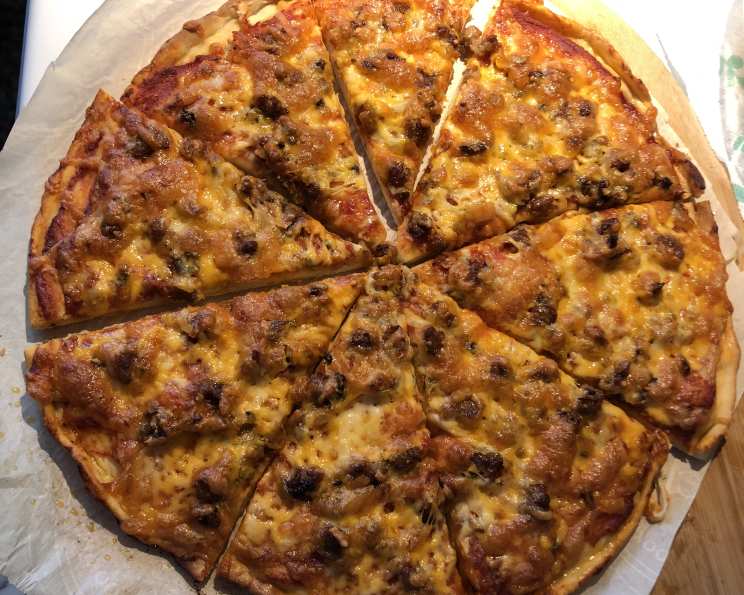
Panago’s Basic Homemade Pizza Dough: A Culinary Journey
I still remember the aroma that wafted through our little apartment every Friday night. It wasn’t just the garlic and oregano, but the distinct scent of homemade pizza dough, slowly proofing on the kitchen counter. My mom, a tireless baker, would transform simple ingredients into a canvas of flavor. That dough, the foundation of countless family meals, holds a special place in my heart, and discovering this recipe has brought back so many wonderful memories.
Recipe Overview
- Prep Time: 15 minutes
- Cook Time: 10 minutes
- Total Time: 55 minutes
- Yields: 2 12-inch pizzas
- Serves: 4-6
- Dietary Type: Vegetarian (easily made vegan)
Ingredients
- 1 tablespoon dry yeast
- 1 1/4 cups warm water (not too hot)
- 4 cups all-purpose flour (plus extra for dusting)
- 1 teaspoon sea salt
- 2 tablespoons olive oil
- 1 tablespoon honey (can substitute maple syrup for vegan option)
Equipment Needed
- Medium bowl
- Large bowl
- Measuring cups and spoons
- KitchenAid mixer (optional)
- Lightly floured surface
- Large, oiled bowl
- Damp cloth
- Parchment paper
- Baking sheet
Instructions
- In a medium bowl, combine the warm water, honey, and dry yeast. Ensure the water isn’t too hot, as this can kill the yeast. Stir until the yeast is dissolved.
- Let the mixture stand for 5-10 minutes, or until the yeast activates. You’ll know it’s ready when a layer of froth develops on the surface. This step is crucial for a light and airy crust.
- In a large bowl, mix the sea salt and all-purpose flour. Create a well in the center of the flour mixture. This provides a space for the wet ingredients.
- Pour the activated yeast mixture and olive oil into the well.
- Mix the ingredients together. You can use a spoon initially, then switch to your hands as the dough comes together. Alternatively, use a KitchenAid mixer with a dough hook attachment.
- Tip the dough onto a lightly floured surface. Knead the dough until it is smooth, shiny, and elastic, approximately 5-10 minutes. If using a KitchenAid, let it knead for the same amount of time.
- If the dough is too sticky or soft, add a little extra flour, one tablespoon at a time, until it reaches the desired consistency. Conversely, if it’s too dry and crumbly, add a little water, one teaspoon at a time.
- Shape the dough into a round ball.
- Place the dough in a large, oiled bowl. Turn the dough to coat it with oil. This prevents the dough from drying out as it rises.
- Cover the bowl with a damp cloth. Let the dough rise in a warm place for roughly 45 minutes, or until it has doubled in size.
- Punch down the dough to remove the air.
- Place the dough on a lightly floured work surface. Divide the dough in half.
- Shape each piece into round disks.
- Place the dough balls on a sheet of parchment paper.
- Cover with a light coating of oil and let them rise again for about 20 minutes.
- The dough is now ready to add whatever toppings you like and cook.
- Bake in a preheated 400-degree Fahrenheit oven for approximately 10 minutes. Keep a close eye on it until the cheese browns (if using) and the crust looks done.
Expert Tips & Tricks
- Water Temperature is Key: Too hot, and you’ll kill the yeast. Too cold, and it won’t activate properly. Aim for lukewarm water, around 105-115°F (40-46°C).
- Kneading is Essential: Don’t skimp on the kneading time! This develops the gluten, which gives the pizza its structure and chewiness. If you are not using a KitchenAid be prepared to put in the work.
- Proofing Matters: A proper proof allows the dough to develop its flavor and airy texture. Resist the urge to rush this step.
- Stretch, Don’t Roll: Gently stretch the dough into shape instead of using a rolling pin, which can compress the dough and result in a tougher crust.
- Pre-bake for Crisper Crust: For an extra crispy crust, pre-bake the dough for 5 minutes before adding toppings.
- Experiment with Flour: You can substitute some of the all-purpose flour with bread flour for a chewier crust, or whole wheat flour for a nuttier flavor.
Serving & Storage Suggestions
Serve your freshly baked pizza immediately for the best flavor and texture. Leftover pizza can be stored in an airtight container in the refrigerator for up to 3 days. To reheat, bake in a preheated oven at 350°F (175°C) for about 5-10 minutes, or until heated through. You can also reheat individual slices in a skillet over medium heat.
For longer storage, the dough can be frozen after the first rise. Punch down the dough, divide it into portions, wrap each portion tightly in plastic wrap, and then place them in a freezer bag. Frozen dough can be stored for up to 2 months. Thaw the dough in the refrigerator overnight before using.
Nutritional Information
| Nutrient | Amount per Serving | % Daily Value |
|---|---|---|
| Calories | 539 kcal | N/A |
| Total Fat | 8 g | 10% |
| Saturated Fat | 1 g | 5% |
| Cholesterol | 0 mg | 0% |
| Sodium | 587 mg | 25% |
| Carbohydrates | 101 g | 37% |
| Fiber | 4 g | 14% |
| Sugars | 5 g | N/A |
| Protein | 14 g | 28% |
Note: Nutritional information is an estimate and may vary based on specific ingredients and portion sizes.
Variations & Substitutions
- Vegan Pizza: Substitute the honey with maple syrup or agave nectar. Ensure your toppings are also vegan-friendly.
- Gluten-Free Pizza: Use a gluten-free all-purpose flour blend specifically designed for baking. You may need to adjust the liquid slightly, as gluten-free flours can absorb more moisture.
- Herb-Infused Dough: Add 1-2 tablespoons of dried herbs, such as oregano, basil, or rosemary, to the flour mixture for a flavorful crust.
- Garlic Pizza: Mix 1-2 cloves of minced garlic into the dough for a savory twist.
- Spicy Pizza: Add a pinch of red pepper flakes to the dough for a little heat.
FAQs (Frequently Asked Questions)
Q: Can I use instant yeast instead of active dry yeast?
A: Yes, you can. Instant yeast doesn’t need to be proofed, so you can add it directly to the flour mixture. Use the same amount as the active dry yeast called for in the recipe.
Q: My dough isn’t rising. What could be the problem?
A: Several factors can affect dough rising. Ensure your yeast is fresh, the water isn’t too hot or too cold, and the environment is warm.
Q: Can I make the dough ahead of time?
A: Absolutely! You can prepare the dough up to 24 hours in advance. After the first rise, punch it down, wrap it tightly, and store it in the refrigerator. Let it come to room temperature before shaping and baking.
Q: How do I get a crispy pizza crust?
A: Preheating your oven and baking stone or baking sheet is key. You can also pre-bake the crust for a few minutes before adding toppings.
Q: What’s the best way to stretch the dough without tearing it?
A: Gently stretch the dough using your fingertips, working from the center outwards. Avoid stretching too quickly, and let the dough rest for a few minutes if it starts to resist.
Final Thoughts
This simple pizza dough recipe unlocks a world of culinary possibilities. Whether you’re a seasoned pizza maker or a beginner, this recipe is a fantastic starting point. Don’t be afraid to experiment with different toppings and flavors to create your own signature pizzas. I hope you and your loved ones enjoy the process and the delicious results! I would love to hear how it turns out for you, and what your favourite pizza toppings are!