
The Art of Paneer: A Chef’s Guide to Fresh Indian Cheese
The scent of warm milk always transports me back to my grandmother’s kitchen in India. I remember standing on a stool, mesmerized, as she transformed a simple gallon of milk into creamy, delicate paneer. The transformation seemed like magic, the curdling milk a testament to her culinary alchemy. That simple block of cheese, a cornerstone of so many Indian dishes, was a symbol of her love and nurturing, a connection to our heritage I cherish to this day. I still find immense satisfaction in recreating her process, sharing this fresh, versatile cheese with my own family.
Recipe Overview
- Prep Time: 15 minutes
- Cook Time: 40 minutes
- Total Time: 55 minutes
- Yields: Approximately 1 pound (30 pieces)
- Dietary Type: Vegetarian, Gluten-Free
Ingredients
- 1 gallon milk (Whole milk will produce a slightly larger yield and creamier cheese compared to 1% or 2% milk.)
- 4 to 5 tablespoons lemon juice
- 1 tablespoon vinegar (White vinegar or apple cider vinegar work well)
Equipment Needed
- Large pot (at least 6-quart capacity)
- Large sieve or colander
- Thin muslin cloth or cheesecloth
- Large bowl
- Flat board
- Paper towels
- Large flat-bottomed skillet
Instructions
-
Begin by heating the milk in a large pot over medium-high heat. Ensure the pot is large enough to prevent the milk from boiling over; a 6-quart pot is usually sufficient. Keep a close watch on the milk, stirring occasionally to prevent scorching at the bottom.
-
As the milk approaches a boil (small bubbles will start to form around the edges), immediately reduce the heat to low. Add 4 to 5 tablespoons of lemon juice and 1 tablespoon of vinegar to the simmering milk.
-
Optionally, you can also add 1 cup of plain yogurt along with the lemon juice and vinegar to help with coagulation. This is not necessary but can add a slight tang and richness to the final product.
-
Continue to simmer the mixture gently. Be extremely cautious to prevent the milk from boiling over. Adjust the heat as needed. Observe as the milk curdles, separating into solid cheese curds and a clear, yellowish liquid called whey.
-
If the milk does not fully curdle after a few minutes, add a little more lemon juice or vinegar, a teaspoon at a time, until clear separation occurs. The amount needed can vary based on the milk’s freshness and fat content.
-
Once the separation is complete, immediately turn off the heat.
-
Line a large sieve or colander with a thin muslin cloth or cheesecloth. Set the sieve over a large bowl to collect the whey.
-
Carefully pour the curdled milk into the lined sieve, allowing the whey to drain into the bowl below.
-
Gently gather the edges of the muslin cloth or cheesecloth and squeeze out as much of the remaining whey as possible. This step is crucial for achieving the desired consistency of the paneer.
-
At this stage, the paneer will have a slightly crumbly texture. You can mash it gently with a spoon to help make it smoother.
-
Allow the paneer to drain in the cloth for a few hours. The longer it drains, the firmer the cheese will become. You can even hang the cloth filled with paneer over a faucet or hook for a few hours to facilitate drainage.
-
For a smoother texture, blend the drained paneer by hand or in a food processor. This step is optional but recommended for a more refined product.
-
Spread the blended paneer evenly, about half an inch thick, on a clean cloth placed on a flat board lined with paper towels.
-
Fold the cloth over the paneer from all four sides to completely enclose it. Then, cover the top with more paper towels.
-
Place a large, flat-bottomed skillet filled with water on top of the wrapped paneer to apply pressure and further drain any excess liquid. The weight helps to create a firm, compact cheese.
-
Replace the paper towels if they become saturated with whey. This ensures efficient drainage.
-
After 30 to 45 minutes, when the paper towels appear mostly dry, carefully unwrap the paneer.
-
Cut the paneer into ½ to ¾ inch cubes (or strips), depending on your intended use.
-
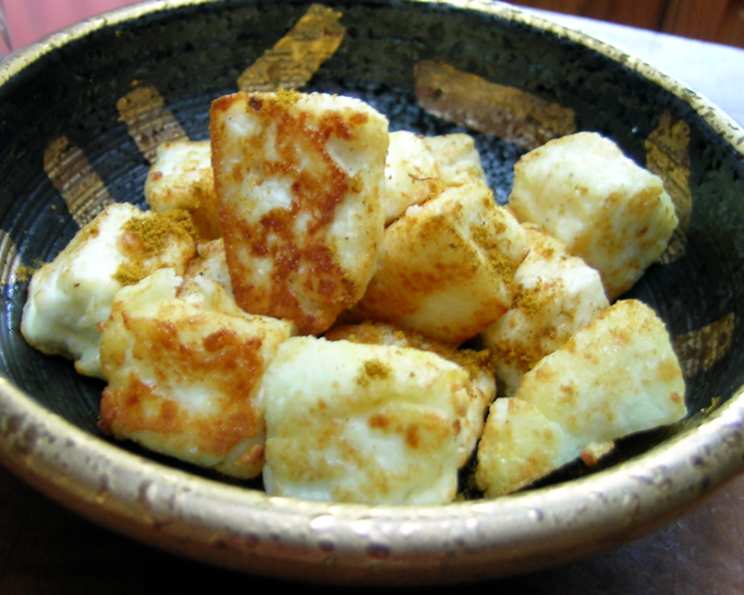
The paneer can be used immediately without frying or lightly fried for a richer flavor and firmer texture.
-
To fry the paneer, heat about 4 tablespoons of oil in a frying pan over medium heat.
-
Lightly brown the paneer cubes on all sides, turning gently with a slotted spatula to ensure even cooking. The frying process should only take a few minutes per side.
Expert Tips & Tricks
- Milk Matters: The type of milk used significantly impacts the final product. Whole milk yields the richest and creamiest paneer.
- Whey Conservation: Don’t discard the whey! It’s a nutritious liquid that can be used as a substitute for water in soups, stews, or even when making dough for bread or roti.
- Texture Control: Adjust the draining time to achieve your desired texture. Less draining results in a softer, ricotta-like cheese; longer draining creates a firmer, more block-like paneer.
- Even Pressure: Ensure the weight applied to the paneer is evenly distributed for uniform compression.
- Flavor Infusion: For added flavor, experiment by adding herbs, spices, or even chopped vegetables to the paneer before pressing. Think fresh cilantro, green chilies, or ginger.
Serving & Storage Suggestions
Paneer can be served in countless ways. Use it in classic Indian dishes like Palak Paneer (spinach and cheese), Shahi Paneer (creamy tomato-based curry), or Paneer Tikka Masala. It’s also delicious grilled or added to salads.
Store leftover paneer in an airtight container in the refrigerator for up to 3-4 days. For longer storage, paneer can be frozen. Wrap it tightly in plastic wrap, then place it in a freezer bag. Frozen paneer may become slightly more crumbly upon thawing, but it’s still perfectly suitable for cooking. Thaw it in the refrigerator overnight before use.
Nutritional Information
| Nutrient | Amount per Serving | % Daily Value |
|---|---|---|
| Calories | 83 kcal | N/A |
| Calories from Fat | 42 kcal | N/A |
| Total Fat | 4.8g | 7% |
| Saturated Fat | 3g | 14% |
| Cholesterol | 18.2mg | 6% |
| Sodium | 63.8mg | 2% |
| Total Carbohydrate | 6g | 2% |
| Dietary Fiber | 0g | 0% |
| Sugars | 0g | 0% |
| Protein | 4.3g | 8% |
Variations & Substitutions
- Vegan Paneer: While traditional paneer requires dairy milk, you can experiment with making a similar cheese using soy milk or cashew milk. The texture will be different, but the concept remains the same.
- Flavored Paneer: Infuse the milk with spices like cardamom, cinnamon, or saffron while heating to create subtly flavored paneer.
- Citrus Variations: Experiment with different citrus juices like lime or orange instead of lemon for a unique flavor profile.
FAQs (Frequently Asked Questions)
Q: Why is my paneer not curdling properly?
A: The most common reason is insufficient acid (lemon juice or vinegar). Add a little more acid, a teaspoon at a time, until clear separation occurs. Also, ensure the milk is hot enough but not boiling vigorously.
Q: How can I make my paneer softer?
A: Reduce the draining and pressing time. Less pressure and shorter draining will result in a softer, more moist cheese.
Q: Can I use different types of milk?
A: Yes, but whole milk will always produce the best results in terms of yield and creaminess. Lower-fat milk will still work, but the paneer will be less rich.
Q: How do I prevent the paneer from becoming too dry?
A: Avoid over-draining and over-pressing the cheese. Also, if frying, do it quickly to prevent moisture loss.
Q: Is it necessary to use muslin cloth?
A: Muslin cloth or cheesecloth is ideal for draining, but in a pinch, you can use a very fine mesh sieve lined with several layers of paper towels.
Final Thoughts
Creating paneer at home is a rewarding experience, connecting you to the traditions of Indian cuisine and offering a fresh, versatile ingredient for your culinary adventures. Don’t be afraid to experiment with flavors and textures to create paneer that suits your personal preferences. Once you master the basic technique, the possibilities are endless. So, gather your ingredients, embrace the process, and enjoy the deliciousness of homemade paneer! Share your creations and feedback, and happy cooking!