
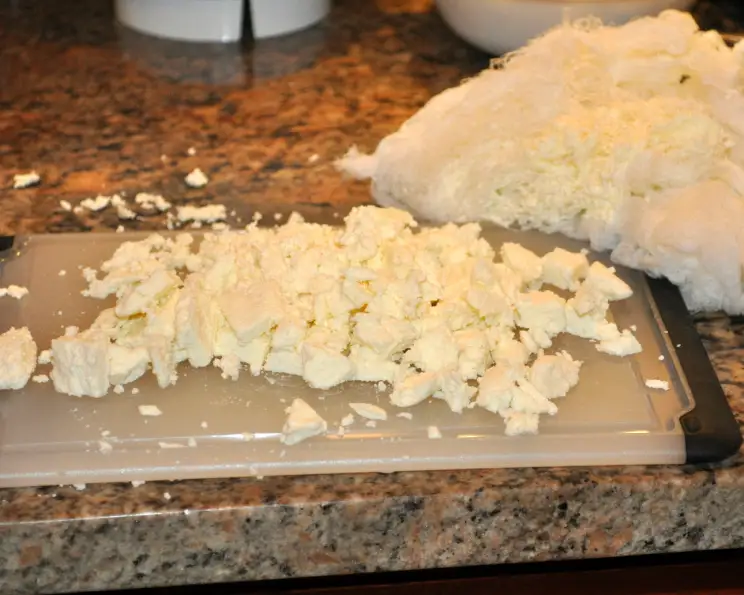
The Magic of Paneer: Crafting Homemade Indian Cheese
The aroma of warm milk simmering on the stove instantly transports me back to my grandmother’s kitchen. As a child, I’d eagerly watch her transform a simple pot of milk into fresh, milky-white paneer. It was always a marvel how she could turn something so basic into a blank canvas for countless flavorful dishes. The taste of her homemade saag paneer, with the creamy cheese melting in my mouth alongside the earthy spinach, is a flavor memory I cherish to this day.
Recipe Overview
- Prep Time: 5 minutes
- Cook Time: 1 hour
- Total Time: 1 hour 5 minutes
- Yields: 1 batch
- Serves: 4
- Dietary Type: Vegetarian, Gluten-Free
Ingredients
- 1 liter milk (whole milk is recommended for the best texture)
- 4 tablespoons vinegar (white vinegar or apple cider vinegar) or 4 tablespoons lemon juice
Equipment Needed
- Large pot
- Slotted spoon or spider
- Fine-mesh sieve
- Cheesecloth or clean muslin cloth
- Bowl to catch whey
- Weight (optional, for firmer paneer)
Instructions
- Pour the milk into a large pot and place it over medium-high heat. Bring the milk to a boil, watching carefully to prevent it from boiling over.
- Once the milk reaches a rolling boil, reduce the heat to low and add the vinegar or lemon juice. Stir gently.
- Observe the milk as it begins to curdle. The solids should separate from the whey (the watery liquid). If the separation does not occur within a minute or two, add another tablespoon of vinegar or lemon juice, stirring gently, until the whey becomes clear and a greenish-yellow color.
- Line a fine-mesh sieve with a double layer of cheesecloth or a clean muslin cloth. Place the sieve over a bowl to catch the whey.
- Carefully pour the curdled milk through the cheesecloth-lined sieve. This will separate the paneer (milk solids) from the whey.
- Once all the liquid has drained, gather the edges of the cheesecloth and gently squeeze out any excess whey. Be careful, as the paneer will be hot.
- At this point, you can use the paneer as a fresh cheese, similar to cottage cheese. For a softer, more cottage cheese-like consistency, you can add a pinch of salt and a few tablespoons of cream (optional).
- For firmer paneer, tie the cheesecloth into a tight bundle, ensuring the paneer is compressed within.
- Place the bundle on a plate or in a shallow dish and place a weight on top of it. A heavy book, a can of food, or a small pot filled with water will work well.
- Refrigerate the paneer under the weight for at least one hour, or longer for a firmer texture. The longer it sits under the weight, the more whey will be expelled, resulting in a denser cheese.
- After refrigerating, remove the paneer from the cheesecloth and cut it into desired shapes (cubes, slices, etc.). The paneer is now ready to use in your favorite recipes.
Expert Tips & Tricks
- Milk Choice Matters: Using whole milk results in the richest and creamiest paneer. Skim milk will still work, but the yield and texture will be significantly different, resulting in a drier, less flavorful cheese.
- Acid Addition: Adding the vinegar or lemon juice gradually and stirring gently is key. Avoid adding too much acid at once, as this can make the paneer tough.
- Whey is Gold: Don’t discard the whey! It’s a nutritious liquid that can be used in soups, stocks, or even as a substitute for water in baking.
- Firmness Control: The amount of weight and the duration of pressing determine the paneer’s firmness. Experiment to find your preferred texture. For a softer paneer, use a lighter weight or shorter pressing time. For a very firm paneer, use a heavier weight and press for several hours or even overnight.
- Washing the Paneer: To remove the slight tang from the vinegar or lemon juice, you can gently rinse the paneer in the cheesecloth with cold water before pressing.
- Instant Pot Method: For a quicker process, you can also make paneer in an Instant Pot. Follow the same steps, bringing the milk to a boil using the “Sauté” function. Then add the acid and proceed as directed.
Serving & Storage Suggestions
Freshly made paneer is best enjoyed immediately. It can be cubed and added to curries, grilled, or even crumbled into salads.
- Refrigeration: Store leftover paneer in an airtight container in the refrigerator, submerged in some of the whey or cold water to keep it moist. It will last for up to 3-4 days. Be sure to change the water every day.
- Freezing: While freezing paneer isn’t ideal as it can alter the texture, it’s possible. Wrap the paneer tightly in plastic wrap and then place it in a freezer-safe bag. It can be frozen for up to 2 months. Thaw it in the refrigerator overnight before using. Expect a slightly crumblier texture after thawing.
- Serving Suggestions: Saag Paneer, Palak Paneer, Shahi Paneer, Paneer Tikka Masala, Paneer Bhurji (scrambled paneer), Paneer Skewers.
Nutritional Information
| Nutrient | Amount per Serving | % Daily Value |
|---|---|---|
| Calories | 168 kcal | – |
| Calories from Fat | 85 kcal | – |
| Total Fat | 9.5 g | 14% |
| Saturated Fat | 5.9 g | 29% |
| Cholesterol | 36.2 mg | 12% |
| Sodium | 127 mg | 5% |
| Total Carbohydrate | 12 g | 4% |
| Dietary Fiber | 0 g | 0% |
| Sugars | 0 g | 0% |
| Protein | 8.5 g | 16% |
Note: Nutritional information is an estimate and may vary based on specific ingredients and preparation methods.
Variations & Substitutions
- Different Acid: While vinegar and lemon juice are most common, you can experiment with other acids like citric acid or even yogurt whey (leftover from a previous batch of paneer).
- Herbed Paneer: Add fresh herbs like cilantro, mint, or dill to the paneer while pressing for a flavorful twist.
- Spiced Paneer: Mix in spices like turmeric, cumin, or chili powder before pressing to create a spiced paneer.
- Vegan Paneer Alternative: While not true paneer (as it’s dairy-based), you can create a similar texture using firm tofu. Press the tofu to remove excess water, then marinate it in a mixture of cashew cream, lemon juice, and spices.
FAQs (Frequently Asked Questions)
Q: Why isn’t my milk curdling properly?
A: The most common reason is that the milk wasn’t hot enough or enough acid (vinegar or lemon juice) was added. Try heating the milk to a full boil and adding a bit more acid, stirring gently.
Q: My paneer is too crumbly. What did I do wrong?
A: Over-boiling the milk or adding too much acid can result in a crumbly texture. Be gentle when stirring and avoid overcooking. Ensure you are using full-fat milk for best results.
Q: Can I use UHT milk to make paneer?
A: While it is possible, UHT milk might not give you the best results. Fresh, full-fat milk is generally preferred for its higher protein content, leading to a better yield and texture.
Q: How long can I store homemade paneer?
A: Homemade paneer can be stored in the refrigerator for 3-4 days, submerged in water. Be sure to change the water daily to keep it fresh.
Q: My paneer tastes a bit sour. How can I fix that?
A: Rinsing the paneer in the cheesecloth with cold water after separating the curds can help remove any excess acid, reducing the sour taste.
Final Thoughts
Creating your own paneer is not only a rewarding culinary experience, but also a way to connect with the rich traditions of Indian cuisine. The simple act of transforming milk into a creamy, versatile cheese opens up a world of flavorful possibilities. Don’t be intimidated – with a few simple steps and readily available ingredients, you can easily master this skill. I encourage you to try this recipe, experiment with different variations, and share your creations with friends and family. Pair your homemade paneer with a vibrant vegetable curry or a cooling raita for a truly memorable meal. Enjoy the journey, and happy cooking!