
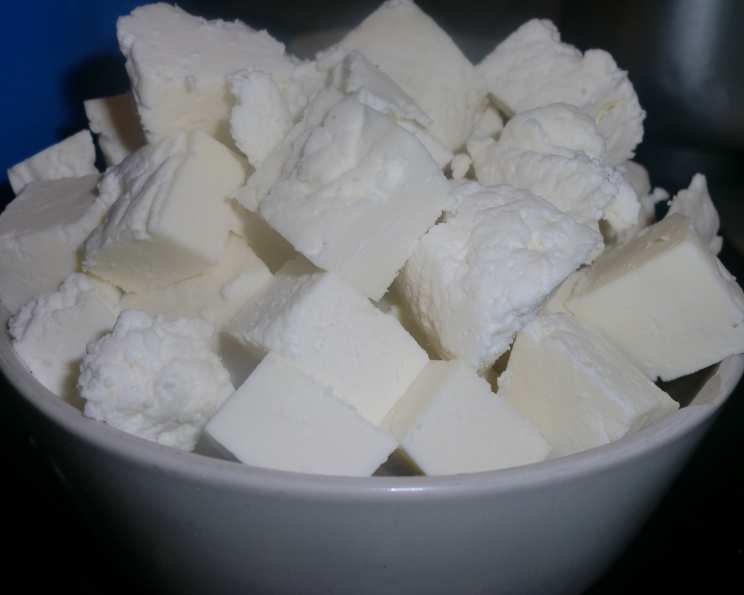
Homemade Paneer: A Chef’s Guide to Fresh Indian Cheese
Paneer. The very word conjures up images of fragrant curries, succulent kebabs, and creamy desserts. As a young chef, I was initially intimidated by the prospect of making my own paneer. It seemed like a culinary secret, best left to the experts. But one afternoon, driven by curiosity and a craving for authentic Indian flavors, I decided to take the plunge. The transformation of humble milk into delicate, milky cubes was nothing short of magic, a culinary alchemy that sparked my lifelong love affair with Indian cuisine. Now, I’m excited to share that magic with you.
Recipe Overview
- Prep Time: 15 minutes
- Cook Time: 30 minutes
- Total Time: 45 minutes
- Servings: Approximately 1 pound of paneer
- Yield: Varies depending on milk fat content
- Dietary Type: Vegetarian, Gluten-Free
Ingredients
- 2 gallons whole milk
- 1/2 cup lemon juice (fresh or bottled)
- 1 cup water
Equipment Needed
- Large pot (8-quart or larger)
- Colander
- Finely woven tea towels (muslin cloth or cheesecloth are not ideal, as they allow too much curd to pass through)
- Slotted spoon
- Fine-mesh strainer
- Heavy pan or weight
Instructions
-
In a large pot, bring the 2 gallons of milk to a boil over medium-high heat. Watch carefully and stir frequently to prevent the milk from scorching on the bottom.
-
Once the milk reaches a full, foaming boil, reduce the heat to medium-low. Continue stirring to prevent sticking.
-
Slowly add the 1/2 cup lemon juice, diluted with the 1 cup water, to the simmering milk, stirring constantly. The acid in the lemon juice will cause the milk to curdle.
-
Continue stirring gently for 10-15 seconds until soft curds begin to form and separate from the whey. The whey should be a light yellow and relatively clear. If the whey is still milky, add a bit more lemon juice, a tablespoon at a time, until the curds separate properly.
-
Remove the pot from the heat and let it stand for 5-6 minutes. This allows the curds to fully form and settle.
-
Line a colander with the finely woven tea towel. Make sure the towel is clean and free of any lint or odors.
-
Using a slotted spoon, gently transfer the curds from the pot into the towel-lined colander. This prevents breaking up the delicate curds. Use a fine strainer to capture any of the smallest curds that remain in the pot after spooning out the majority.
-
Once all the curds are in the colander, gather the corners of the tea towel and twist them together to form a tight ball, squeezing out as much excess whey as possible.
-
Place the ball of curds in the colander and put a weight (a heavy pan filled with water works well) on top of the ball. This will press the paneer into a firm block. Let it rest for at least 10 minutes, or longer for a firmer texture.
-
Unwrap the paneer from the tea towel. It should now be a solid block. You can use it immediately in your recipe or wrap it tightly in plastic wrap and refrigerate it for later use.
Expert Tips & Tricks
- Milk Matters: Use whole milk for the best results. The higher fat content yields a richer, more flavorful paneer. Skim or low-fat milk will result in a drier, less creamy paneer.
- Lemon Juice Alternatives: While lemon juice is the most common acid used, you can also use white vinegar, lime juice, or even whey from a previous batch of paneer. The flavor will be slightly different, but the process remains the same.
- Adjusting Texture: If you prefer a softer paneer, reduce the pressing time. For a firmer paneer, increase the pressing time and use a heavier weight.
- Whey Power: Don’t discard the whey! It’s packed with nutrients and can be used in soups, stocks, bread making, or even as a protein-rich addition to smoothies.
- Flavor Infusion: For an extra touch of flavor, you can add herbs or spices to the milk during the boiling process. Cardamom pods, peppercorns, or bay leaves can impart subtle aromatic notes to the paneer. Just remember to remove them before pressing.
- Preventing Scorching: Continuously stirring the milk, especially as it heats up, is crucial to prevent scorching. A heavy-bottomed pot will also help distribute heat more evenly.
Serving & Storage Suggestions
Freshly made paneer can be used immediately in a variety of Indian dishes, such as palak paneer, matar paneer, paneer tikka masala, and paneer butter masala. It can also be grilled, pan-fried, or crumbled into salads and wraps.
To store leftover paneer, wrap it tightly in plastic wrap and refrigerate it. It will keep for up to 3-4 days. You can also freeze paneer for longer storage. To freeze, cut the paneer into cubes, arrange them in a single layer on a baking sheet, and freeze until solid. Then, transfer the frozen cubes to a freezer bag. Frozen paneer can be stored for up to 2-3 months. Thaw it in the refrigerator overnight before using. Note that freezing may slightly alter the texture of the paneer, making it a bit more crumbly.
Nutritional Information
| Nutrient | Amount per Serving (approx. 4 oz) | % Daily Value |
|---|---|---|
| Calories | 350 kcal | 18% |
| Total Fat | 28g | 43% |
| Saturated Fat | 18g | 90% |
| Cholesterol | 90mg | 30% |
| Sodium | 150mg | 7% |
| Total Carbohydrate | 3g | 1% |
| Dietary Fiber | 0g | 0% |
| Sugars | 3g | – |
| Protein | 20g | 40% |
Note: Nutritional information is an estimate and may vary based on specific ingredients and portion sizes.
Variations & Substitutions
- Spiced Paneer: Add ground spices like turmeric, cumin, or coriander to the milk while boiling for a flavorful twist.
- Herb-Infused Paneer: Mix fresh herbs like cilantro, mint, or dill into the curds before pressing.
- Smoked Paneer: After pressing, smoke the paneer for a few hours using your preferred smoking method for a unique smoky flavor.
- Vegan Paneer Alternative: While traditional paneer is dairy-based, you can experiment with making a vegan version using firm tofu or cashew cream. The texture will be different, but it can provide a similar protein-rich element to your dishes.
FAQs (Frequently Asked Questions)
Q: Why isn’t my milk curdling properly?
A: This could be due to several factors. Make sure you’re using whole milk, as low-fat milk doesn’t curdle as well. Also, ensure your lemon juice is fresh and acidic. If the milk still isn’t curdling, add a bit more lemon juice, one tablespoon at a time.
Q: How do I get a smooth, even texture for my paneer?
A: Use a finely woven tea towel or muslin cloth to strain the curds. This will prevent small particles from passing through and ensure a smoother final product. Pressing the paneer evenly with a weight is also crucial.
Q: Can I use store-bought milk to make paneer?
A: Yes, you can use store-bought milk, but whole milk will give you the best results. Avoid using ultra-pasteurized (UHT) milk, as it may not curdle as effectively.
Q: How long does homemade paneer last?
A: Homemade paneer will last for up to 3-4 days in the refrigerator, wrapped tightly in plastic wrap. You can also freeze it for longer storage.
Q: What can I do with the leftover whey?
A: Don’t throw away the whey! It’s a valuable ingredient. You can use it in soups, stocks, bread making, or as a protein-rich addition to smoothies.
Final Thoughts
Making your own paneer is a rewarding culinary experience that allows you to create fresh, flavorful cheese at home. With a few simple ingredients and a little patience, you can transform humble milk into a versatile ingredient that will elevate your Indian cooking. Don’t be afraid to experiment with different flavors and textures to create your own signature paneer. I encourage you to try this recipe and share your creations with friends and family. Pair your homemade paneer with a vibrant vegetable curry or a refreshing raita for a truly satisfying meal. Happy cooking!