
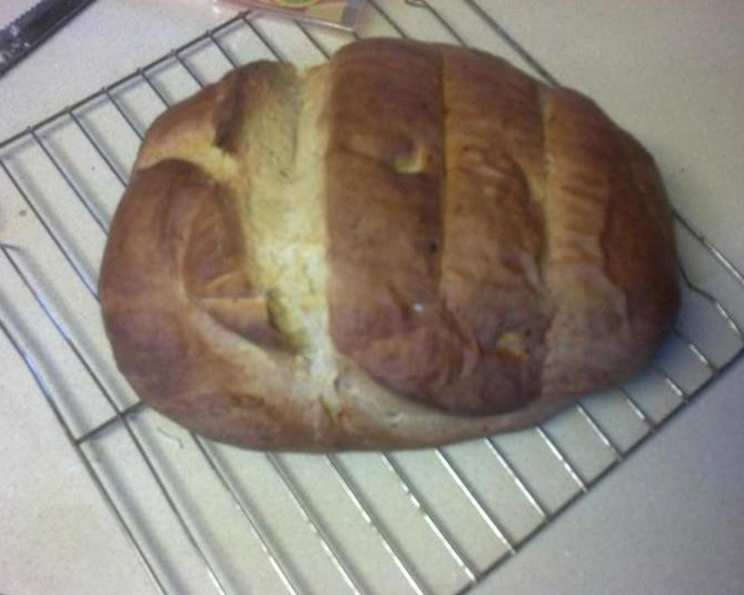
Mastering the Art of Panera’s Three Cheese Bread: A Home Baker’s Journey
The aroma alone is enough to transport me back to cozy afternoons spent studying in the corner of a Panera, the gentle hum of conversation a comforting background to the serious business of textbooks and caffeine. But it wasn’t just the atmosphere; it was the unmistakable, tantalizing scent of their Three Cheese Bread, a savory, crusty masterpiece that seemed to elevate any soup or sandwich it accompanied. I remember once trying to replicate that experience at home, failing miserably, and resolving to one day truly master this iconic loaf. Today, I’m excited to share everything I’ve learned so you can recreate this delicious bread in your own kitchen.
Recipe Overview
- Prep Time: 48 hours
- Ingredients: 13
- Yields: 2 loaves
- Serves: 12
Ingredients
For the Starter:
- 1 cup warm water (95-105 F)
- 2 teaspoons fresh yeast
- 1 cup all-purpose flour
For the Dough:
- ¾ cup warm water (95-105 F)
- 3 tablespoons honey
- 4 teaspoons fresh yeast
- ¼ cup vegetable shortening, plus 1 teaspoon vegetable shortening (2 ounces)
- 4 ¾ cups all-purpose flour
- 1 tablespoon salt
- ½ cup romano cheese (1/2-inch cubes)
- ½ cup parmesan cheese (1/2-inch cubes)
- ½ cup asiago cheese (1/2-inch cubes)
Equipment Needed
- Medium mixing bowl
- Stand mixer
- Proofing basket (optional)
- Warm, damp cloth
- Sharp knife
- Spray bottle
- Cooling rack
- Loaf pans (optional)
Instructions
-
Prepare the Starter: In a medium mixing bowl, combine the warm water and fresh yeast. Stir until the yeast is fully dissolved. Add the all-purpose flour to the bowl and stir until the ingredients are fully incorporated. Cover the bowl with a cloth and ferment the starter at room temperature for 30 minutes. This starter is essential for the bread’s complex flavor and airy texture.
-
Make the Dough: In the bowl of a stand mixer, combine the warm water, honey, and fresh yeast. Stir to dissolve the yeast completely. Add the vegetable shortening, all-purpose flour, salt, cheeses (romano, parmesan, and asiago), and the fermented starter.
-
Mix the Dough: Mix the dough on low speed until it is fully developed. The dough should be smooth and elastic. This may take several minutes, so be patient and allow the mixer to do its work.
-
Divide and Shape: Remove the dough from the mixing bowl. Divide the dough into 2 pieces, each weighing about 22 ounces. Set aside any remaining dough and freeze it for future use. Roll each piece of dough into a smooth ball.
-
First Proof: Place the dough balls on the counter or in a proofing basket and cover with a warm, damp cloth. Allow them to rest at room temperature for 30 minutes. This initial proof allows the gluten to relax, making the dough easier to shape.
-
Preheat the Oven: Preheat the oven to 400°F (200°C). This high temperature is crucial for achieving a crisp crust.
-
Shape the Loaves: Form the dough into loaves. You can shape them freeform on a baking sheet or place them in loaf pans for a more uniform shape.
-
Second Proof: Cover the loaves with a warm, damp cloth and proof at room temperature for 30 minutes. This final proof allows the loaves to rise fully before baking.
-
Score and Bake: Score the tops of the loaves with a sharp knife. This helps to control how the bread expands during baking. Spray the loaves with water. The steam created by the water helps to create a crispier crust. Bake the loaves for 30 minutes, or until the crusts are a deep golden brown and the middle of the loaves reaches a temperature of 190-200°F (88-93°C) when measured with a food thermometer.
-
Cool the Bread: Remove the bread from the oven and place it on a cooling rack for 30 minutes. If the bread was baked in loaf pans, remove it from the pans before cooling. This prevents the bottom crust from becoming soggy.
Expert Tips & Tricks
- Cheese Consistency: Ensure your cheeses are in ½-inch cubes. This allows for even distribution and pockets of cheesy goodness throughout the loaf.
- Yeast Activity: Always check the expiration date on your yeast to ensure it’s fresh. If you’re unsure, proof the yeast in a small amount of warm water with a pinch of sugar before adding it to the dough. If it doesn’t foam up within 5-10 minutes, the yeast is likely inactive.
- Dough Hydration: If your dough seems too dry, add a tablespoon of water at a time until it reaches the desired consistency. Conversely, if it’s too sticky, add a tablespoon of flour.
- Steam Power: For an even crispier crust, consider using a Dutch oven. Preheat the Dutch oven along with your oven, then carefully place the loaf inside and bake with the lid on for the first half of the baking time, then remove the lid for the remaining time.
- Flavor Boost: Experiment with adding other cheeses, such as Gruyere or provolone, to customize the flavor. You can also add herbs like rosemary or thyme for an extra layer of complexity.
Serving & Storage Suggestions
This Three Cheese Bread is fantastic served warm, either sliced or torn apart. It’s the perfect accompaniment to soups, salads, or pasta dishes. It also makes a delightful sandwich bread.
- Storage: Store leftover bread in an airtight container at room temperature for up to 2 days. For longer storage, wrap the bread tightly in plastic wrap and freeze it for up to 2 months.
- Reheating: To reheat, preheat the oven to 350°F (175°C). Wrap the bread in foil and bake for 10-15 minutes, or until warmed through. You can also reheat individual slices in a toaster oven.
Nutritional Information
| Nutrient | Amount per Serving | % Daily Value |
|---|---|---|
| Calories | 329.5 kcal | N/A |
| Calories from Fat | N/A | 24% |
| Total Fat | 9 g | 13% |
| Saturated Fat | 3.8 g | 18% |
| Cholesterol | 13.5 mg | 4% |
| Sodium | 761.1 mg | 31% |
| Total Carbohydrate | 50.5 g | 16% |
| Dietary Fiber | 1.6 g | 6% |
| Sugars | 4.6 g | N/A |
| Protein | 10.8 g | 21% |
Note: Nutritional information is an estimate and may vary based on specific ingredients and preparation methods.
Variations & Substitutions
- Gluten-Free: For a gluten-free version, substitute the all-purpose flour with a gluten-free bread flour blend. You may need to adjust the amount of liquid to achieve the desired dough consistency.
- Vegan: While the original recipe relies on dairy cheese, you can create a vegan version using plant-based cheese alternatives. Look for brands that melt well and have a similar flavor profile to romano, parmesan, and asiago.
- Herbaceous Twist: Incorporate fresh herbs like rosemary, thyme, or oregano into the dough for an aromatic variation. Add about 1-2 tablespoons of finely chopped herbs along with the flour.
- Spicy Kick: Add a pinch of red pepper flakes to the dough for a subtle heat.
- Different Cheeses: Experiment with other hard, flavorful cheeses such as Gruyere, Asiago, or sharp cheddar.
FAQs (Frequently Asked Questions)
Q: Why is my bread dense and not airy?
A: Several factors can contribute to dense bread. Make sure your yeast is fresh and active, and avoid over-mixing the dough, which can develop too much gluten. Also, ensure you’re allowing the dough to proof adequately in a warm environment.
Q: Can I use instant yeast instead of fresh yeast?
A: Yes, you can substitute instant yeast. Use about half the amount of fresh yeast called for in the recipe. You can add it directly to the dry ingredients without proofing.
Q: How do I know when the bread is done baking?
A: The bread is done when the crust is a deep golden brown and the internal temperature reaches 190-200°F (88-93°C). A hollow sound when you tap the bottom of the loaf is another good indicator.
Q: Can I make the dough ahead of time?
A: Yes, you can prepare the dough ahead of time and store it in the refrigerator for up to 24 hours. This will slow down the fermentation process and allow the flavors to develop even further. Bring the dough to room temperature before shaping and baking.
Q: What if I don’t have a stand mixer?
A: You can make the dough by hand. Be prepared for a bit of a workout! Mix the ingredients in a large bowl and knead the dough on a lightly floured surface for 10-15 minutes, or until it becomes smooth and elastic.
Final Thoughts
Now it’s your turn to embark on this baking adventure and create your own version of this irresistible bread. Don’t be afraid to experiment with different cheeses and herbs to create a flavor profile that suits your preferences. Share your creations with friends and family, and let me know how your baking experience goes. The joy of sharing freshly baked bread is one of life’s simplest, yet greatest pleasures. Pair it with a hearty tomato soup or a simple green salad for a complete and satisfying meal!