
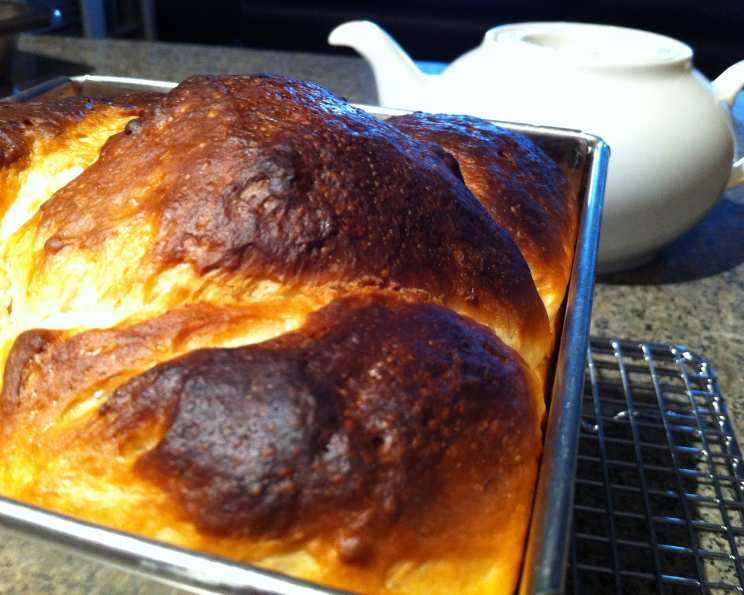
Panipopo: Sweet Coconut Buns from Samoa
The first time I tasted panipopo, it was at a potluck in college. I remember walking into the room, the air thick with the aroma of a hundred different dishes. But then I saw it – a tray of golden-brown buns, glistening with a sweet, creamy sauce. One bite, and I was transported. The soft, pillowy texture, the subtle sweetness of the dough, and the rich, intoxicating flavor of coconut…it was pure comfort food. It wasn’t just a dessert; it was a taste of the islands, a warm hug in bread form, a culinary memory etched forever in my mind.
Recipe Overview
- Prep Time: 30 minutes
- Cook Time: 20-25 minutes
- Total Time: 1 hour 30 minutes (including rising time)
- Servings: 12 buns
- Yield: 1 baking pan of Panipopo
- Dietary Type: Vegetarian
Ingredients
For the Buns:
- 1 (2 1/4 teaspoon) package active dry yeast
- 1 cup warm water
- 1/4 cup sugar
- 1/2 teaspoon salt
- 1 egg, lightly beaten
- 2 tablespoons vegetable oil
- 3 cups all-purpose flour
For the Coconut Sauce:
- 3/4 cup coconut milk, canned or fresh
- 3/4 cup water
- 1/2 cup sugar
Equipment Needed
- Large bowl (or stand mixer bowl)
- Measuring cups and spoons
- 9×13 inch baking pan
- Clean kitchen towel
- Whisk
- Oven
Instructions
-
In a large bowl, or the bowl of your stand mixer, combine the yeast and warm water. Let this mixture sit for about 10 minutes, allowing the yeast to activate and become foamy. This step is crucial for a good rise. If your yeast doesn’t foam, it might be old, and you’ll need to use a fresh package.
-
Add the sugar, salt, lightly beaten egg, and vegetable oil to the yeast mixture. Mix well to combine all the wet ingredients.
-
Gradually add the flour, mixing until a soft dough forms. If using a stand mixer, use the dough hook attachment.
-
Turn the dough out onto a lightly floured surface. Knead the dough for 10 to 20 minutes until it becomes smooth and elastic. This is an important step – the kneading develops the gluten, which gives the buns their lovely texture. If using a stand mixer, knead with the dough hook for about 8-10 minutes.
-
Place the dough in a lightly greased bowl, turning to coat all sides. Cover the bowl with a clean kitchen towel or plastic wrap. Let the dough rise in a warm place until it doubles in volume. This usually takes about 1 to 1.5 hours, depending on the temperature of your kitchen. An optional step here is to punch down the dough after the first rise and let it double again, which will result in an even lighter bun.
-
Once the dough has doubled, punch it down to release the air. Turn the dough out onto a lightly floured surface.
-
Shape the dough into 12 equal-sized balls. Place the balls in an ungreased 9×13 inch baking pan, spacing them evenly. Gently pat them down slightly, so they have a flat surface. This is important if you plan to serve them upside down, allowing the sauce to pool nicely on top.
-
Cover the pan with a clean kitchen towel and let the buns rise again until almost doubled in size. This should take about 30-45 minutes.
-
While the buns are rising for the second time, preheat your oven to 190°C (375°F) and prepare the coconut sauce.
-
In a medium bowl or saucepan, combine the coconut milk, water, and sugar. Whisk well until the sugar is completely dissolved. No need to cook it on the stove; a thorough whisking is all that is needed.
-
Once the buns have almost doubled in size, carefully pour the coconut sauce evenly over them, ensuring each bun is well-coated.
-
Bake for 20 to 25 minutes, or until the buns are golden brown, and the sauce is bubbling up around the edges. Keep a close eye on them during the last few minutes of baking to prevent burning. If they start to brown too quickly, you can loosely tent the pan with foil.
-
Remove the pan from the oven and let the buns cool for at least 30 minutes before cutting into them. This resting time allows the buns to set up and the sauce to thicken slightly, preventing a soggy mess.
Expert Tips & Tricks
- Yeast Activation: Make sure your water is warm, not hot, as hot water can kill the yeast. Aim for around 105-115°F (40-46°C).
- Kneading: Don’t skimp on the kneading! Proper kneading is key to developing the gluten for a light and airy texture. If the dough is too sticky to knead, add flour one tablespoon at a time until it becomes manageable.
- Rising Time: The rising time will vary depending on the temperature of your kitchen. A warm, draft-free environment is ideal. You can proof the dough in a slightly warmed oven (turned off!) or in a sunny spot.
- Sauce Consistency: If you prefer a thicker sauce, you can simmer it gently on the stovetop for a few minutes after baking, but be careful not to overcook it or it will become too sugary.
- Even Baking: Rotate the pan halfway through baking to ensure even browning.
Serving & Storage Suggestions
Panipopo are best served warm, allowing the sweet coconut sauce to soak into the soft buns. You can serve them right-side up or flip them upside down, letting the sauce pool on top for a visually appealing presentation.
Store any leftover panipopo in an airtight container at room temperature for up to 2 days or in the refrigerator for up to 4 days. To reheat, warm them in a microwave for a few seconds or in a low oven until heated through. You can also freeze them for longer storage. Wrap them individually in plastic wrap and then place them in a freezer-safe bag. Thaw completely before reheating. Frozen panipopo are best within 1-2 months for optimal quality.
Nutritional Information
| Nutrient | Amount per Serving | % Daily Value |
|---|---|---|
| Calories | 218 kcal | N/A |
| Total Fat | 6g | 9% |
| Saturated Fat | 3.1g | 15% |
| Cholesterol | 15.5mg | 5% |
| Sodium | 106.8mg | 4% |
| Total Carbohydrate | 37.1g | 12% |
| Dietary Fiber | 1.1g | 4% |
| Sugars | 12.6g | N/A |
| Protein | 4.3g | 8% |
Note: Nutritional information is an estimate and may vary based on specific ingredients and portion sizes.
Variations & Substitutions
- Dairy-Free: While this recipe is already mostly dairy-free, you can ensure it’s entirely dairy-free by using a plant-based “egg” substitute.
- Gluten-Free: For a gluten-free version, substitute the all-purpose flour with a gluten-free all-purpose flour blend. You might need to adjust the amount of liquid slightly, as gluten-free flours tend to absorb more moisture.
- Flavor Variations: Add a touch of vanilla extract or almond extract to the coconut sauce for a different flavor profile.
- Sweetness Level: Adjust the amount of sugar in the coconut sauce to your liking.
FAQs (Frequently Asked Questions)
Q: Can I use fresh coconut milk instead of canned?
A: Yes, absolutely! Fresh coconut milk will add an even richer flavor to the sauce. Just be sure to strain it well before using.
Q: What if my dough doesn’t rise?
A: Make sure your yeast is fresh and that the water isn’t too hot. Also, ensure the dough is in a warm, draft-free place. If it still doesn’t rise, you may need to start over with new yeast.
Q: Can I make the dough ahead of time?
A: Yes, you can prepare the dough the day before and store it in the refrigerator after the first rise. Punch it down before refrigerating and then let it come to room temperature before shaping and baking.
Q: Can I freeze the baked panipopo?
A: Yes, panipopo freeze well. Wrap them individually in plastic wrap and then place them in a freezer-safe bag or container. Thaw completely before reheating.
Q: My sauce is too thin. How do I thicken it?
A: You can simmer the sauce gently on the stovetop for a few minutes after baking to thicken it, but be careful not to overcook it or it will become too sugary and crystallized.
Final Thoughts
I hope this recipe inspires you to try making your own Panipopo. It’s a simple yet incredibly satisfying treat that’s perfect for sharing with family and friends. Don’t be intimidated by the yeast – with a little patience, you’ll be rewarded with the most delicious, soft, and coconutty buns imaginable. Feel free to experiment with variations and make it your own. And most importantly, enjoy the process and the wonderful aroma that will fill your kitchen!