
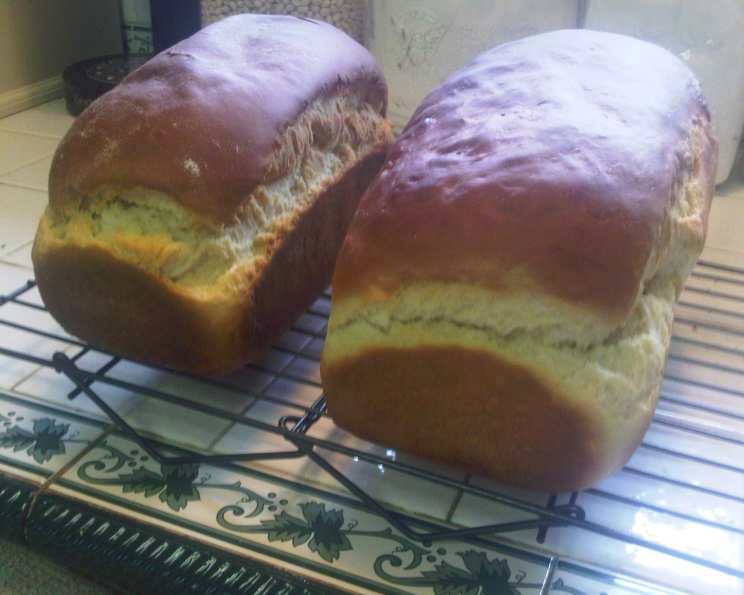
Pão Doce: A Taste of Portugal in Every Bite
The scent of Pão Doce, or Portuguese Sweet Bread, instantly transports me back to my grandmother’s sun-drenched kitchen. I remember her flour-dusted hands kneading the dough with a practiced rhythm, the air thick with the warm, yeasty aroma that promised pure comfort. More than just a bread, it was a symbol of family, love, and the simple joys of life – a memory I cherish and try to recreate with every loaf I bake. Sharing this recipe is like sharing a piece of my heart, hoping that you, too, can experience the magic of this traditional treat.
Recipe Overview
- Prep Time: 30 minutes + rising time
- Cook Time: 35-45 minutes
- Total Time: 3 hours (including rising)
- Servings: Varies depending on loaf/roll size
- Yields: 2 loaves
- Dietary Type: Not suitable for Vegan, Gluten-Free, or Dairy-Free diets.
Ingredients
- 1 large potato
- 2 tablespoons sugar
- 1 package active dry yeast
- 1/4 cup milk
- 1 teaspoon salt
- 1/4 cup butter
- 3 large eggs
- 3/4 cup sugar
- 4 cups flour (or more), plus more for kneading
Equipment Needed
- Large pot
- Measuring cups and spoons
- Large mixing bowl
- Pie pans or bread pans
- Clean kitchen towel
- Oven
Instructions
- Begin by preparing the potato. Place the potato in a large pot, cover with water, and boil until soft. Reserve 1/4 cup of the potato water after boiling, and allow it to cool to lukewarm. The starch in the potato water helps to create a soft and moist bread.
- Mash the cooked potato thoroughly and measure out 1/2 cup of the mashed potato.
- In a small bowl, combine the reserved 1/4 cup lukewarm potato water, 2 tablespoons sugar, and the 1 package of active dry yeast. Stir gently to dissolve the yeast. Then, stir in the 1/2 cup of mashed potato. Set the mixture aside in a warm place to allow it to double in bulk. This usually takes about 15-20 minutes. This step is crucial for activating the yeast and giving the bread its characteristic airy texture.
- Scald the 1/4 cup milk in a small saucepan or microwave. This helps to soften the gluten in the flour, resulting in a more tender bread. Add the 1 teaspoon salt to the milk and let it cool to lukewarm.
- Melt the 1/4 cup of butter in a separate small saucepan or microwave. Allow it to cool slightly. Be careful not to overheat the butter, as this can inhibit the yeast activity.
- In a large, warm mixing bowl (rinse with hot water and dry the bowl to warm it up), beat the 3 large eggs.
- Remove 1 tablespoon of the beaten eggs and set it aside to use later for brushing the tops of the loaves. This will give the bread a beautiful golden-brown color.
- Gradually beat in the 3/4 cup sugar into the beaten eggs, then beat in the cooled, melted butter.
- Combine the egg mixture with the yeast mixture. Blend thoroughly until well combined.
- Add 1 1/3 cups of the 4 cups flour and 1/4 cup milk to the mixture. Beat until completely mixed. This initial addition of flour creates a smooth batter.
- Add another 1 1/3 cups flour and beat until blended. At this stage, the dough will start to come together.
- Turn the dough out onto a lightly floured surface.
- Add the remaining 1 1/3 cups flour, plus any additional flour needed, and knead the dough until it is smooth and elastic, approximately 75 to 100 times. The dough should be smooth, not sticky, after kneading. If the dough is too sticky, gradually add more flour, 1 tablespoon at a time, until it reaches the desired consistency.
- Form the dough into a ball and place it in a lightly oiled bowl. Cover the bowl with a damp cloth and let it rise in a warm place until it has doubled in bulk. This may take about 1 to 1.5 hours, depending on the temperature of your kitchen.
- Once the dough has doubled, punch it down to release the air. Divide the dough into 2 equal portions. Form each portion into a round ball and place them in 2 lightly oiled pie pans or bread pans.
- Allow the dough to double in bulk again, about 1 hour. This second rising is important for achieving a light and airy texture.
- Preheat your oven to 350 degrees Fahrenheit (175 degrees Celsius).
- Brush the tops of the loaves with the reserved beaten egg.
- Bake for 35-45 minutes, or until the loaves are golden brown and sound hollow when tapped on the bottom. The baking time may vary depending on your oven.
- Remove the loaves from the oven and let them cool in the pans for a few minutes before transferring them to a wire rack to cool completely.
Expert Tips & Tricks
- For an even richer flavor, try using brown butter instead of regular melted butter. To make brown butter, melt the butter in a saucepan over medium heat and cook until it turns a nutty brown color. Let it cool slightly before adding it to the dough.
- If your kitchen is cold, you can speed up the rising process by placing the dough in a warm oven with the door slightly ajar. Just make sure the oven isn’t too hot, or it will kill the yeast.
- To ensure the bread is cooked through, insert a toothpick into the center. If it comes out clean, the bread is done.
- If the tops of the loaves are browning too quickly, tent them with aluminum foil during the last 15 minutes of baking.
Serving & Storage Suggestions
Pão Doce is delicious served warm or at room temperature. Enjoy it plain, with butter, or as an accompaniment to your favorite breakfast or brunch dishes. It’s also wonderful toasted and topped with jam or honey.
To store, wrap the cooled loaves tightly in plastic wrap or place them in an airtight container. They will keep at room temperature for 2-3 days, in the refrigerator for up to a week, or in the freezer for up to 3 months. To reheat frozen bread, thaw it completely and then warm it in a preheated oven at 350°F (175°C) for 10-15 minutes.
Nutritional Information
Note: Nutritional information is an estimate and may vary based on specific ingredients and serving size.
| Nutrient | Amount per Serving | % Daily Value |
|---|---|---|
| Calories | 1733 kcal | N/A |
| Calories from Fat | 307 g | 18% |
| Total Fat | 34.1 g | 52% |
| Saturated Fat | 18.1 g | 90% |
| Cholesterol | 344.3 mg | 114% |
| Sodium | 1505.6 mg | 62% |
| Total Carbohydrate | 314.1 g | 104% |
| Dietary Fiber | 11.8 g | 47% |
| Sugars | 89.8 g | 359% |
| Protein | 41.7 g | 83% |
Variations & Substitutions
- Pão Doce Rolls: Instead of making loaves, divide the dough into smaller portions and shape them into rolls before the second rising. This is perfect for individual servings or for making sliders.
- Citrus Zest: Add the zest of one orange or lemon to the dough for a bright, aromatic twist.
- Cinnamon Spice: Incorporate 1 teaspoon of ground cinnamon into the dough for a warmer, more comforting flavor.
- Raisins or Currants: Fold in 1/2 cup of raisins or currants into the dough after the first rising for added texture and sweetness.
FAQs (Frequently Asked Questions)
Q: Can I use instant yeast instead of active dry yeast?
A: Yes, you can. Simply skip the step of dissolving the yeast in potato water and add the instant yeast directly to the dry ingredients.
Q: Can I make the dough ahead of time and refrigerate it?
A: Yes, you can. After the first rising, punch down the dough, wrap it tightly in plastic wrap, and refrigerate it for up to 24 hours. Allow the dough to come to room temperature before proceeding with the recipe.
Q: Why is my bread not rising?
A: There could be several reasons. Make sure your yeast is fresh and not expired. Also, ensure that the water or milk you are using is not too hot, as this can kill the yeast. Lastly, make sure your kitchen is warm enough, as yeast thrives in warm environments.
Q: Can I freeze the baked bread?
A: Absolutely! Wrap the cooled loaves tightly in plastic wrap and then in aluminum foil before freezing. This will prevent freezer burn and maintain the bread’s freshness.
Q: My bread is browning too quickly. What can I do?
A: Tent the bread loosely with aluminum foil during the last 10-15 minutes of baking. This will help to prevent the top from burning while allowing the inside to cook through.
Final Thoughts
Now it’s your turn to create your own memories with this cherished recipe. The aroma of Pão Doce baking in your oven is an invitation to slow down, savor the process, and share the warmth with those you love. Don’t be afraid to experiment with variations and make it your own. And please, share your experiences and feedback – I’d love to hear about your Pão Doce journey! Perhaps pair it with a strong cup of Portuguese coffee for a truly authentic experience. Bom Apetite!