
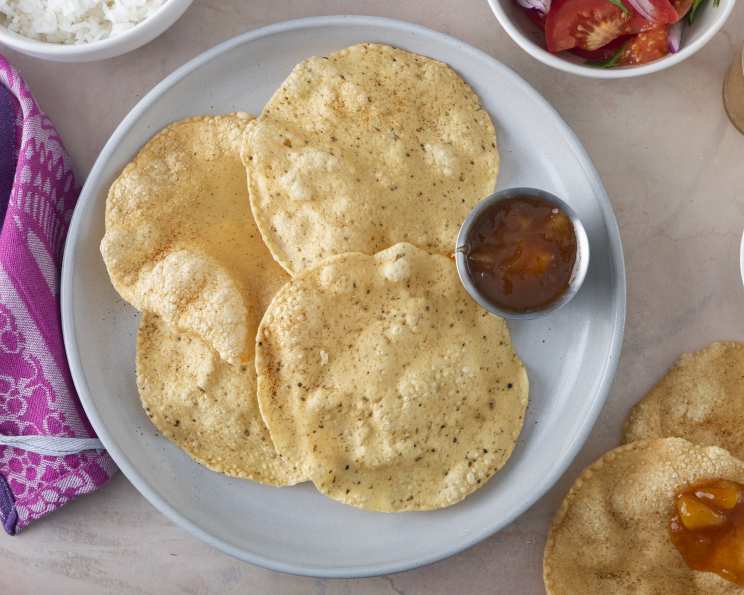
The Art of Papadams: A Crispy, Spicy Delight
I remember the first time I truly understood the power of a papadam. I was backpacking through India, and after a long, dusty train journey, I stumbled into a small roadside dhaba. The air hung thick with the scent of spices and wood smoke. The proprietor, a kindly man with a warm smile, placed a plate of vibrant, crispy papadams before me. The sharp, salty crunch, the subtle heat of the spices, and the way they crumbled in my mouth – it was more than just a snack; it was a sensory explosion that instantly transported me to the heart of India. From that moment on, I was hooked, and I’ve been on a mission to recreate that perfect papadam ever since.
Recipe Overview
- Prep Time: 20 minutes
- Cook Time: 25 minutes + Drying Time (optional)
- Total Time: 45 minutes + Drying Time (optional)
- Servings: 12
- Yield: Approximately 12 papadams
- Dietary Type: Vegan
Ingredients
- 2 cups gram flour (chickpea flour)
- 1 teaspoon cracked/coarsely ground black pepper
- 1 teaspoon ground cumin
- 1/2 teaspoon salt
- 1 clove garlic, pressed
- 1/4 cup water
- 1 tablespoon water (or as needed)
- Cayenne pepper (for dusting tops)
- Oil, for frying (optional)
Equipment Needed
- Large bowl or food processor
- Rolling pin
- Sharp knife
- Lightly oiled surface
- Metal spatula
- Large baking sheets
- Cooling rack
- Large skillet (for frying, optional)
- Paper towels (for draining, optional)
Instructions
-
Begin by combining the gram flour, cracked black pepper, ground cumin, and salt in a large bowl or the bowl of a food processor. Ensure you mix thoroughly until the spices are evenly distributed throughout the flour. This even distribution is key to getting that characteristic flavor in every bite.
-
Add the pressed garlic to the flour mixture and mix well. The garlic provides a subtle but essential depth of flavor.
-
Gradually add the 1/4 cup of water to the flour mixture. Mix until a dough begins to form and holds together in a cohesive ball. If needed, add up to 1 additional tablespoon of water, but add it sparingly, a little at a time.
-
The dough should be fairly stiff and dry to ensure it rolls out properly. If the dough becomes too wet, it will stick to the rolling surface and become difficult to work with.
-
Knead the dough for about 5 minutes by hand, or pulse it in the food processor for about 15 seconds. The goal is to achieve a smooth dough. This kneading process develops the gluten (though minimal in gram flour) and creates a more pliable dough.
-
With your hands, shape the dough into a cylinder or log approximately 2 inches thick and 6 inches long.
-
Using a sharp knife, carefully cut the cylinder into 1/2-inch thick slices. These slices will be the individual papadams.
-
For the rolling process, avoid using your pastry cloth and rolling pin sleeve, as oil will be used. Place each slice on a lightly oiled surface.
-
Lightly oil the top of each slice and then roll it out into a very thin circle, aiming for a diameter of about 6 or 7 inches.
-
Papadams must be rolled extremely thin, ideally no more than 1/16 inch thick. This is crucial for achieving the desired crispness.
-
If the dough sticks to your rolling pin, gently pull it off. A little extra oil on the surface can help prevent sticking.
-
Dust the tops of each rolled-out papadam with cayenne pepper. The amount of cayenne can be adjusted to your preference for spice.
-
Using a metal spatula, carefully loosen the edges of the papadams from the rolling surface. Then, place them on large baking sheets.
-
You have two primary cooking options: baking or frying. For baking, preheat your oven to 300°F (150°C) and bake the papadams for about 15 to 25 minutes, or until they are crisp and dry. The cooking time may vary depending on the thickness and moisture content of the dough.
-
Cool the baked papadams on a rack to maintain their crispness.
-
To prepare the papadams in a more traditional manner, skip the baking step initially. Instead, allow them to dry. This can be done by leaving them in the sun for a few hours or by placing them in a very low oven (less than 200°F or 95°C) for 1 to 2 hours, turning them occasionally.
-
Dry the papadams until they are just slightly flexible and show no moisture. They should not brown or bake during this drying process.
-
At this stage, the dried papadams may be stacked flat and stored in an airtight container until needed. If stored properly, they will keep for months.
-
When ready to serve using the traditional method, heat about 1/8 inch of oil in a large skillet. The oil should be hot but not smoking. A drop of water flicked into the skillet should sizzle immediately.
-
One at a time, carefully drop the papadams into the hot oil.
-
Turn the papadam when it begins to curl at the edges. It will quickly fry and become crisp.
-
Remove the papadam before it turns brown. Overcooking will result in a bitter taste.
-
Cool and drain the fried papadams on paper towels to remove excess oil. Serve immediately for the best flavor and texture.
Expert Tips & Tricks
- Rolling Consistency: The key to papadams is rolling them incredibly thin. Don’t be afraid to apply pressure and stretch the dough.
- Spice Level: Adjust the amount of cayenne pepper to suit your heat preference. You can also experiment with other spices like chili powder or garam masala for different flavor profiles.
- Drying Time: The drying time is crucial if you plan to fry the papadams. Properly dried papadams will puff up beautifully when fried. If they still contain moisture, they will become soggy.
- Frying Temperature: Maintaining the correct oil temperature is essential. Too low, and the papadams will absorb too much oil. Too high, and they will burn quickly.
- Preventing Sticking: If the dough is sticking excessively, try lightly dusting your rolling surface with a little gram flour.
Serving & Storage Suggestions
Papadams are best served fresh, either baked or fried. They make an excellent accompaniment to Indian meals, serving as a crunchy appetizer with chutneys, raita, or pickles. Serve them alongside a flavorful curry or dal for a satisfying and textural contrast.
Store baked or dried papadams in an airtight container at room temperature. They will last for several weeks if properly stored. Fried papadams are best consumed immediately but can be stored in an airtight container for a day or two, although they will lose some of their crispness. Reheating is not recommended, as they tend to become greasy.
Nutritional Information
(Note: Nutritional information is approximate and will vary based on preparation methods and specific ingredients used.)
| Nutrient | Amount per Serving | % Daily Value |
|---|---|---|
| Calories | 60 kcal | 3% |
| Total Fat | 1 g | 1% |
| Saturated Fat | 0 g | 0% |
| Cholesterol | 0 mg | 0% |
| Sodium | 107 mg | 5% |
| Total Carbohydrate | 9 g | 3% |
| Dietary Fiber | 2 g | 7% |
| Sugars | 2 g | 0% |
| Protein | 4 g | 8% |
Variations & Substitutions
- Gluten-Free: This recipe is naturally gluten-free since it uses gram flour (chickpea flour). Ensure your other spices are also gluten-free.
- Spice Variations: Experiment with different spices like ajwain seeds (carom seeds), red chili flakes, or black salt (kala namak) for unique flavor profiles.
- Herb Infusion: Add finely chopped fresh herbs like cilantro or mint to the dough for a refreshing twist.
- Lentil Papadams: You can find variations of papadams made with different lentil flours like urad dal or moong dal. These will have slightly different textures and flavors.
FAQs (Frequently Asked Questions)
Q: Why are my papadams not crispy?
A: This is usually due to rolling them too thick or not drying them sufficiently before frying (if frying). Ensure you roll them as thin as possible and allow ample drying time.
Q: Can I bake papadams instead of frying them?
A: Yes, baking is a healthier alternative. Bake at 300°F (150°C) until crisp, usually around 15-25 minutes.
Q: How long can I store the papadam dough?
A: The dough is best used immediately, but you can store it in the refrigerator for up to 24 hours. Wrap it tightly in plastic wrap to prevent it from drying out.
Q: What is gram flour?
A: Gram flour, also known as chickpea flour or besan, is a flour made from ground chickpeas. It is a staple ingredient in Indian cuisine and naturally gluten-free.
Q: Can I use a pasta machine to roll out the papadams?
A: Yes, a pasta machine can be used to achieve a very thin and even result. Start with the widest setting and gradually decrease the thickness until you reach the desired thinness.
Final Thoughts
Making papadams at home might seem a little daunting at first, but trust me, the result is well worth the effort. The crispy, spicy, and utterly addictive flavor of homemade papadams is simply unmatched. Gather your ingredients, embrace the process, and don’t be afraid to experiment with different spice combinations to find your perfect papadam. So go ahead, give this recipe a try, and let the flavors of India transport you to a world of culinary delight. I encourage you to share your creations and experiences. Happy cooking!