
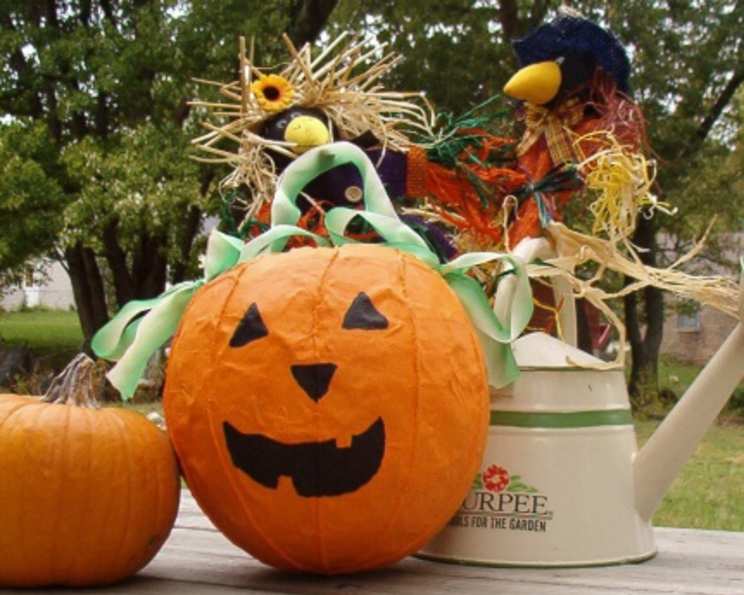
A Childhood Reimagined: Crafting Memories with Papier Mâché
I can still recall the particular scent of damp newspaper drying in the sun, a smell inextricably linked to my childhood summers. My siblings and I would spend hours huddled around a rickety card table in the backyard, elbow-deep in a strange, gloopy paste, transforming discarded newsprint into fantastical creatures and elaborate masks. It wasn’t just about the crafting; it was about the shared laughter, the sticky fingers, and the sheer joy of creating something tangible from nothing. This simple papier mâché recipe unlocks those memories, and I’m excited to share it with you.
Recipe Overview: Papier Mâché Paste
- Prep Time: 10 minutes
- Cook Time: 5 minutes
- Total Time: Several Hours (includes drying time)
- Yield: Approximately 4 cups
- Dietary Type: Vegan, Gluten-Free
Ingredients:
- ½ cup flour
- 2 cups cold water
- 2 cups boiling water
- 3 tablespoons sugar
- Newspaper, cut into strips (approximately 1 inch wide and 4-6 inches long)
Equipment Needed:
- Medium-sized mixing bowl
- Medium-sized saucepan
- Whisk
- Spoon
- Work surface covered with newspaper or a plastic tablecloth
- Containers for dipping newspaper strips (bowls or plates)
- Wire rack or similar for drying
Instructions:
- In the mixing bowl, thoroughly combine the flour and cold water using a whisk. Ensure there are no lumps for a smooth consistency.
- In the saucepan, bring 2 cups of water to a rolling boil. This ensures the starch in the flour cooks properly, creating a strong adhesive.
- Slowly pour the flour and water mixture into the boiling water while whisking constantly. This prevents the flour from clumping.
- Return the mixture to a boil, stirring continuously. Be careful as the mixture may splatter.
- Once boiling, remove the saucepan from the heat and stir in the sugar. The sugar acts as a preservative and adds to the adhesive properties of the paste.
- Allow the mixture to cool completely. As it cools, the paste will thicken significantly. This is a crucial step; the paste needs to be thick enough to adhere to the newspaper strips but not so thick that it’s difficult to work with.
- Once the paste has thickened and cooled to room temperature, it’s ready for use.
- Dip a newspaper strip into the papier mâché paste, ensuring it’s thoroughly coated.
- Remove the excess paste by gently running the strip between your fingers or against the edge of the container. Too much paste will prolong drying time and could lead to mold.
- Apply the paste-soaked newspaper strip to your chosen form or structure. Overlap the strips slightly to create a strong, even layer.
- Repeat steps 8-10, adding layers of newspaper strips until you achieve the desired thickness and strength. Several layers are usually needed for a sturdy final product.
- Allow the papier mâché to dry completely. This can take several hours or even overnight, depending on the humidity and the thickness of the layers. Ensure adequate ventilation to prevent mold growth.
- The papier mâché is dry when it feels stiff and hard to the touch.
Expert Tips & Tricks:
- Preventing Lumps: To avoid lumps in your paste, sift the flour before mixing it with the cold water. You can also use a blender or immersion blender to ensure a perfectly smooth mixture.
- Controlling Thickness: If your paste becomes too thick, add a small amount of water to thin it out. If it’s too thin, simmer it gently on the stovetop for a few minutes to thicken it further.
- Mold Prevention: Ensure adequate ventilation during the drying process. A dehumidifier can also help speed up drying and prevent mold growth, especially in humid climates. You can also add a small amount of salt to the paste to further inhibit mold.
- Paper Choice: While newspaper is the most common choice, you can experiment with other types of paper, such as paper towels or tissue paper, to achieve different textures and effects.
- Layering for Strength: Building your papier mâché project with multiple thin layers is much stronger than using a few thick layers. Allow each layer to dry partially before applying the next.
- Adding Texture: Incorporate materials like string, fabric scraps, or sand into your papier mâché project to add unique textures and visual interest.
Serving & Storage Suggestions:
While you can’t exactly “serve” papier mâché in the traditional culinary sense, the finished product is ready for display or use once it’s fully dried and decorated. Store your papier mâché creations in a dry place to prevent them from becoming damp or moldy. Avoid direct sunlight, which can fade painted or decorated surfaces. Properly stored, your papier mâché creations can last for many years. Leftover paste can be stored in an airtight container in the refrigerator for up to a week. However, it may lose some of its adhesive properties over time.
Nutritional Information:
As papier mâché is not intended for consumption, nutritional information is not applicable.
Variations & Substitutions:
- Gluten-Free Papier Mâché: Substitute the all-purpose flour with a gluten-free flour blend. You may need to adjust the amount of water to achieve the desired consistency.
- Alternative Adhesives: While this flour-based paste is a classic choice, you can also use wallpaper paste or school glue diluted with water as an alternative adhesive.
- Scented Papier Mâché: Add a few drops of essential oil to the paste for a pleasant scent. Lavender or citrus oils work particularly well.
- Colored Papier Mâché: Add food coloring to the paste for colored layers. This can reduce the need for painting later.
FAQs (Frequently Asked Questions):
Q: Why does my papier mâché keep cracking?
A: Cracking often occurs when the papier mâché dries too quickly or when the layers are too thick. Ensure you’re applying thin layers and allowing them to dry gradually in a well-ventilated area.
Q: How can I make my papier mâché waterproof?
A: Papier mâché is not naturally waterproof. To make it more resistant to water, seal the finished project with a waterproof sealant or varnish.
Q: Can I paint papier mâché?
A: Absolutely! Once the papier mâché is completely dry, you can paint it with acrylic paints, watercolors, or spray paint. For best results, apply a primer coat first.
Q: How do I dispose of leftover papier mâché paste?
A: Do not pour leftover paste down the drain, as it can clog your plumbing. Instead, allow the paste to dry completely and then dispose of it in the trash.
Q: My papier mâché project is developing mold. What should I do?
A: If you notice mold growing on your project, discard it immediately. Mold can be harmful to your health. Prevent mold growth by ensuring adequate ventilation during the drying process.
Final Thoughts:
This simple papier mâché recipe is more than just a crafting technique; it’s a portal to creativity and imagination. Whether you’re building fantastical creatures, creating decorative objects, or simply reliving childhood memories, I encourage you to gather your materials, embrace the mess, and let your imagination run wild. Share your creations with friends and family, and most importantly, have fun! And if you create a new twist or variation, be sure to share the results – I’m always eager to learn and be inspired by your ideas.