
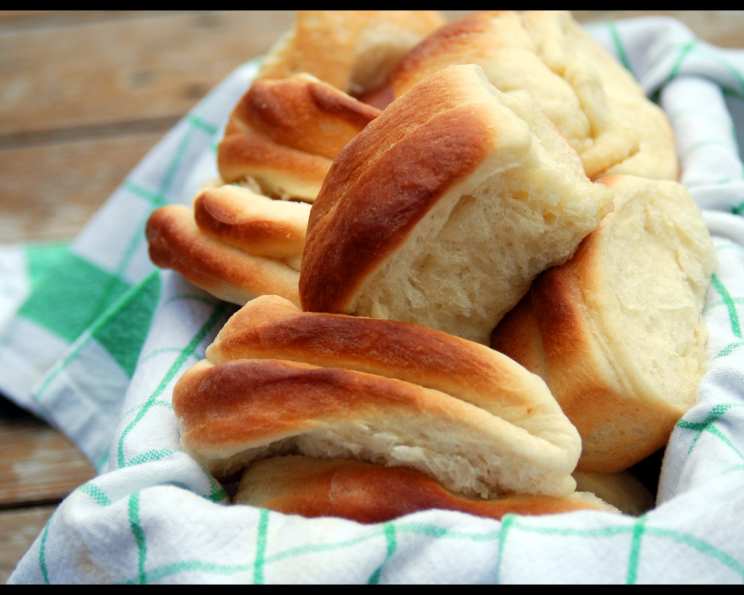
Parker House Rolls: A Bread Machine Delight
The aroma of baking bread has always been a siren song in my kitchen. But there’s something particularly enchanting about Parker House rolls. I remember as a child, my grandmother, her hands dusted with flour, would pull a tray of these golden-brown pillows from her ancient oven. The buttery scent would fill the entire house, and the anticipation was almost unbearable. Each roll, with its distinctive folded shape, was a miniature masterpiece, a testament to her love and patience. Now, armed with my trusty bread machine, I can recreate that same magic, bringing a touch of nostalgia and deliciousness to my own table.
Recipe Overview
- Prep Time: 20 minutes
- Cook Time: 15-18 minutes
- Total Time: 2 hours 48 minutes (including rise time)
- Yields: 12-18 Rolls
- Serves: 4
- Dietary Type: Not specified
Ingredients
- 3 cups bread flour
- 1/4 cup white sugar
- 1 teaspoon salt
- 1 (1/4 ounce) package active dry yeast
- 1/2 cup butter, softened, Do Not Use Margarine*
- 1 large egg (whisked)
- 3/4 cup water (120F*)
- 2 tablespoons water (120F*)
Important Notes:
- Using softened, real butter is crucial for the proper texture of the rolls. Margarine’s water content can negatively impact the dough.
- The water temperature is critical for activating the yeast. Use a thermometer to ensure accuracy.
Equipment Needed
- Bread machine
- Baking pan
- Small saucepan or microwave-safe bowl
- Lightly floured surface
- 2 3/4-inch round cutter
- Wire rack
Instructions
-
Prepare the Bread Machine: Add water (3/4 cup, 120F), 1/4 cup softened butter, egg, salt, bread flour, sugar, and yeast to the bread machine pan in the order suggested by your bread machine manufacturer. This is important as some machines require the yeast to be added last, on top of the flour.
-
Select Dough Cycle: Select the dough/manual cycle on your bread machine. This cycle will mix and knead the dough, and then allow it to rise.
-
Melt the Butter: While the bread machine is working, prepare the baking pan. Put the remaining 1/4 cup butter in the baking pan. Melt the butter over low heat on the stovetop, or in a microwave-safe bowl in short bursts in the microwave, being careful not to let it splatter.
-
Grease the Pan: Tilt the pan to grease the entire bottom evenly with the melted butter. This will prevent the rolls from sticking and add to their rich flavor.
-
Remove and Roll the Dough: When the dough cycle is complete, carefully remove the dough from the bread machine and place it on a lightly floured surface.
-
Roll Out the Dough: Use a rolling pin to roll the dough out to approximately 1/2-inch thickness.
-
Cut the Rolls: With a floured 2 3/4-inch round cutter, cut the dough into circles. The flour prevents the cutter from sticking.
-
Butter and Fold: Holding a dough circle by the edge, dip both sides into the melted butter in the pan, ensuring each side is well-coated. Then, fold the circle in half.
-
Arrange in Pan: Arrange the folded dough circles in rows in the prepared baking pan, positioning each roll closely to the others, almost touching. This close arrangement encourages them to rise upwards, creating soft, pillowy sides.
-
Re-roll Scraps: Knead the dough trimmings together. Re-roll the dough and cut out more rolls until all the dough is used.
-
Second Rise: Cover the pan of rolls with a clean kitchen towel or plastic wrap and let them rise in a warm, draft-free place for about 45 minutes, or until doubled in size. A warm oven (turned off!) or a sunny spot in the kitchen works well.
-
Preheat Oven: While the rolls are rising, preheat your oven to 400 degrees Fahrenheit (200 degrees Celsius).
-
Bake: Bake the rolls in the preheated oven for 15 to 18 minutes, or until they are golden brown and cooked through. The internal temperature should reach about 200 degrees Fahrenheit (93 degrees Celsius).
-
Cool and Serve: Remove the pan from the oven and let the rolls cool slightly on a wire rack.
-
Butter (Optional): Brush the tops of the warm rolls with additional melted butter for extra richness and shine, if desired.
Expert Tips & Tricks
- Proof the Yeast: If you’re unsure about the freshness of your yeast, proof it before adding it to the bread machine. Simply mix the yeast with a little warm water and sugar. If it foams up in 5-10 minutes, it’s good to use.
- Don’t Over-Knead: The bread machine handles the kneading, but be gentle when re-rolling the dough scraps. Over-kneading can result in tough rolls.
- Even Baking: If your oven tends to bake unevenly, rotate the pan halfway through the baking time to ensure even browning.
- Make-Ahead Option: You can prepare the rolls up to the point of baking and then refrigerate them overnight. Let them come to room temperature for about 30 minutes before baking.
- Freeze for Later: Baked and cooled Parker House rolls freeze beautifully. Wrap them tightly in plastic wrap and then in a freezer bag. Thaw at room temperature before reheating.
Serving & Storage Suggestions
Serve these Parker House rolls warm as a delightful accompaniment to any meal, especially during holidays or special occasions. They pair perfectly with roasted chicken, turkey, ham, or a hearty stew.
- Room Temperature: Store leftover rolls in an airtight container at room temperature for up to 2 days.
- Refrigerator: For longer storage, keep them in an airtight container in the refrigerator for up to 5 days.
- Freezer: As mentioned above, these rolls freeze exceptionally well. Freeze for up to 2-3 months for best quality.
- Reheating: To reheat, wrap the rolls in foil and warm them in a 350°F (175°C) oven for about 10-15 minutes, or until heated through. You can also microwave them briefly, but be careful not to overheat and dry them out.
Nutritional Information
(Estimated values; will vary based on specific ingredients and serving size)
| Nutrient | Amount per Serving | % Daily Value |
|---|---|---|
| Calories | 154 kcal | N/A |
| Total Fat | 6 g | N/A |
| Saturated Fat | 4 g | N/A |
| Cholesterol | 25 mg | N/A |
| Sodium | 160 mg | N/A |
| Total Carbohydrate | 20 g | N/A |
| Dietary Fiber | 1 g | N/A |
| Sugars | 3 g | N/A |
| Protein | 3 g | N/A |
Variations & Substitutions
- Sweet Potato Parker House Rolls: Add 1/2 cup of mashed cooked sweet potato to the dough for a touch of sweetness and a vibrant orange color. Reduce the water by about 1/4 cup to compensate for the moisture in the sweet potato.
- Garlic Herb Parker House Rolls: Mix 1 tablespoon of minced garlic and 1 tablespoon of chopped fresh herbs (such as rosemary, thyme, or parsley) into the melted butter before dipping the rolls.
- Gluten-Free Parker House Rolls: Substitute the bread flour with a gluten-free bread flour blend. You may need to adjust the liquid slightly, as gluten-free flours absorb moisture differently. Be sure to use a bread machine cycle specifically designed for gluten-free bread.
FAQs (Frequently Asked Questions)
Q: Why did my rolls turn out flat?
A: Using margarine instead of butter is a common culprit. Margarine’s higher water content can inhibit the dough’s rise. Also, be sure your yeast is fresh and active.
Q: Can I make the dough without a bread machine?
A: Yes, you can. Mix the ingredients in a bowl, knead for 8-10 minutes until smooth and elastic, then let rise in a warm place until doubled before proceeding with the recipe.
Q: How can I keep the rolls from drying out while baking?
A: Place a pan of hot water on the bottom rack of the oven while baking to create steam, which helps keep the rolls moist.
Q: Can I use instant yeast instead of active dry yeast?
A: Yes, you can substitute instant yeast. Add it directly to the dry ingredients without proofing it first.
Q: How do I know when the rolls are done baking?
A: The rolls should be golden brown on top and feel firm to the touch. An internal temperature of 200°F (93°C) indicates they are fully cooked.
Final Thoughts
These Parker House Rolls, made easy with the help of a bread machine, are a true celebration of simple pleasures. The buttery, tender texture and classic folded shape make them a perfect addition to any meal, from weeknight dinners to festive holiday gatherings. Don’t be afraid to experiment with variations and substitutions to make them your own. I encourage you to try this recipe and share the joy of homemade bread with your loved ones. Your feedback is always welcome, and I can’t wait to hear about your baking adventures!