
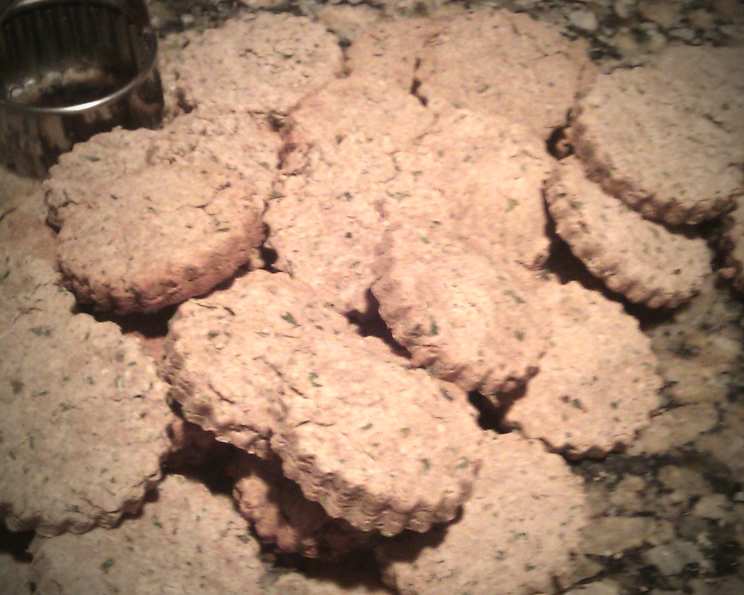
Parsley Kisses: Homemade Dog Cookies Your Pup Will Adore
The first time I made these treats, my overly enthusiastic Labrador, Gus, nearly pulled me off my feet trying to get to the cooling rack. He’s usually a picture of canine decorum (except when squirrels are involved), but the aroma of these cookies transformed him into a whirling dervish of puppy love. It was a chaotic, flour-dusted scene, complete with happy barks and a rapidly disappearing pile of “kisses.” To this day, the scent of these baking fills my kitchen with the joyful memory of Gus’s unbridled excitement—and a silent promise to always keep a batch on hand.
Recipe Overview
- Prep Time: 10 minutes
- Cook Time: 15 minutes
- Total Time: 2 hours 25 minutes
- Yields: About 40 cookies
- Serves: Varies depending on dog size and appetite
- Dietary Type: Suitable for most dogs, check ingredients for sensitivities
Ingredients
- 2 cups whole wheat flour
- ½ cup wheat germ
- ⅛ cup dried parsley flakes (or triple the amount if using fresh, finely chopped)
- ½ cup water
- ¼ cup unsweetened applesauce (or pureed apple or pear)
- 1 egg
Equipment Needed
- Mixing Bowl
- Measuring Cups and Spoons
- Work Surface (lightly floured)
- Rolling Pin (optional)
- Cookie Cutters (small biscuit cutter or other shapes)
- Cookie Sheet
- Oven
Instructions
-
Begin by preheating your oven to 375°F (190°C). This ensures even baking and the perfect crispness for your canine companions.
-
In a large mixing bowl, whisk together the whole wheat flour, wheat germ, and dried parsley flakes. Make sure the parsley is evenly distributed throughout the dry ingredients. This blend provides a wholesome base and those breath-freshening benefits. If using fresh parsley make sure to finely chop it.
-
Now, add the water and unsweetened applesauce to the dry ingredients. Mix well until a shaggy dough starts to form. The applesauce adds a touch of natural sweetness and helps bind the ingredients.
-
Next, incorporate the egg. Mix well until the dough comes together into a cohesive ball. The egg provides structure and richness to the cookies.
-
Lightly flour your work surface. Knead a portion of the dough in your hands for a few moments to ensure it’s pliable and easy to work with. Then, flatten the dough on the prepared surface to approximately ¼-inch thick. You can use a rolling pin for a more even thickness, but it’s not strictly necessary.
-
Using a small biscuit cutter or other cookie cutters in fun shapes, cut out neat shapes from the flattened dough. Get creative! Bones, hearts, or even simple circles work perfectly.
-
Repeat steps 5 and 6 with the remaining dough. You can re-roll the scraps to minimize waste, but the dough may become a bit tougher with each re-rolling.
-
Carefully place the cookies onto a cookie sheet, leaving a little space between each one to allow for even baking.
-
Bake the cookies in the preheated oven for approximately 15 minutes, or until the bottoms are just starting to brown. Keep a close eye on them to prevent burning.
-
Once the bottoms are lightly browned, shut off the oven and let the cookies rest inside for 2 hours. This slow cooling process allows the cookies to dry out and become extra crunchy, which is what dogs love.
-
After the 2-hour rest, remove the cookies from the oven and let them cool completely on a wire rack before serving to your furry friend.
Expert Tips & Tricks
- For extra-crunchy cookies, you can reduce the oven temperature slightly and extend the baking time.
- If you want to add a little extra flavor, try adding a pinch of brewer’s yeast to the dough. Many dogs enjoy the taste and it’s a good source of B vitamins.
- To prevent the cookies from sticking to the cookie sheet, you can line it with parchment paper.
- If your dog has allergies, be sure to check all ingredients carefully. You can substitute the whole wheat flour with a gluten-free alternative like oat flour or rice flour.
Serving & Storage Suggestions
These Parsley Kisses are best served as a reward or a treat between meals. Always ensure your dog has access to fresh water.
To store the cookies, place them in an airtight container. They will last for up to 3 weeks in the refrigerator or up to 4 months in the freezer. If freezing, thaw completely before serving.
Nutritional Information
| Nutrient | Amount per Serving (approximate) |
|---|---|
| Calories | 30 kcal |
| Total Fat | 0.5 g |
| Saturated Fat | 0.1 g |
| Cholesterol | 0 mg |
| Sodium | 2 mg |
| Total Carbohydrate | 5 g |
| Dietary Fiber | 1 g |
| Sugars | 0 g |
| Protein | 1 g |
Note: Nutritional information is an estimate and may vary based on specific ingredients and portion sizes.
Variations & Substitutions
- Gluten-Free: Substitute the whole wheat flour with a gluten-free blend or oat flour.
- Egg-Free: Replace the egg with a flax egg (1 tablespoon of ground flaxseed mixed with 3 tablespoons of water, let sit for 5 minutes to thicken).
- Flavor Boost: Add a tablespoon of peanut butter (ensure it’s xylitol-free, as xylitol is toxic to dogs) or a sprinkle of dried rosemary for added flavor.
- Seasonal Twist: Incorporate a small amount of pureed pumpkin or sweet potato during the fall months.
FAQs (Frequently Asked Questions)
Q: Can I use fresh parsley instead of dried?
A: Yes, but you’ll need to use about three times the amount, finely chopped, to achieve the same level of flavor.
Q: My dog has a wheat allergy. What can I substitute?
A: You can substitute the whole wheat flour with oat flour, rice flour, or a gluten-free flour blend specifically designed for baking.
Q: How long will these cookies last?
A: They will last up to 3 weeks in the refrigerator or up to 4 months in the freezer, stored in an airtight container.
Q: My dough is too dry/wet. What should I do?
A: If the dough is too dry, add a tablespoon of water at a time until it comes together. If it’s too wet, add a tablespoon of flour at a time until it reaches the right consistency.
Q: Can I add other ingredients to these cookies?
A: Yes, you can add small amounts of dog-safe ingredients like peanut butter (xylitol-free), grated carrot, or cooked chicken. Just be mindful of any allergies your dog may have.
Final Thoughts
These Parsley Kisses are more than just dog treats; they’re a symbol of the love and care we shower upon our furry family members. They’re easy to make, packed with wholesome ingredients, and sure to bring a wagging tail and a happy bark. So go ahead, bake a batch and watch your pup’s eyes light up with joy. And don’t forget to share your baking adventures – and adorable dog photos – with fellow pet parents! Happy baking!