
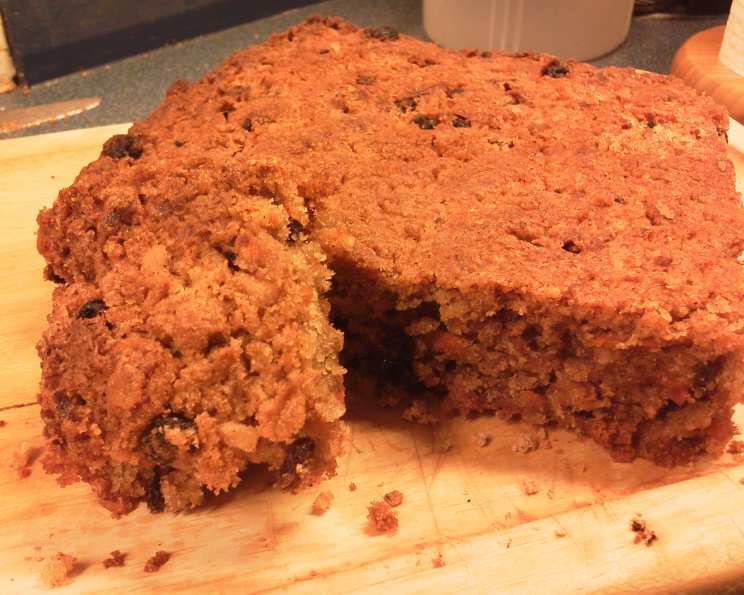
Parsnip Cake: A Spiced Autumn Delight
The scent of warm spices and sweet root vegetables baking in the oven always takes me back to my grandmother’s kitchen. I remember huddling around the Aga on chilly afternoons, watching her deftly grate parsnips for her famous cake, a closely guarded family secret until now! The aroma, a unique blend of vanilla, butterscotch, and earthy sweetness, was a promise of comfort and joy. That cake, seemingly humble, held a magic that transcended its simple ingredients, and to this day, a slice of parsnip cake feels like a warm hug from Grandma herself.
Recipe Overview
- Prep Time: 20 minutes
- Cook Time: 60 minutes
- Total Time: 1 hour 20 minutes
- Servings: 10
- Yield: 1 cake
- Dietary Type: Vegetarian
Ingredients
- 3 eggs
- 1 cup canola oil
- 1 cup caster sugar
- 1 teaspoon vanilla essence
- ¾ cup self-raising flour
- ¾ cup whole wheat flour
- 1 teaspoon cinnamon
- 1 teaspoon mixed spice
- ½ teaspoon ground ginger
- 1 teaspoon baking powder
- 3 tablespoons desiccated coconut
- 2 cups finely grated parsnips
- ½ cup cranberries (or any dried fruit)
- ½ cup sultanas
Equipment Needed
- Large mixing bowl
- Wooden spoon
- Sifter
- Measuring cups and spoons
- Grater
- 23cm round cake tin
- Greaseproof paper (optional)
- Oven
Instructions
-
Preheat your oven to 180°C (350°F). Grease a 23cm round cake tin thoroughly. Lining the base with greaseproof paper will make it easier to remove the cake later.
-
In a large bowl, sift together the self-raising flour, whole wheat flour, cinnamon, mixed spice, ground ginger, and baking powder. This ensures the spices are evenly distributed and prevents any lumps in the batter.
-
In a separate bowl, combine the caster sugar, eggs, canola oil, and vanilla essence. Whisk well until the mixture is light and well combined. This helps create a tender and moist cake.
-
Add the finely grated parsnips, desiccated coconut, cranberries, and sultanas to the egg mixture. Mix well until everything is evenly distributed. The parsnips add moisture and a subtle sweetness to the cake, while the coconut and dried fruits provide texture and flavor.
-
Gently fold the wet ingredients into the dry ingredients using a wooden spoon. Be careful not to overmix – stir only until the dry ingredients are just incorporated. Overmixing can result in a tough cake.
-
Pour the batter into the prepared cake tin and spread it evenly.
-
Bake in the preheated oven for 1 hour. To check for doneness, insert a skewer into the center of the cake. If it comes out clean, the cake is ready. If not, bake for a further 5-10 minutes.
-
Once baked, remove the cake from the oven and let it cool in the tin for about 10 minutes before turning it out onto a wire rack to cool completely. This prevents the cake from breaking apart.
-
Once the cake is completely cool, you can ice it with cream cheese icing, if desired.
Expert Tips & Tricks
- For a richer flavor, toast the desiccated coconut lightly before adding it to the batter.
- If you don’t have whole wheat flour, you can substitute it with more self-raising flour.
- To prevent the dried fruit from sinking to the bottom of the cake, toss them in a little flour before adding them to the batter.
- If the top of the cake starts to brown too quickly, cover it loosely with foil during the last 15 minutes of baking.
- Use freshly grated spices for the best flavor.
- The cake is even better the next day, as the flavors have had time to meld together.
Serving & Storage Suggestions
Serve the parsnip cake at room temperature, either plain or with a generous layer of cream cheese icing. A dusting of icing sugar or a sprinkle of chopped nuts can also enhance the presentation. Pair it with a cup of tea or coffee for a comforting afternoon treat.
To store, wrap the cake tightly in plastic wrap or store it in an airtight container. It will keep at room temperature for up to 3 days, in the refrigerator for up to a week, or in the freezer for up to 2 months. Thaw frozen cake overnight in the refrigerator before serving.
Nutritional Information
| Nutrient | Amount per Serving | % Daily Value |
|---|---|---|
| Calories | 412 kcal | N/A |
| Total Fat | 24.1 g | 37% |
| Saturated Fat | 2.6 g | 12% |
| Cholesterol | 55.8 mg | 18% |
| Sodium | 185.3 mg | 7% |
| Total Carbohydrate | 46.7 g | 15% |
| Dietary Fiber | 3.4 g | 13% |
| Sugars | 27.1 g | N/A |
| Protein | 4.7 g | 9% |
Variations & Substitutions
- Gluten-Free: Substitute the self-raising and whole wheat flours with a gluten-free all-purpose flour blend.
- Nut-Free: Omit the desiccated coconut.
- Spice it Up: Add a pinch of ground cloves or cardamom for a warmer, more complex flavor.
- Citrus Zest: Incorporate the zest of an orange or lemon for a bright, zesty twist.
- Apple Parsnip Cake: Substitute one cup of the grated parsnips with grated apple for a slightly different flavor and texture.
- Cream Cheese Icing Alternative: Try a simple lemon glaze made with powdered sugar and lemon juice.
FAQs (Frequently Asked Questions)
Q: Can I use different dried fruits in this cake?
A: Absolutely! Feel free to substitute the cranberries and sultanas with other dried fruits such as raisins, chopped apricots, or dates.
Q: Can I freeze the parsnip cake?
A: Yes, parsnip cake freezes well. Wrap it tightly in plastic wrap and then in foil to prevent freezer burn. Thaw overnight in the refrigerator before serving.
Q: What can I use instead of canola oil?
A: You can use other neutral-flavored oils such as vegetable oil or sunflower oil. Melted butter also works well, but it will give the cake a slightly different flavor.
Q: My cake is browning too quickly. What should I do?
A: If the top of the cake is browning too quickly, cover it loosely with foil during the last 15 minutes of baking.
Q: Can I make this cake ahead of time?
A: Yes, you can make the cake a day or two in advance. Store it wrapped tightly in plastic wrap at room temperature or in the refrigerator.
Final Thoughts
This parsnip cake is a delightful way to enjoy seasonal vegetables in a comforting and delicious treat. Don’t be afraid to experiment with different variations and substitutions to create your own signature version. I hope you enjoy baking and sharing this recipe as much as my family and I do. Let me know what you think! I’d love to hear how it turns out and what creative twists you add to it. Happy baking!