
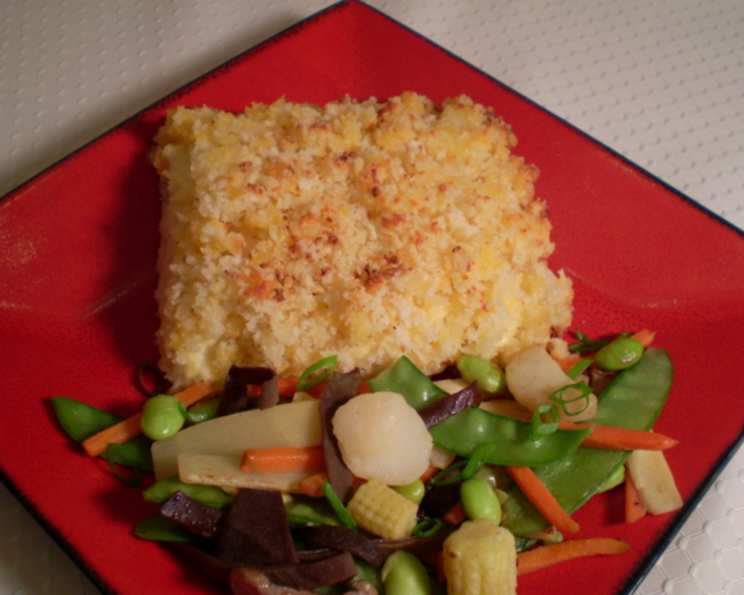
Party Chicken: A Crowd-Pleasing Classic
My aunt Carol, bless her heart, was legendary for her potlucks. And without fail, amidst the seven-layer salads and ambrosia, there was always a bubbling casserole dish of “Party Chicken.” It wasn’t fancy, but it was pure comfort food – tender chicken cloaked in a creamy sauce and topped with a crunchy, cheesy crust that everyone devoured. Every scoop felt like a warm hug from Aunt Carol herself. This recipe brings back those memories, and it’s a dish I’ve proudly carried forward to my own family gatherings.
Recipe Overview
- Prep Time: 15 minutes
- Cook Time: 25 minutes
- Total Time: 40 minutes
- Servings: 4
- Dietary Type: Not Gluten-Free
Ingredients
- Cooking spray
- 2 tablespoons unsalted butter, softened
- 1/4 cup flour
- 1 1/2 lbs chicken breast fillets
- 1/2 teaspoon salt
- 1/8 teaspoon pepper
- 10 3/4 ounces reduced-sodium cream of chicken soup
- 1/2 cup mayonnaise
- 1 cup panko breadcrumbs (Japanese bread crumbs)
- 1 cup shredded cheddar cheese
Equipment Needed
- 2-quart baking dish
- Large zip-top bag (or shallow bowl/plate)
- Mixing bowl
- Measuring cups and spoons
- Instant-read meat thermometer
- Aluminum Foil
Instructions
-
Begin by preheating your oven to 425°F (220°C). While the oven heats, coat a 2-quart baking dish with cooking spray. This will prevent the chicken from sticking and make cleanup a breeze.
-
Next, prepare the chicken. Place the flour in a large zip-top bag. Season the chicken breast fillets with salt and pepper for simple but important flavor enhancement. Add the seasoned chicken to the bag. Seal the bag tightly and shake to coat the chicken thoroughly with flour. Alternatively, if you don’t have a zip-top bag, you can simply put the flour onto a large plate or in a shallow bowl and dredge each chicken piece, ensuring it’s evenly coated.
-
Remove the chicken from the bag and shake off any excess flour. This step is crucial to prevent the flour from creating a gummy texture in the final dish. Arrange the chicken evenly in the prepared baking dish. The chicken should be in a single layer.
-
Now, prepare the creamy sauce. In a bowl, combine the reduced-sodium cream of chicken soup and mayonnaise. Spread this mixture evenly over the chicken in the baking dish, ensuring each piece is nicely coated. This mixture provides moisture and richness to the chicken, keeping it tender during baking.
-
Prepare the crunchy topping. In a separate bowl, stir together the panko breadcrumbs, shredded cheddar cheese, and softened butter. Mix until the mixture is crumbly and the panko breadcrumbs are evenly coated with the cheese mixture. The softened butter helps bind the panko and cheese together, creating a delicious, golden-brown crust.
-
Top the chicken with the cheese mixture, spreading it evenly over the cream of chicken soup and mayonnaise layer. Cover the dish tightly with foil. This initial covering will help steam the chicken and keep it moist.
-
Bake the covered dish for 10 minutes. This allows the chicken to begin cooking without the risk of the topping browning too quickly.
-
Remove the foil from the dish. Put the uncovered dish back in the oven and bake for an additional 10-15 minutes, or until the top is golden brown and the internal temperature of the chicken reaches 165°F (74°C). Use an instant-read meat thermometer to accurately ensure doneness by inserting it into the thickest part of the chicken breast.
-
Once cooked through, remove the Party Chicken from the oven and let it stand for 5-10 minutes before serving. This resting period allows the juices to redistribute throughout the chicken, resulting in a more tender and flavorful dish.
Expert Tips & Tricks
- Panko Perfection: Using panko breadcrumbs is key to getting that extra-crispy topping. Their irregular shape creates more surface area for browning. If you only have regular breadcrumbs, you can toast them lightly in a skillet with a bit of butter before mixing with the cheese.
- Soup Savvy: Using reduced-sodium cream of chicken soup helps control the overall saltiness of the dish. If you’re concerned about sodium, you can even make your own cream of chicken soup from scratch.
- Don’t Overbake: Overbaking chicken can make it dry and tough. Always use a meat thermometer to ensure the chicken reaches the safe internal temperature of 165°F (74°C).
- Customize your Cheese: Feel free to experiment with different types of cheese in the topping. Monterey Jack, Colby, or even a blend of cheddar and Parmesan would be delicious.
- Consider adding a dash of garlic powder or onion powder to the flour for an extra layer of flavor.
Serving & Storage Suggestions
Serve the Party Chicken hot, straight from the oven. It pairs wonderfully with a simple side salad, steamed green beans, or mashed potatoes. For a complete meal, consider serving it with a side of rice or quinoa.
Leftovers can be stored in an airtight container in the refrigerator for up to 3-4 days. To reheat, bake in a preheated oven at 350°F (175°C) until heated through, or microwave in short intervals, checking frequently to avoid overcooking. While you can freeze Party Chicken, the texture of the sauce and topping may change slightly upon thawing. If freezing, wrap the dish tightly in plastic wrap and then foil before freezing for up to 2 months. Thaw in the refrigerator overnight before reheating.
Nutritional Information
| Nutrient | Amount per Serving | % Daily Value |
|---|---|---|
| Calories | 601.9 kcal | N/A |
| Calories from Fat | 256 g | 43% |
| Total Fat | 28.6 g | 43% |
| Saturated Fat | 11.9 g | 59% |
| Cholesterol | 151.3 mg | 50% |
| Sodium | 984.2 mg | 41% |
| Total Carbohydrate | 32.8 g | 10% |
| Dietary Fiber | 1.4 g | 5% |
| Sugars | 3.7 g | 14% |
| Protein | 51.1 g | 102% |
Note: Nutritional information is an estimate and may vary based on specific ingredients used.
Variations & Substitutions
- Gluten-Free Party Chicken: Substitute the all-purpose flour with a gluten-free all-purpose flour blend. Ensure the cream of chicken soup and panko breadcrumbs are also gluten-free.
- Spicy Kick: Add a pinch of red pepper flakes to the cheese topping or a dash of hot sauce to the cream of chicken soup mixture for a little heat.
- Herbaceous Twist: Mix fresh or dried herbs, such as thyme, rosemary, or parsley, into the cheese topping for a more sophisticated flavor profile.
- Veggie Boost: Add a layer of sliced mushrooms, bell peppers, or onions to the baking dish before adding the chicken for extra nutrients and flavor.
- Lighter Version: Use light mayonnaise and reduced-fat cheddar cheese to cut down on the fat content.
FAQs (Frequently Asked Questions)
Q: Can I use frozen chicken breasts for this recipe?
A: Yes, but make sure to thaw the chicken completely before using. Pat the chicken dry with paper towels before dredging in flour to remove excess moisture.
Q: Can I make this ahead of time?
A: Absolutely! You can assemble the dish (up to the baking step) and store it in the refrigerator for up to 24 hours. Add about 5-10 minutes to the baking time if baking directly from the fridge.
Q: My topping isn’t browning, what should I do?
A: If the topping isn’t browning sufficiently, you can broil it for the last minute or two, watching carefully to prevent burning.
Q: Can I use a different type of soup?
A: While cream of chicken soup is traditional, you could experiment with cream of mushroom or cream of celery soup for a slightly different flavor.
Q: Is it really necessary to use a meat thermometer?
A: Yes, using a meat thermometer is the best way to ensure the chicken is cooked safely to an internal temperature of 165°F (74°C).
Final Thoughts
Party Chicken isn’t just a recipe; it’s a memory, a comfort, and a guaranteed crowd-pleaser. Whether you’re bringing it to a potluck, serving it for a family dinner, or simply craving a taste of nostalgia, this dish is sure to hit the spot. So gather your ingredients, preheat that oven, and get ready to experience the simple joy of Party Chicken. I encourage you to give this recipe a try and let me know what you think! What are your favorite sides to pair it with? I’d love to hear your feedback and see your own creative twists on this classic dish.