
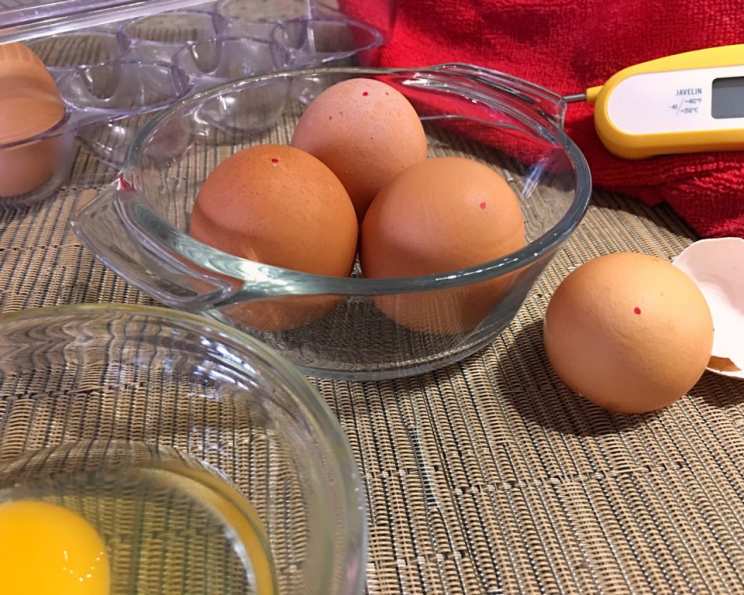
Mastering the Art of Pasteurizing Eggs at Home
I’ll never forget the first time I made homemade mayonnaise. I was so proud of the silky, tangy emulsion, a far cry from the jarred stuff. But then, a little voice of worry crept in – the raw eggs! I’d heard the warnings about salmonella, and suddenly my culinary triumph felt…risky. That’s when I discovered the magic of pasteurizing eggs at home. Now, I can whip up hollandaise, Caesar dressing, and ice cream bases with complete peace of mind, knowing I’ve taken that extra step for safety without sacrificing flavor.
Recipe Overview:
- Prep Time: 30 minutes
- Cook Time: 3 minutes
- Total Time: 43 minutes
- Servings: 4
- Yield: 4 pasteurized eggs
- Dietary Type: Vegetarian
Ingredients:
- 4 eggs
- 4 cups water
Equipment Needed:
- Medium saucepan
- Thermometer (preferably digital for accuracy)
- Ice bath (bowl filled with ice and water)
- Slotted spoon
- Marker
Instructions:
-
Begin by taking the eggs out of the refrigerator. Allow them to sit on the counter for 30 minutes. This crucial step helps them reach a more even temperature, which is essential for consistent pasteurization.
-
In a medium saucepan, gently place the eggs and cover them with cold water, ensuring the water level is about 2 inches above the eggs.
-
Insert a thermometer into the saucepan. Make sure the tip of the thermometer isn’t touching the bottom of the pan; this can give you an inaccurate reading. A digital thermometer is highly recommended for precise temperature control.
-
Turn the heat to medium. Closely monitor the water temperature. The goal is to reach a specific temperature range, not a full boil. When the water reaches 130-132°F, immediately turn the heat down to low.
-
Continue to watch the thermometer like a hawk! When the water reaches precisely 140°F, it’s time to start the pasteurization process. Cook the eggs at this temperature for exactly 3 minutes. If you’re using jumbo or extra-large eggs, extend the cooking time to 4 minutes to ensure thorough pasteurization.
-
Temperature fluctuations are common, so be vigilant. If the water temperature creeps beyond 140°F, carefully add a small splash of cold water to bring it back down. Maintaining a consistent temperature is paramount for effective pasteurization.
-
Once the cooking time is up, promptly remove the saucepan from the heat. Using a slotted spoon, carefully transfer the eggs to the prepared ice bath.
-
Allow the eggs to remain in the ice bath for 10 minutes. This rapid cooling stops the cooking process and prevents the eggs from becoming hard-boiled.
-
After the ice bath, gently dry the eggs with a clean towel. Before placing them back in the refrigerator, use a marker to mark each egg with a “P” or some other indicator. This will help you easily identify the pasteurized eggs and avoid any confusion later on.
-
Store the pasteurized eggs in the refrigerator. They will be good for up to 1 week.
Expert Tips & Tricks:
- Temperature is King: The most critical aspect of pasteurizing eggs at home is maintaining the correct temperature. Too low, and you won’t eliminate the risk of salmonella. Too high, and you’ll end up with partially cooked eggs. A reliable thermometer is your best friend here.
- The Float Test: Before you even start, do the float test to check the freshness of your eggs. Place the eggs in a bowl of water. If they sink and lay flat, they are fresh. If they sink but stand on one end, they are still good but should be used soon. If they float, they are no longer fresh and should be discarded.
- Water Level Matters: Make sure the eggs are fully submerged in water throughout the entire process. If necessary, add more water to maintain the correct level.
- Gentle Handling: Be careful when handling the eggs, especially when transferring them to and from the ice bath. Cracking the shell compromises the pasteurization process.
- Pre-Planning is Key: Have your ice bath ready and waiting before you start cooking the eggs. This ensures a quick and efficient cooling process.
Serving & Storage Suggestions:
Pasteurized eggs can be used in any recipe that calls for raw or lightly cooked eggs, such as:
- Homemade mayonnaise
- Hollandaise sauce
- Caesar salad dressing
- Eggnog
- Ice cream and custard bases
- Mousse
- Tiramisu
Because they’ve been pasteurized, you don’t have to worry as much about potential risks when enjoying these delicious treats.
Store pasteurized eggs in their original carton in the refrigerator for up to 1 week. Do not leave pasteurized eggs at room temperature for more than 2 hours.
Nutritional Information:
| Nutrient | Amount per Egg | % Daily Value* |
|---|---|---|
| Calories | 70 | 3% |
| Total Fat | 5g | 6% |
| Saturated Fat | 2g | 10% |
| Cholesterol | 185mg | 62% |
| Sodium | 70mg | 3% |
| Total Carbohydrate | 1g | 0% |
| Dietary Fiber | 0g | 0% |
| Sugars | 0g | 0% |
| Protein | 6g | 12% |
*Percent Daily Values are based on a 2,000 calorie diet. Your daily values may be higher or lower depending on your calorie needs.
Variations & Substitutions:
- Duck Eggs: While this recipe is designed for chicken eggs, the same principle can be applied to duck eggs. Duck eggs are larger and richer, so you may need to adjust the cooking time slightly, adding an extra minute or two to the 4-minute cooking time for extra-large eggs.
- Organic vs. Conventional: You can use either organic or conventional eggs for pasteurization. Choose the type you prefer based on your budget and dietary preferences.
- Brown vs. White Eggs: The color of the eggshell does not affect the pasteurization process. Both brown and white eggs can be pasteurized using this method.
FAQs (Frequently Asked Questions):
Q: Why is it important to pasteurize eggs?
A: Pasteurizing eggs significantly reduces the risk of salmonella, a bacteria that can cause foodborne illness. It’s especially important when using raw or lightly cooked eggs in recipes.
Q: Will pasteurizing eggs change their flavor or texture?
A: When done correctly, pasteurizing eggs using this method should not noticeably alter their flavor or texture. The low temperature and short cooking time minimize any changes.
Q: How can I be sure the eggs are properly pasteurized?
A: The key is precise temperature control. Use a reliable thermometer and carefully monitor the water temperature throughout the process. If you follow the instructions accurately, the eggs will be effectively pasteurized.
Q: Can I pasteurize a large batch of eggs at once?
A: You can pasteurize more than 4 eggs at a time, but make sure the saucepan is large enough to accommodate them without overcrowding. Ensure the eggs are fully submerged in water and maintain consistent temperature. You may need to slightly increase the cooking time if you are pasteurizing a very large batch.
Q: What if I accidentally overheat the eggs during pasteurization?
A: If the water temperature exceeds 140°F for too long, the eggs may start to cook. If this happens, they are still safe to eat, but they may not be suitable for recipes that require raw eggs.
Final Thoughts:
Pasteurizing eggs at home might seem like a small step, but it makes a huge difference in your peace of mind, especially when preparing dishes for loved ones. With this simple method, you can confidently create delicious and safe culinary masterpieces. Don’t hesitate to experiment with classic recipes that call for raw eggs – now you can enjoy them without any worry. Try it out, and let me know how it goes! Share your favorite recipes using pasteurized eggs, and let’s inspire each other in the kitchen.