
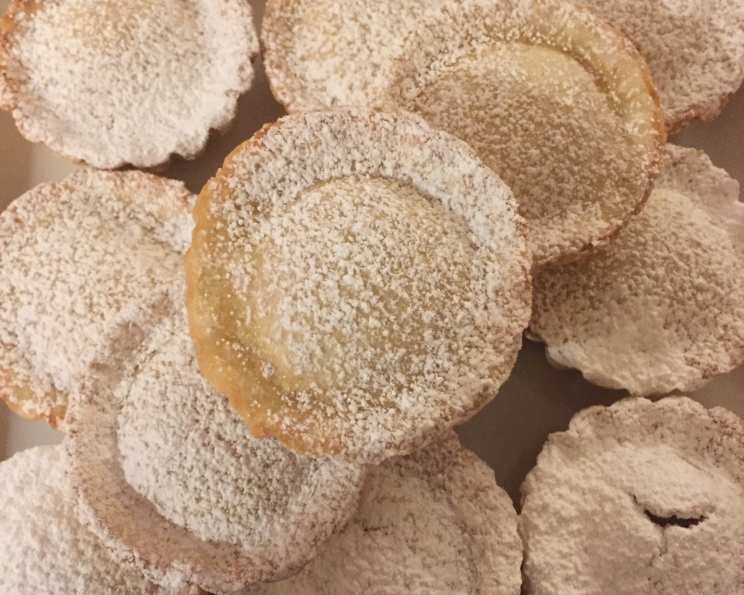
Pasticiotti: A Taste of Southern Italian Sunshine
The scent of almond extract always transports me back to my Nonna’s sun-drenched kitchen in Calabria. Every summer, she would spend hours crafting dozens of these little golden tarts, her hands moving with practiced ease. The slightly sweet, crumbly crust and creamy custard filling were the perfect afternoon treat, enjoyed with a strong espresso while the cicadas buzzed in the olive trees outside. These Pasticiotti, or Pasta Ciotti as some call them, are more than just pastries; they’re edible memories of warmth, family, and the simple pleasures of life.
Recipe Overview
- Prep Time: 45 minutes
- Cook Time: 12-15 minutes
- Total Time: 1 hour 15 minutes
- Yield: 1 Dozen (3-inch) tarts, or 2 1/2 Dozen miniature tarts
- Dietary Type: Not Gluten-Free
Ingredients
For the Dough:
- 2 cups unbleached all-purpose flour
- 1/2 cup granulated sugar
- 3/4 teaspoon baking powder
- 1/8 teaspoon salt
- 1/2 cup vegetable shortening
- 1/4 cup milk
- 3/4 teaspoon vanilla extract
- 1 large egg, well beaten
For the Filling:
- 3 tablespoons cornstarch
- 2/3 cup granulated sugar
- 1 1/2 cups milk
- 1 1/2 tablespoons unsalted butter
- 1 large egg yolk, slightly beaten
- 1 teaspoon almond extract
For the Egg Wash:
- 1 egg beaten with 2 tablespoons milk
Equipment Needed
- Large bowl
- Pastry blender
- Plastic wrap
- Medium saucepan
- Whisk
- Wooden spoon
- Floured surface
- Rolling pin
- 3-inch fluted biscuit cutter (or smaller for mini tarts)
- 3 x 1 1/4-inch tart pans (or smaller for mini tarts)
- Cookie sheet
- Pastry brush
- Cooling rack
Instructions
-
In a large bowl, sift together the flour, sugar, baking powder, and salt. This ensures a light and airy dough.
-
Using a pastry blender, cut in the vegetable shortening until the mixture resembles coarse cornmeal. The smaller the pieces of shortening, the more tender your crust will be.
-
Add the milk, vanilla extract, and well-beaten egg to the bowl. Use your hands to mix the ingredients until a smooth ball of dough forms. Avoid overmixing, as this can lead to a tough crust.
-
Wrap the dough in plastic wrap and set aside to rest. This allows the gluten to relax, making the dough easier to roll out.
-
While the dough rests, prepare the filling. In a medium saucepan, whisk together the cornstarch and sugar, ensuring there are no lumps. This is crucial for a smooth, creamy custard.
-
Gradually whisk in the milk. This helps to prevent lumps from forming as you cook the custard.
-
Add the butter to the saucepan. Place the saucepan over medium heat and cook, stirring constantly with a wooden spoon, until the mixture thickens into a custard consistency. This may take several minutes, so be patient and keep stirring to prevent scorching.
-
Remove the saucepan from the heat and stir in the egg yolk and almond extract. The egg yolk enriches the custard, while the almond extract adds a distinctive Italian flavor. Set the custard aside to cool slightly.
-
Divide the dough in half. This makes it easier to work with.
-
On a lightly floured surface, roll out one piece of dough into an 11-inch circle, about 1/4-inch thick. Try to keep the circle as even as possible for consistent baking.
-
Using a 3-inch fluted biscuit cutter, cut out circles of dough. Gently press each circle into the bottom and up the sides of the 3 x 1 1/4-inch tart pans. If making miniature tarts, use a smaller cutter and smaller tart pans.
-
Reroll the scraps of dough and cut out additional circles until you have 12 tart shells (or more if making mini tarts).
-
Place the tart pans on a cookie sheet. This makes it easier to transfer them to and from the oven.
-
Spoon about 2 tablespoons of the filling into each tart shell. Be careful not to overfill, as the filling may expand during baking.
-
Roll out the second piece of dough and cut out 3-inch circles (or smaller for mini tarts). Place a circle over each tart and pinch the edges closed, sealing the filling inside.
-
With a pastry brush, paint the top of each tart with the egg wash. This will give them a beautiful golden-brown color.
-
Refrigerate the tarts for 30 minutes. This helps the dough to firm up, preventing it from shrinking during baking.
-
Preheat the oven to 425 degrees F (220 degrees C).
-
Bake the tarts on the middle oven rack for 12 to 15 minutes, or until the tops are golden brown. If making miniature tarts, bake for only 8 to 10 minutes.
-
Remove the tarts from the oven and place them on a wire rack to cool completely.
-
Carefully remove the tarts from the pans. Store in an airtight container in the refrigerator.
Expert Tips & Tricks
- For a richer flavor, try using browned butter in the filling. Simply melt the butter in the saucepan and cook until it turns a nutty brown color before adding the milk.
- If the dough becomes too sticky while rolling, dust it with a little extra flour.
- To prevent the crust from puffing up during baking, prick the bottom of the tart shells with a fork before adding the filling.
- For a smoother custard, strain it through a fine-mesh sieve after cooking.
- To easily remove the tarts from the pans, run a thin knife around the edges before inverting them.
Serving & Storage Suggestions
Pasticiotti are best served at room temperature or slightly chilled. They make a wonderful dessert or afternoon treat, perfect with a cup of coffee or tea. You can store them in an airtight container in the refrigerator for up to 3 days. They are not recommended for freezing as the crust may become soggy upon thawing.
Nutritional Information
| Nutrient | Amount per Serving | % Daily Value |
|---|---|---|
| Calories | 282.2 kcal | N/A |
| Calories from Fat | 110 g | 39% |
| Total Fat | 12.3 g | 18% |
| Saturated Fat | 4.5 g | 22% |
| Cholesterol | 39.7 mg | 13% |
| Sodium | 72 mg | 2% |
| Total Carbohydrate | 39 g | 13% |
| Dietary Fiber | 0.6 g | 2% |
| Sugars | 19.6 g | 78% |
| Protein | 4.1 g | 8% |
Variations & Substitutions
- Chocolate Pasticiotti: Add 2 tablespoons of cocoa powder to the filling mixture along with the cornstarch and sugar.
- Ricotta Filling: Substitute the custard filling with a mixture of ricotta cheese, sugar, and a touch of lemon zest.
- Gluten-Free: Use a gluten-free flour blend to make the dough. You may need to adjust the amount of liquid depending on the blend you use.
- Lemon Pasticiotti: Add lemon zest to both the dough and the filling for a refreshing citrus flavor.
FAQs (Frequently Asked Questions)
Q: Can I use a different type of shortening?
A: Yes, you can substitute the vegetable shortening with butter or lard for a different flavor and texture.
Q: What if my custard is too thin?
A: If the custard doesn’t thicken enough, return the saucepan to the heat and cook for a few more minutes, stirring constantly.
Q: Can I make the dough ahead of time?
A: Yes, the dough can be made ahead of time and stored in the refrigerator for up to 2 days.
Q: Why are my tarts cracking?
A: Cracking can occur if the oven temperature is too high or if the dough is too dry. Make sure your oven is properly calibrated and add a little extra milk to the dough if it seems dry.
Q: How do I prevent the tart shells from browning too quickly?
A: If the tart shells are browning too quickly, you can loosely tent them with aluminum foil during the last few minutes of baking.
Final Thoughts
Now it’s your turn to create your own memories with these delightful Pasticiotti. Don’t be intimidated by the steps; the process is simpler than it seems, and the result is well worth the effort. Whether you stick to the classic vanilla almond filling or experiment with variations, I encourage you to embrace the spirit of Italian baking: with passion, patience, and a little love. Share your creations with family and friends, and let the aroma of these little tarts fill your home with warmth and joy. Buon appetito!