
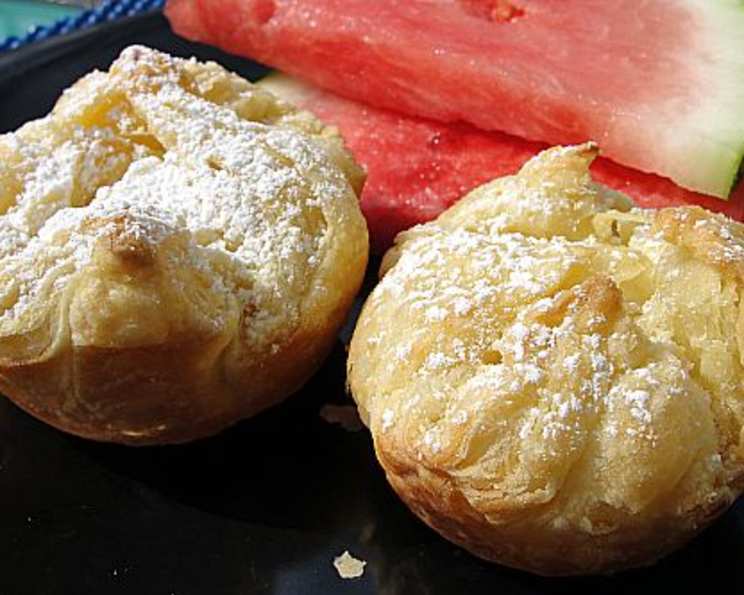
Pastry Puffs with Sweet Cheese Filling
I can almost smell the powdered sugar dusting my grandmother’s kitchen table as I think of these little puffs. She always made them for our family get-togethers, especially around the holidays. The buttery, flaky pastry, cradling that creamy, cheesecake-like filling, was always the first thing to disappear from the dessert platter. They’re a nostalgic bite of comfort and sweetness that I’ve cherished ever since. The best part? They are deceptively easy to make, perfect for impressing guests or simply treating yourself to a delightful homemade pastry.
Recipe Overview
- Prep Time: 45 minutes
- Cook Time: 20-25 minutes
- Total Time: 1 hour 5 minutes (plus 6-8 hours chilling)
- Yields: 3 1/2 dozen
- Dietary Type: Not specified
Ingredients
For the Pastry:
- 2 cups flour
- 1 cup butter, cold and cut into cubes
- 1/2 cup sour cream
- 1 egg yolk
- Powdered sugar, for dusting
For the Cheese Filling:
- 1 (8 ounce) package cream cheese, softened
- 1 egg
- 1/2 cup sugar
- 1 teaspoon vanilla extract
- 1 teaspoon lemon juice or 1 teaspoon grated lemon rind
Equipment Needed
- Food processor
- Plastic wrap
- Rolling pin
- Lightly floured surface
- 3-inch square cookie cutter or knife
- 1 3/4-inch muffin pan
- Mixing bowl
- Electric mixer
- Wire rack
Instructions
-
Prepare the Pastry: Place the flour and cold, cubed butter into the bowl of a food processor fitted with the blade attachment. Pulse the mixture 4 to 5 times, or until it resembles coarse crumbs. It’s important not to over-process, as you want to maintain those little butter pockets for a flaky crust.
-
Add Wet Ingredients: Add the sour cream and egg yolk to the food processor.
-
Form the Dough: Process the mixture until a ball of dough forms and pulls away from the sides of the bowl. Again, be careful not to over-process.
-
Chill the Dough: Divide the dough in half, wrap each half tightly in plastic wrap, and chill in the refrigerator for at least 6 to 8 hours. This chilling time is crucial for relaxing the gluten and allowing the butter to firm up, resulting in a tender and flaky pastry.
-
Roll Out the Dough: Once chilled, remove one portion of the dough from the refrigerator and place it on a lightly floured surface. Roll the dough out to an approximately 1/8-inch thickness.
-
Cut into Squares: Use a 3-inch square cookie cutter or a knife to cut the rolled-out pastry into squares.
-
Prepare the Muffin Pan: Gently press each pastry square into a 1 3/4-inch muffin pan, leaving the corners of the square extending beyond the edge of the pan. This will create the puff shape.
-
Make the Filling: In a mixing bowl, combine the softened cream cheese, egg, sugar, vanilla extract, and lemon juice (or lemon rind).
-
Mix the Filling: Beat all ingredients together at medium speed until smooth and fluffy. Ensure there are no lumps of cream cheese remaining.
-
Fill the Pastries: Spoon 1 teaspoon of the cheese filling into each prepared pastry shell in the muffin pan.
-
Fold and Pinch: Fold the corners of each pastry square over the filling and pinch them together at the top to secure the filling.
-
Chill Again: Chill the filled pastry puffs in the refrigerator for 30 minutes. This helps the pastries maintain their shape during baking.
-
Bake the Puffs: Preheat your oven to 375°F (190°C).
-
Bake: Bake the pastry puffs in the preheated oven for 20 to 25 minutes, or until they are golden brown. Keep a close eye on them, as baking times can vary depending on your oven.
-
Cool and Dust: Remove the baked pastry puffs from the muffin pan and place them on a wire rack to cool completely. Once cooled, sprinkle generously with powdered sugar.
Expert Tips & Tricks
- Keep Ingredients Cold: Cold butter is key to achieving a flaky pastry. Make sure your butter is well-chilled before starting. If you notice the dough getting too warm while working with it, return it to the refrigerator for a few minutes.
- Don’t Overmix: Overmixing the dough develops the gluten, resulting in a tough pastry. Process the dough just until it comes together.
- Even Baking: For even baking, rotate the muffin tin halfway through the baking time.
- Lemon Zest: If using lemon zest, make sure it is finely grated to avoid a bitter taste.
- Make-Ahead Tip: The filling can be made a day in advance and stored in the refrigerator. The pastry dough can also be made ahead of time, tightly wrapped, and frozen for up to a month. Thaw in the refrigerator overnight before using.
Serving & Storage Suggestions
These pastry puffs are best served at room temperature, allowing the filling to soften slightly and enhance the flavors. They make a beautiful addition to any brunch spread, dessert table, or afternoon tea.
- Storage: Store leftover pastry puffs in an airtight container at room temperature for up to 2 days, or in the refrigerator for up to 4 days.
- Freezing: For longer storage, freeze the baked pastry puffs in a single layer on a baking sheet until solid, then transfer them to a freezer-safe bag or container. They can be frozen for up to 2 months. Thaw at room temperature before serving.
- Reheating: If desired, you can reheat the pastry puffs in a preheated oven at 350°F (175°C) for a few minutes to warm them through. Be careful not to overheat, or the filling may become runny.
Nutritional Information
Please note that this is an estimate and can vary based on specific ingredient brands and portion sizes.
| Nutrient | Amount per Serving | % Daily Value |
|---|---|---|
| Calories | 220 kcal | 11% |
| Total Fat | 15g | 23% |
| Saturated Fat | 9g | 45% |
| Cholesterol | 50mg | 17% |
| Sodium | 80mg | 3% |
| Total Carbohydrate | 18g | 6% |
| Dietary Fiber | 0.5g | 2% |
| Sugars | 9g | – |
| Protein | 3g | 6% |
Variations & Substitutions
- Gluten-Free: Use a gluten-free all-purpose flour blend for the pastry, but be sure to add a binder like xanthan gum to help with the structure.
- Different Flavors: Experiment with different extracts in the filling, such as almond extract or orange extract, for a unique twist.
- Fruit Filling: Add a small dollop of your favorite fruit preserves or fresh berries to the cheese filling for a fruity variation.
- Savory Option: Omit the sugar from the cheese filling and add herbs such as dill or chives for a savory pastry puff.
FAQs (Frequently Asked Questions)
Q: Why is my pastry dough tough?
A: Overmixing the dough develops the gluten, resulting in a tough pastry. Be careful not to over-process the dough in the food processor.
Q: Can I use store-bought pastry dough?
A: Yes, you can use store-bought puff pastry dough as a shortcut, but the homemade pastry dough will have a superior flavor and texture.
Q: What if I don’t have a food processor?
A: You can cut the butter into the flour using a pastry blender or your fingertips until the mixture resembles coarse crumbs.
Q: How can I prevent the filling from leaking out during baking?
A: Make sure to pinch the corners of the pastry squares tightly together to seal the filling. Chilling the filled pastries before baking also helps.
Q: Can I make these ahead of time and freeze them?
A: Yes, you can freeze the baked pastry puffs for up to 2 months. Thaw at room temperature before serving.
Final Thoughts
I truly hope you give these Pastry Puffs with Sweet Cheese Filling a try. They’re a delightful treat that’s sure to bring a smile to anyone’s face. Whether you’re baking for a special occasion or simply craving a sweet homemade pastry, these puffs are a wonderful choice. Feel free to experiment with different variations and fillings to create your own signature version. And please, don’t forget to share your creations and feedback! Pair these puffs with a cup of hot coffee or a glass of chilled sparkling wine for the perfect indulgence. Happy baking!