
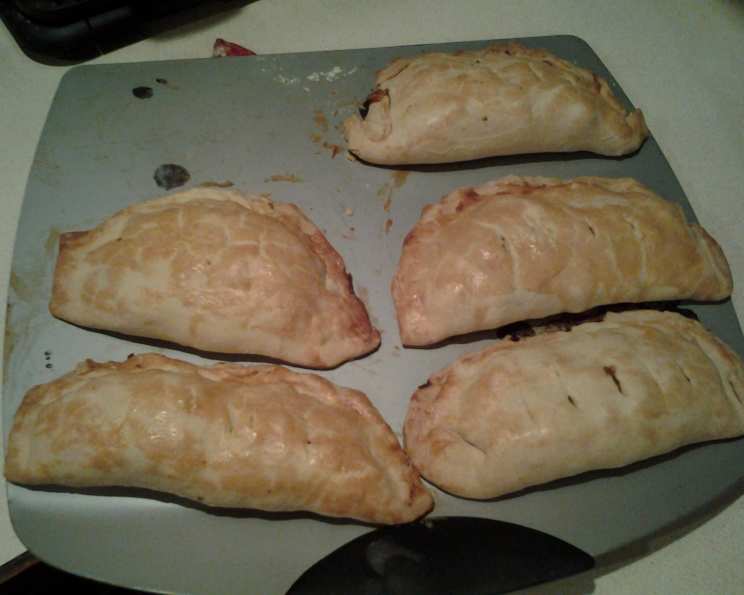
Pasty Perfection: Crafting the Ideal Crust for Cornish Miners’ Pasties
The scent of a freshly baked pasty, emerging from the oven, transports me back to my childhood. My grandmother, a woman with flour perpetually dusted on her apron, would spend hours crafting these savory hand pies. I remember being fascinated by the crimped edges, each one a testament to her patience and love. The anticipation as the aroma filled the kitchen, promising a hearty and satisfying meal, is a memory I cherish, and this recipe, very similar to hers, is my way of keeping that tradition alive.
Recipe Overview
- Prep Time: 10 minutes
- Cook Time: Varies by filling
- Total Time: 10 minutes (plus chilling time)
- Servings: 6-8
- Yields: 6-8 pasties
- Dietary Type: Vegetarian (can be vegan with shortening)
Ingredients
- 3 cups flour
- 1 1/2 teaspoons salt
- 3/4 teaspoon baking powder
- 1 cup shortening or 1 cup lard (Lard is traditionally preferred for the most authentic flavor and texture. Shortening will work as a substitute for a vegetarian or vegan option.)
- 3/4 cup ice water (The colder, the better!)
Equipment Needed
- Mixing Bowl
- Pastry Blender or Food Processor
- Fork
- Plastic Wrap
- Rolling Pin
- Baking Sheet
Instructions
- In a large mixing bowl, combine the flour, salt, and baking powder. Whisk to ensure the ingredients are evenly distributed.
- Cut the shortening or lard into the dry ingredients using a pastry blender or a food processor. Pulse until the mixture resembles coarse crumbs. The goal is to have small pieces of fat evenly dispersed throughout the flour, which will create flaky layers when baked.
- Gradually add the ice water, a little at a time, tossing the mixture with a fork to form a dough. The amount of water needed may vary depending on the humidity and the flour.
- If the dough seems dry and doesn’t hold together when squeezed lightly, add a bit more water, a tablespoon at a time, until it comes together. Be careful not to overwork the dough.
- Gather the dough into a ball and press it firmly to consolidate.
- Wrap the dough tightly with plastic wrap and chill in the refrigerator while you prepare the pasty filling ingredients (refer to a separate pasty filling recipe for instructions). Chilling the dough allows the gluten to relax, which will result in a more tender and flaky crust. Ideally, chill for at least 30 minutes, but longer is fine too.
- Once your pasty filling is ready, remove the dough from the refrigerator. On a lightly floured surface (or on top of a piece of plastic wrap which can easily be folded over), roll out the dough to about 1/8 inch thickness. You can also roll the dough out between two sheets of plastic wrap for easy handling and cleanup.
- Cut out circles of dough large enough to accommodate your filling. A 6-8 inch diameter circle is typical for a standard pasty.
- Place a portion of the prepared filling in the center of each dough circle, leaving about an inch of space around the edges.
- Brush the edges of the dough with a small amount of water. This will help the dough seal properly.
- Fold the dough over the filling to create a half-moon shape. Crimp the edges VERY firmly with a fork to seal. For extra security against leaks, fold the crimped edge over itself and crimp again. The crimping is not just decorative; it’s essential to prevent the filling from escaping during baking.
- Place the assembled pasties on a baking sheet lined with parchment paper.
- Brush the tops of the finished pasties with milk to enhance the crust and help it bake to a beautiful golden brown. You can also use an egg wash for a richer color.
- Bake in a preheated oven, following the specific temperature and baking time instructions for your chosen pasty filling recipe. This will usually be around 375-400°F (190-200°C) for 45-60 minutes, or until the crust is golden brown and the filling is cooked through.
Handle with Care! Like pastry dough, pasty dough should be handled as LITTLE as possible to ensure flakiness.
Expert Tips & Tricks
- Keep everything cold: The key to a flaky crust is keeping the ingredients cold. Use ice water, and make sure your shortening or lard is well-chilled before using it. You can even chill the flour and mixing bowl.
- Don’t overmix: Overmixing develops the gluten in the flour, resulting in a tough crust. Mix just until the dough comes together.
- Rest the dough: Chilling the dough is crucial. It allows the gluten to relax, making the dough easier to roll and preventing it from shrinking during baking.
- Dock the crust: If you’re using this dough for a quiche or pie, prick the bottom of the crust with a fork (docking) before baking to prevent it from puffing up. You can also blind bake the crust by lining it with parchment paper, filling it with pie weights or dried beans, and baking it for about 15 minutes before adding the filling.
- Make ahead: The dough can be made ahead of time and stored in the refrigerator for up to 3 days or in the freezer for up to 3 months. Thaw completely in the refrigerator before using.
- Consider adding a touch of sugar to the pastry dough for a slightly sweeter crust, especially if your pasties contain fruit. Start with 1-2 tablespoons of granulated sugar.
Serving & Storage Suggestions
Serve your Cornish miners’ pasties warm, straight from the oven. They are a complete meal in themselves, but a simple side salad can complement the richness of the filling.
Leftover pasties can be stored in the refrigerator for up to 3 days. To reheat, bake in a preheated oven at 350°F (175°C) until warmed through, or microwave for a quick reheat (although the crust may soften).
For longer storage, pasties can be frozen for up to 3 months. Wrap them tightly in plastic wrap and then in foil, or place them in a freezer-safe container. Thaw completely in the refrigerator before reheating.
Nutritional Information
Note: Nutritional information is an estimate and will vary based on specific ingredients and portion sizes.
| Nutrient | Amount per Serving | % Daily Value |
|---|---|---|
| Calories | 529.8 kcal | N/A |
| Calories from Fat | 313 kcal | 59% |
| Total Fat | 34.8 g | 53% |
| Saturated Fat | 8.6 g | 43% |
| Cholesterol | 0 mg | 0% |
| Sodium | 628.9 mg | 26% |
| Total Carbohydrate | 47.8 g | 15% |
| Dietary Fiber | 1.7 g | 6% |
| Sugars | 0.2 g | 0% |
| Protein | 6.5 g | 12% |
Variations & Substitutions
- Gluten-Free: Substitute the all-purpose flour with a gluten-free blend. Be sure to add a binder like xanthan gum to help hold the dough together.
- Vegan: Use vegetable shortening or a vegan butter alternative instead of lard. Ensure any milk used for brushing is plant-based (almond, soy, or oat milk work well).
- Different Flours: Try using a portion of whole wheat flour for a nuttier flavor and added fiber.
- Savory Herbs: Incorporate dried herbs like thyme, rosemary, or sage into the dough for extra flavor. Add about 1-2 teaspoons of dried herbs to the dry ingredients.
FAQs (Frequently Asked Questions)
Q: Why is it important to use ice water in this recipe?
A: Ice water helps to keep the fat cold, which prevents the gluten from developing too much and results in a more tender and flaky crust.
Q: Can I use a food processor instead of a pastry blender?
A: Yes, a food processor can be used. Pulse the ingredients until the mixture resembles coarse crumbs. Be careful not to over-process.
Q: How can I prevent the filling from leaking out during baking?
A: Ensure the edges are brushed with water and crimped very firmly with a fork. You can also fold the crimped edge over itself and crimp again for extra security.
Q: Can I freeze the dough?
A: Yes, the dough can be frozen for up to 3 months. Wrap it tightly in plastic wrap and thaw it completely in the refrigerator before using.
Q: What temperature should my oven be for baking pasties?
A: The ideal baking temperature is generally between 375-400°F (190-200°C), but always follow the specific temperature instructions in your pasty filling recipe. The baking time will depend on the filling ingredients and how quickly they cook.
Final Thoughts
Making pasty dough might seem intimidating at first, but with a little practice and attention to detail, you’ll be crafting delicious, flaky crusts in no time. This recipe is a tribute to tradition, and I encourage you to embrace the process and create your own cherished memories around this classic dish. Don’t hesitate to experiment with different fillings and variations to make it your own. Share your creations with loved ones, and let the warmth of a homemade pasty bring people together.