
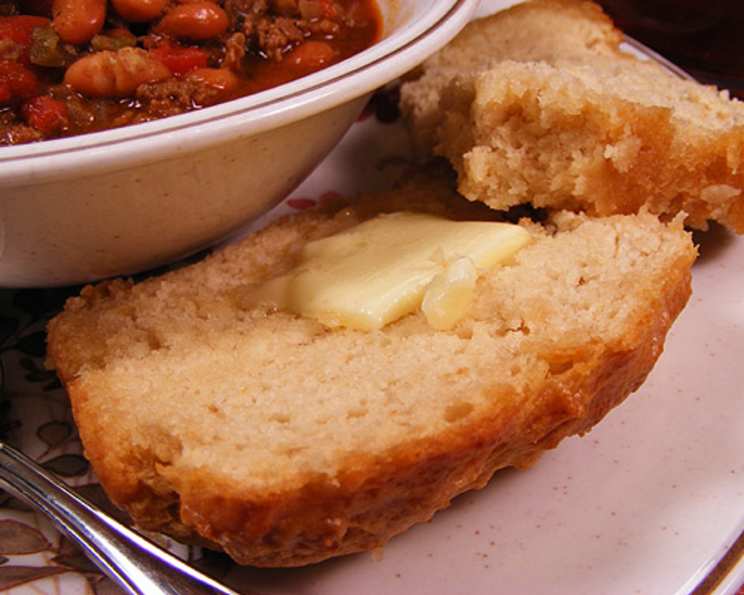
Pat’s Beer Bread: A Coastal Comfort
The scent of beer bread baking always transports me back to summer evenings on the Delaware coast. Crabs, steamed to bright red perfection and piled high on newspaper-covered tables, were the centerpiece of countless family gatherings. But it wasn’t just the succulent crab meat that I looked forward to. It was my mother-in-law, Pat’s, famous beer bread, a rustic, golden loaf that perfectly complemented the briny sweetness of the seafood. Each bite was a taste of home, a reminder of laughter, family, and the simple joys of coastal living.
Recipe Overview
- Prep Time: 10 minutes
- Cook Time: 45-55 minutes
- Total Time: 55-65 minutes
- Servings: 6
- Yield: 1 loaf
- Dietary Type: Vegetarian (easily adaptable to Dairy-Free)
Ingredients
- 3 cups self-rising flour
- 3 tablespoons sugar
- 1 (12 ounce) can beer (such as Miller Lite)
- 1/2 cup butter (more or less depending on your taste), or 1/2 cup Earth Balance whipped spread (more or less depending on your taste) for a dairy-free option
Equipment Needed
- Loaf pan (Pyrex recommended)
- Mixing bowl
- Measuring cups and spoons
- Oven
Instructions
-
Preheat your oven to 350 degrees F (175 degrees C). Make sure your oven rack is positioned in the center for even baking.
-
In a large mixing bowl, combine the self-rising flour, and sugar. Whisk or stir with a fork until well combined. This ensures that the sugar is evenly distributed throughout the flour, preventing clumps and promoting a consistent flavor in every slice.
-
Pour the beer into the bowl with the dry ingredients. Gently stir until just combined. Be careful not to overmix the batter. Overmixing can develop the gluten in the flour, resulting in a tougher, less tender bread. A few lumps are perfectly fine!
-
Grease a loaf pan thoroughly with cooking spray or butter. A Pyrex glass loaf pan is recommended for even heat distribution and easy release, but any loaf pan will work.
-
Pour the batter into the prepared loaf pan. Spread it evenly to ensure uniform baking.
-
Bake in the preheated oven for 45-55 minutes, or until the top is golden brown and crusty. To check for doneness, insert a toothpick into the center of the loaf. If it comes out clean or with just a few moist crumbs, the bread is done. If the toothpick comes out with wet batter, continue baking for a few more minutes and check again. Keep a close eye on the loaf during the last 15 minutes of baking to prevent over-browning. You can tent it loosely with foil if it starts to get too dark.
-
While the bread is baking, melt the butter in a small saucepan or in the microwave. If using Earth Balance, melt it similarly. Be sure not to overheat the butter, as it can splatter.
-
Once the bread is finished baking, remove it from the oven. Immediately and slowly pour the melted butter (or melted Earth Balance) all over the top of the loaf. The butter will soak into the bread, adding richness and flavor.
-
Let the bread sit in the loaf pan for 10-15 minutes before slicing and serving. This allows the bread to cool slightly and makes it easier to slice.
-
Serve warm and enjoy!
Expert Tips & Tricks
- For a richer flavor, use a darker beer like a stout or porter. The malty notes will add depth to the bread.
- If you don’t have self-rising flour, you can make your own by combining 1 cup all-purpose flour with 1 1/2 teaspoons baking powder and 1/4 teaspoon salt. Multiply as needed.
- To prevent the bottom of the bread from getting too dark, place a baking sheet on the rack below the loaf pan.
- If you want a sweeter bread, increase the amount of sugar to 1/4 cup.
- Add herbs like rosemary, thyme, or garlic powder to the batter for a savory twist. A tablespoon or two of finely chopped fresh herbs works well.
- If the top of the bread is browning too quickly, tent it with foil during the last 15-20 minutes of baking.
- For a crispier crust, remove the bread from the loaf pan during the last 5-10 minutes of baking and place it directly on the oven rack.
- For an extra buttery top, poke holes in the top of the warm bread with a skewer or toothpick before pouring over the melted butter.
Serving & Storage Suggestions
This beer bread is best served warm, straight from the oven. It’s delicious on its own, with butter or jam, or as a side to soups, stews, or salads. It’s especially perfect alongside a seafood feast!
Leftovers can be stored at room temperature in an airtight container for up to 2 days, or in the refrigerator for up to 5 days. To reheat, wrap the bread in foil and warm it in a 350°F (175°C) oven for 10-15 minutes, or until heated through. You can also microwave individual slices for a quick reheat.
For longer storage, the bread can be frozen for up to 2 months. Wrap it tightly in plastic wrap and then in foil before freezing. Thaw overnight in the refrigerator before reheating.
Nutritional Information
Note: Nutritional information is an estimate and may vary based on specific ingredients and portion sizes.
| Nutrient | Amount per Serving | % Daily Value |
|---|---|---|
| Calories | 407 kcal | 20% |
| Total Fat | 16g | 25% |
| Saturated Fat | 10g | 50% |
| Cholesterol | 41mg | 14% |
| Sodium | 905mg | 38% |
| Total Carbohydrate | 55g | 19% |
| Dietary Fiber | 2g | 7% |
| Sugars | 6g | 13% |
| Protein | 7g | 14% |
Variations & Substitutions
- Dairy-Free: Substitute the butter with Earth Balance whipped spread or another vegan butter alternative.
- Gluten-Free: While this recipe relies on self-rising flour, experimenting with a gluten-free self-rising flour blend might work. Be sure to adjust baking time and temperature accordingly.
- Sweet & Savory: Add a tablespoon of honey or maple syrup along with a teaspoon of dried rosemary for a sweet and savory bread.
- Cheesy: Incorporate 1 cup of shredded cheddar cheese into the batter for a cheesy beer bread.
- Spicy: Add a pinch of cayenne pepper or a finely chopped jalapeño pepper to the batter for a spicy kick.
- Herbaceous: Add 2 tablespoons of your favorite chopped fresh herbs, such as rosemary, thyme, or chives, for a flavorful twist.
FAQs (Frequently Asked Questions)
Q: Can I use a different type of beer?
A: Absolutely! While a light beer like Miller Lite is used in the original recipe, you can experiment with different types of beer to achieve different flavor profiles. Darker beers like stouts or porters will add a richer, more malty flavor, while IPAs will impart a hoppy bitterness.
Q: My bread is browning too quickly. What should I do?
A: If the top of the bread is browning too quickly, tent it loosely with aluminum foil during the last 15-20 minutes of baking. This will help to prevent it from burning while still allowing the inside to cook through.
Q: Can I make this bread ahead of time?
A: Yes, you can bake the bread ahead of time and store it at room temperature or in the refrigerator. However, it’s best served warm, so be sure to reheat it before serving.
Q: What is self-rising flour?
A: Self-rising flour is all-purpose flour that has baking powder and salt already added to it. This makes it convenient for recipes that require leavening.
Q: Can I freeze the beer bread?
A: Yes, you can freeze the beer bread for up to 2 months. Wrap it tightly in plastic wrap and then in foil before freezing. Thaw overnight in the refrigerator before reheating.
Final Thoughts
Pat’s beer bread is more than just a recipe; it’s a taste of coastal tradition and family warmth. Its simplicity makes it accessible to any home cook, while its versatility allows for endless creative twists. Whether you’re serving it alongside a crab feast or enjoying a simple slice with butter, this beer bread is sure to become a family favorite. So gather your ingredients, preheat your oven, and get ready to experience the comforting aroma and delicious flavor of this classic recipe. And don’t forget to share your creations and variations – I’d love to hear how you make it your own!