
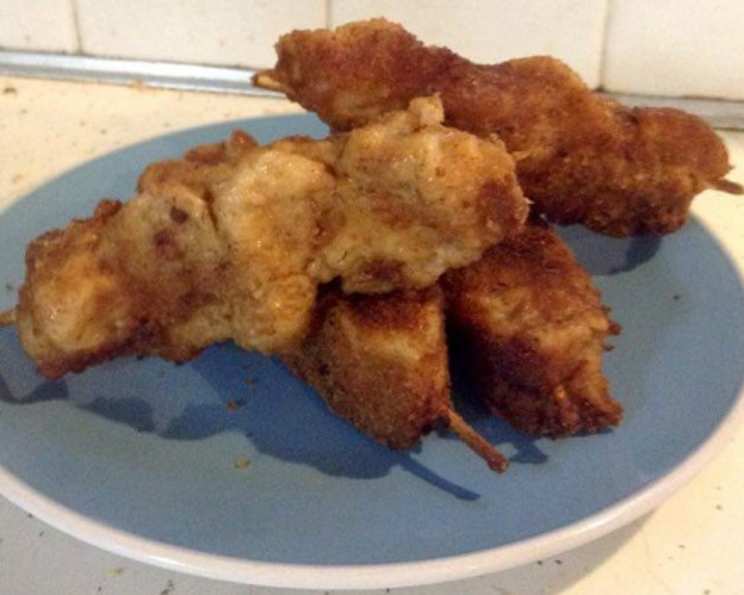
Patychky: Ukrainian Skewered Pork Perfection
The aroma still takes me back. As a child, the scent of garlic, frying pork, and baking celery always signaled a special occasion. My Baba would be in the kitchen, humming softly, meticulously threading marinated pork onto skewers. We knew then that a feast was coming, a celebration filled with laughter, stories, and the unforgettable taste of her Patychky. It wasn’t just food; it was a tradition woven into the very fabric of our family gatherings.
Recipe Overview
- Prep Time: 20 minutes (plus marinating time)
- Cook Time: 1 hour 30 minutes
- Total Time: 6 hours (including marinating)
- Servings: 24 skewers
- Yield: 24 Patychky
- Dietary Type: Not Gluten-Free, Not Dairy-Free
Ingredients
- 3-4 lbs pork shoulder, fat trimmed and cubed
- 8 garlic cloves, chopped
- 1 beer (lager or pilsner works well)
- 3 cups flour
- 4 eggs, beaten with a bit of water (for egg wash)
- 3 cups breadcrumbs
- 1 tablespoon paprika
- 2 teaspoons dried dill
- 1 teaspoon salt and pepper
- 1 cup oil (for frying)
- 1 bunch celery
- 24 wooden skewers
Equipment Needed
- Large storage bag or container
- Wooden skewers
- Cookie sheet
- 3 shallow dishes or pans (for flour, egg wash, and breadcrumbs)
- Large skillet
- Roaster or large baking pan
Instructions
- In a large storage bag or container, combine the cubed pork shoulder, chopped garlic, and beer. Ensure the meat is well coated.
- Remove as much air as possible from the bag or container, then seal tightly. Place in the refrigerator to marinate for at least 4 hours, but preferably overnight for maximum flavor. You can also freeze the pork at this stage and thaw it in the refrigerator the day before you plan to cook it.
- When ready to cook, drain the liquid from the marinated pork.
- Thread the cubed pork onto the wooden skewers, leaving about 1 inch of space at the bottom. Squeeze the meat tightly together on each skewer to ensure it stays compact during cooking. Place the prepared skewers on a cookie sheet. Continue until all the meat has been skewered.
- Prepare three separate stations for dredging. In the first station, place the flour. In the second, place the eggs beaten with a bit of water (egg wash). In the third, combine the breadcrumbs, paprika, dried dill, salt, and pepper.
- Preheat your oven to 350 degrees Fahrenheit (175 degrees Celsius).
- Wash the celery thoroughly. Place it rib-side down in a roaster or large baking pan. This creates a flavorful bed for the Patychky to bake on, preventing them from sticking and adding moisture.
- Pour about 2 inches of oil into a large skillet. Heat the oil over medium-high heat until it’s hot enough for frying (around 350°F or 175°C). You can test the oil by dropping a small piece of breadcrumb into it; if it sizzles and turns golden brown quickly, the oil is ready.
- Dredge each skewer in the flour, shaking off any excess. Then, dip it into the egg wash, ensuring it’s fully coated. Finally, coat the skewer in the breadcrumb mixture, squeezing the breadcrumbs tightly around the meat to create a good crust.
- Carefully place a few skewers at a time into the hot oil. Fry for 2 to 3 minutes on each side, or until golden brown and crispy. Add more oil to the skillet if needed during the frying process to maintain a consistent depth.
- Transfer the fried skewers to the bed of celery in your roaster or baking pan. If you don’t have enough room to arrange them in a single layer, you can carefully stack them on top of each other.
- Bake in the preheated oven for 60 to 90 minutes, or until the meat is no longer pink inside. Check for doneness by cutting into one of the larger pieces of pork. The internal temperature should reach 145°F (63°C).
Expert Tips & Tricks
- Marinating is Key: Don’t skimp on the marinating time. The longer the pork sits in the beer and garlic, the more flavorful and tender it will become.
- Breadcrumb Boost: For extra crispy breading, try using panko breadcrumbs instead of regular breadcrumbs.
- Celery Substitute: If you don’t have celery, you can use sliced onions or carrots as a bed for baking.
- Prevent Soggy Breading: Make sure the oil is hot enough before frying. If the oil isn’t hot enough, the breading will absorb too much oil and become soggy.
- Oven Temperature Fine-Tuning: If you notice the breading is browning too quickly during baking, you can lower the oven temperature slightly (to 325°F or 160°C) and continue baking for a longer time.
Serving & Storage Suggestions
Serve Patychky hot, straight from the oven. They are delicious on their own or with a side of mashed potatoes, sauerkraut, or a simple salad. For a traditional touch, serve them with a dollop of sour cream.
Leftover Patychky can be stored in the refrigerator for up to 3 days in an airtight container. To reheat, you can bake them in the oven at 350°F (175°C) for about 15-20 minutes, or until heated through. You can also reheat them in a skillet over medium heat, but be careful not to burn the breading. Freezing is not recommended as it can affect the texture of the breading.
Nutritional Information
| Nutrient | Amount per Serving | % Daily Value |
|---|---|---|
| Calories | 342 kcal | N/A |
| Calories from Fat | 189 kcal | N/A |
| Total Fat | 21g | 32% |
| Saturated Fat | 5.2g | 25% |
| Cholesterol | 71.3mg | 23% |
| Sodium | 164.4mg | 6% |
| Total Carbohydrate | 22.8g | 7% |
| Dietary Fiber | 1.5g | 5% |
| Sugars | 1.3g | N/A |
| Protein | 14.5g | 28% |
Note: Nutritional information is an estimate and may vary depending on specific ingredients and portion sizes.
Variations & Substitutions
- Gluten-Free Patychky: Use gluten-free flour and breadcrumbs for a gluten-free version.
- Spicy Patychky: Add a pinch of cayenne pepper to the breadcrumb mixture for a spicy kick.
- Chicken or Beef Patychky: Substitute chicken thighs or beef chuck for the pork shoulder. Adjust the cooking time accordingly. Chicken will require less baking time than pork or beef.
- Vegetarian “Patychky”: For a vegetarian option, try using halloumi cheese or firm tofu cut into cubes, marinated in a similar mixture of garlic and beer, then breaded and fried.
FAQs (Frequently Asked Questions)
Q: Can I use a different type of beer for the marinade?
A: Yes, you can use any beer you like, but lighter beers like lagers and pilsners tend to work best. Avoid dark, heavy beers, as they can overpower the flavor of the pork.
Q: Can I prepare the skewers ahead of time?
A: Yes, you can thread the pork onto the skewers and refrigerate them for up to 24 hours before cooking. Just make sure to keep them covered to prevent them from drying out.
Q: How do I prevent the breadcrumbs from falling off during frying?
A: Make sure to dredge the skewers thoroughly in the flour, egg wash, and breadcrumb mixture, pressing the breadcrumbs firmly onto the meat. Also, make sure the oil is hot enough before frying.
Q: Can I bake the Patychky without frying them first?
A: While frying adds to the texture and flavor, you can bake them without frying. However, the breading may not be as crispy. If baking without frying, spray the breaded skewers with cooking oil before baking.
Q: What’s the best way to keep the Patychky warm if I’m serving them at a party?
A: You can keep them warm in a low oven (200°F or 95°C) for up to an hour. Alternatively, you can use a chafing dish or warming tray.
Final Thoughts
So, go ahead, try your hand at making Patychky. It might seem like a bit of work, but the end result – tender, flavorful pork skewers with a crispy, golden crust – is well worth the effort. Share them with your loved ones, and create your own memories around this delicious Ukrainian tradition. And don’t be shy, let me know how they turn out! Maybe you’ll discover your own family tradition in the making. They pair wonderfully with a crisp green salad or alongside a hearty serving of sauerkraut. Enjoy!