
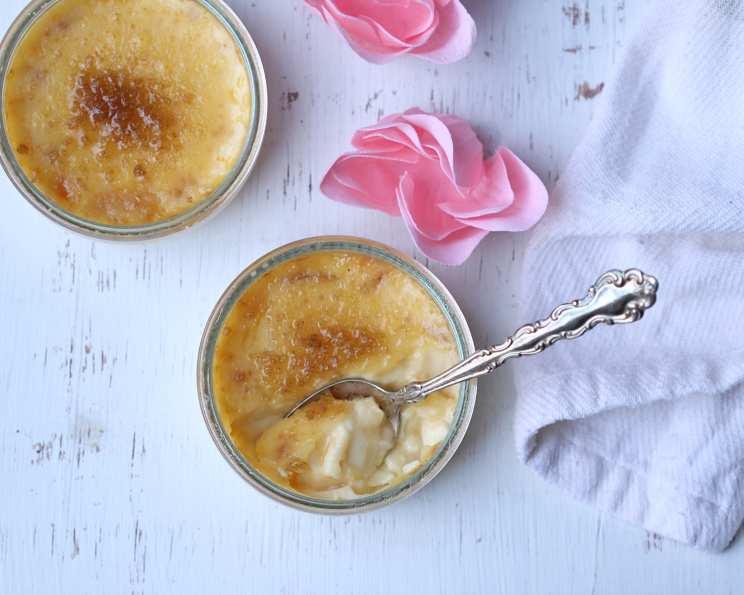
The Enduring Elegance of Paul Bocuse’s Crème Brûlée
There’s a reason some desserts become classics, etched in the culinary memory of generations. For me, crème brûlée evokes a specific memory: the hushed reverence of my first apprenticeship in Lyon, France. The head pastry chef, a stern but secretly kind woman named Madame Dubois, would occasionally allow me to witness the making of her signature dessert. The anticipation as she gently torched the sugar crust, the intoxicating aroma of caramelized sugar filling the kitchen – those moments felt like glimpses into the very soul of French cuisine. Each perfectly cracked spoonful was a lesson in precision and the power of simple ingredients transformed.
Recipe Overview
- Prep Time: 20 minutes
- Cook Time: 1 hour 15 minutes
- Total Time: 5 hours 35 minutes (includes chilling)
- Servings: 4
- Dietary Type: Gluten-Free
Ingredients
- 4 large egg yolks
- 1/3 cup granulated sugar
- 1 tablespoon granulated sugar
- 2 cups heavy cream
- 1 vanilla bean, split lengthwise and scraped
- 1/4 cup light brown sugar, air dried
Equipment Needed
- Medium bowl
- Small saucepan
- Whisk
- Fine-mesh strainer
- Four 5-ounce ramekins or shallow gratin dishes
- Baking dish large enough to hold ramekins
- Broiler
Instructions
-
Preheat the oven to 275°F (135°C). This low temperature is essential for a silky-smooth custard. A higher temperature will likely result in a curdled or rubbery texture.
-
In a medium bowl, whisk the egg yolks with half of the granulated sugar (approximately 2 2/3 tablespoons). Whisk until the mixture is pale yellow and slightly thickened. Be careful not to overwhip, which can incorporate too much air.
-
In a small saucepan, warm the heavy cream with the vanilla bean scrapings and the remaining granulated sugar (1 tablespoon) until steaming. Do not boil the cream. We want to infuse the cream with the vanilla’s delicate flavor, not scald it.
-
Gradually whisk the hot cream into the egg yolks, tempering the eggs to prevent them from scrambling. This is a crucial step! Add the hot cream in a slow, steady stream, whisking constantly and vigorously.
-
Strain the custard through a fine-mesh strainer. This step removes any bits of cooked egg or vanilla bean and ensures a perfectly smooth final product.
-
Pour the custard into four 5-ounce ramekins or shallow gratin dishes. Evenly distribute the custard among the ramekins.
-
Set the ramekins in a small baking dish. Add enough hot tap water to the dish to reach halfway up the sides of the ramekins, creating a water bath (bain-marie). This gentle cooking method helps to distribute heat evenly and prevents the custard from overcooking.
-
Bake for about 1 hour and 15 minutes, or until just set. The custards should be firm around the edges but still slightly jiggly in the center. A slight wobble is what you’re looking for.
-
Let cool in the water bath for 10 minutes, then remove and let cool completely. Cooling slowly in the water bath prevents cracking.
-
Cover the ramekins and refrigerate for at least 4 hours or, ideally, overnight. This allows the flavors to meld and the custard to fully set.
-
Preheat the broiler. Ensure your broiler rack is positioned as close as possible to the heat source, but watch carefully to avoid burning.
-
Sift a thin, even layer of the air-dried light brown sugar over each custard. Sifting the sugar ensures an even caramelization.
-
Broil 1 ramekin at a time, as close as possible to the heat source, until the sugar melts, forming a caramelized crust. This happens very quickly, so watch closely! The sugar should be deeply golden brown and bubbly. Rotate the ramekin if needed to ensure even caramelization.
-
Serve immediately. The contrast between the cold custard and the warm, brittle sugar crust is what makes crème brûlée so irresistible.
Notes: To air dry brown sugar, sift it onto a plate and leave it out, uncovered, for 1 day. If it’s humid, the sifted sugar can also be dried in a 250°F (120°C) oven for 20 minutes. Drying the brown sugar ensures a crispier crust that melts evenly under the broiler.
Expert Tips & Tricks
- Vanilla Bean Power: Don’t discard the vanilla bean pod after scraping it. Add it to your sugar canister to infuse your sugar with vanilla flavor, or steep it in milk for a vanilla-infused treat.
- Torching Alternative: If you don’t have a broiler, a kitchen torch works beautifully to caramelize the sugar. Use a sweeping motion to avoid burning the sugar in one spot.
- The Jiggle Test: The custard is done when it’s set around the edges but still has a slight jiggle in the center. It will continue to set as it cools.
- Avoid Overbaking: Overbaking results in a grainy texture. Keep a close eye on the custards during baking.
- Salt Boost: A tiny pinch of salt in the custard base enhances the flavors and balances the sweetness.
Serving & Storage Suggestions
Crème brûlée is best served immediately after brûléeing the sugar. The contrast between the cold custard and the warm, crisp sugar is the essence of the dessert. If you have leftover crème brûlée that hasn’t been brûléed, cover the ramekins tightly with plastic wrap and store them in the refrigerator for up to 2 days. Do not brûlée the sugar until you are ready to serve, as the caramelized sugar will soften over time. Brûléed crème brûlée is not suitable for freezing.
Nutritional Information
| Nutrient | Amount per Serving | % Daily Value |
|---|---|---|
| Calories | 594 kcal | 30% |
| Total Fat | 48.5g | 74% |
| Saturated Fat | 29g | 145% |
| Cholesterol | 347.5mg | 115% |
| Sodium | 57.4mg | 2% |
| Total Carbohydrate | 37.2g | 12% |
| Dietary Fiber | 0g | 0% |
| Sugars | 33.3g | 133% |
| Protein | 5.2g | 10% |
Variations & Substitutions
- Citrus Zest: Add a teaspoon of lemon or orange zest to the cream for a bright, citrusy flavor.
- Coffee Infusion: Steep coffee beans in the cream for a rich coffee-flavored crème brûlée.
- Chocolate Crème Brûlée: Add melted dark chocolate to the custard base for a decadent twist.
- Spice it Up: A pinch of cinnamon, nutmeg, or cardamom can add warmth and complexity to the flavor.
- Liqueur Boost: A tablespoon of your favorite liqueur, such as Grand Marnier or Amaretto, can add a sophisticated touch.
FAQs (Frequently Asked Questions)
Q: Why is my crème brûlée grainy?
A: Overbaking is the most common cause of a grainy texture. Make sure to bake the custards until they are just set, with a slight jiggle in the center.
Q: Can I make crème brûlée ahead of time?
A: Yes! The custards can be made up to 2 days in advance and stored in the refrigerator. However, brûlée the sugar just before serving.
Q: What if I don’t have a kitchen torch?
A: You can use your oven’s broiler, as described in the recipe. Just be sure to watch it carefully, as the sugar can burn quickly.
Q: Can I use regular sugar instead of brown sugar for the topping?
A: While brown sugar creates a richer flavor and deeper color, you can use granulated sugar. The caramelization will be slightly different.
Q: Why is it important to use a water bath?
A: A water bath helps to distribute heat evenly and prevents the custards from overcooking and curdling. It ensures a smooth, creamy texture.
Final Thoughts
Paul Bocuse’s Crème Brûlée is more than just a dessert; it’s an experience. The creamy vanilla custard, the brittle caramelized sugar, the satisfying crack of the spoon – it’s a symphony of textures and flavors that is sure to impress. Don’t be intimidated by the seemingly intricate steps; with a little patience and attention to detail, you can create this classic French dessert in your own kitchen. So, gather your ingredients, preheat your oven, and prepare to transport yourself to a Parisian patisserie. And don’t forget to share your creation – and maybe even the recipe – with your loved ones. Bon appétit!