
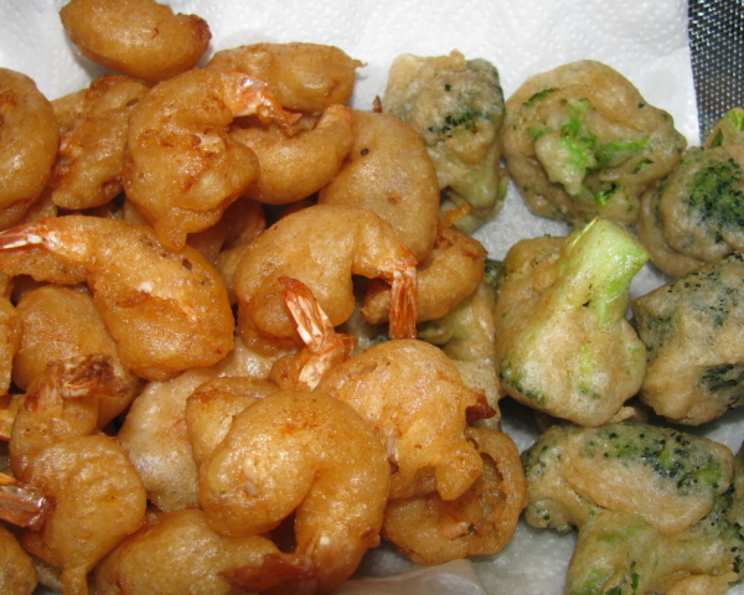
Paula Deen’s Irresistible Beer Battered Shrimp
My first encounter with beer-battered shrimp was at a small seafood shack down in Savannah. The salty air, the cries of gulls overhead, and the golden, crispy shrimp served with a tangy tartar sauce—it all created a memory I cherish. I remember thinking, “This is comfort food at its finest!” I knew I had to recreate that magic in my own kitchen, and when I stumbled upon Paula Deen’s recipe, I knew I was on the right track. It’s simple, delicious, and captures the essence of Southern coastal cuisine perfectly.
Recipe Overview
- Prep Time: 15 minutes
- Cook Time: 2-3 minutes per batch
- Total Time: At least 4 hours, 15 minutes (including batter resting time)
- Servings: 4
- Yield: Variable, depending on shrimp size
- Dietary Type: Not Gluten-Free, Not Dairy-Free
Ingredients
- 1 cup beer (lager or pilsner is recommended)
- 1 cup all-purpose flour
- ½ teaspoon salt
- 21-25 large shrimp, peeled and deveined, tails left on
- Oil, for frying (vegetable, canola, or peanut oil)
Equipment Needed
- Deep fryer or large, heavy-bottomed pot
- Mixing bowl
- Whisk
- Paper towels
- Tongs or slotted spoon
Instructions
-
Prepare the Frying Setup: If using a deep fryer, fill it according to the manufacturer’s instructions. If using a pot, fill it halfway with your chosen oil. Ensure you have enough oil for the shrimp to float freely. Begin heating the oil to 350 degrees F (175 degrees C). Use a thermometer to monitor the temperature accurately.
-
Make the Beer Batter: In a mixing bowl, combine the beer, flour, and salt. Whisk the ingredients together until you have a smooth batter. Don’t worry if there are a few small lumps; they will dissolve as the batter rests.
-
Rest the Batter: This is a crucial step. Allow the batter to sit at room temperature for several hours (at least 4 hours is recommended). This resting period allows the gluten in the flour to relax, resulting in a lighter and crispier fried shrimp. You can even prepare the batter a day in advance and store it in the refrigerator, but be sure to bring it back to room temperature before using.
-
Prepare the Shrimp: While the oil is heating and the batter is resting, prepare the shrimp. Gently pat the shrimp dry with paper towels. This helps the batter adhere better and prevents the oil from splattering excessively.
-
Batter the Shrimp: Once the oil has reached 350 degrees F (175 degrees C) and the batter has rested, it’s time to coat the shrimp. Dip each shrimp individually into the batter, ensuring it’s fully coated. Let any excess batter drip off before carefully placing the shrimp into the hot oil.
-
Fry the Shrimp: Fry the shrimp in batches, being careful not to overcrowd the fryer or pot. Overcrowding will lower the oil temperature and result in soggy shrimp. Fry for approximately 2 to 3 minutes, or until the shrimp are golden brown and cooked through. The internal temperature of the shrimp should reach 145 degrees F (63 degrees C).
-
Drain and Serve: Once the shrimp are golden brown and cooked through, use tongs or a slotted spoon to remove them from the oil. Place the fried shrimp on a plate lined with paper towels to drain any excess oil.
-
Serve Immediately: Serve the beer-battered shrimp immediately while they are still hot and crispy. They are delicious with a variety of dipping sauces, such as tartar sauce, cocktail sauce, remoulade, or even a simple squeeze of lemon.
Expert Tips & Tricks
- Beer Selection: The type of beer you use will affect the flavor of the batter. A light lager or pilsner will provide a subtle, slightly malty flavor. Darker beers, like stouts or porters, will impart a richer, more complex flavor. Experiment to find your favorite!
- Batter Consistency: The batter should be thick enough to coat the shrimp evenly but thin enough to drip off easily. If the batter is too thick, add a tablespoon or two of beer until you reach the desired consistency. If it’s too thin, add a tablespoon or two of flour.
- Oil Temperature is Key: Maintaining the correct oil temperature is essential for crispy, non-greasy fried shrimp. If the oil is too cold, the shrimp will absorb too much oil and become soggy. If the oil is too hot, the shrimp will burn on the outside before they are cooked through on the inside.
- Preventing Soggy Shrimp: Besides maintaining the correct oil temperature, patting the shrimp dry before battering them and avoiding overcrowding the fryer are crucial for preventing soggy shrimp.
- Adding Flavor to the Batter: Feel free to add other seasonings to the batter to customize the flavor. Garlic powder, onion powder, paprika, cayenne pepper, or even a pinch of Old Bay seasoning can add a delicious kick.
Serving & Storage Suggestions
Serve Paula Deen’s beer-battered shrimp immediately while they are hot and crispy. Arrange them artfully on a platter with a side of your favorite dipping sauce. Consider serving them with coleslaw, french fries, or hushpuppies for a complete Southern-style meal.
Storage: Leftover fried shrimp are best stored in an airtight container in the refrigerator. They will keep for 1-2 days, but they will lose some of their crispness.
Reheating: To reheat leftover fried shrimp, preheat your oven to 350 degrees F (175 degrees C). Place the shrimp on a baking sheet lined with parchment paper and bake for 5-10 minutes, or until heated through. You can also reheat them in an air fryer for a few minutes for a crispier result. Avoid microwaving them, as this will make them soggy.
Nutritional Information
Here’s an estimate of the nutritional information per serving:
| Nutrient | Amount per Serving | % Daily Value |
|---|---|---|
| Calories | 168 kcal | N/A |
| Fat | 5 g | 3% |
| Saturated Fat | 0.1 g | 0% |
| Cholesterol | 56 mg | 18% |
| Sodium | 358 mg | 14% |
| Carbohydrates | 26 g | 8% |
| Fiber | 0.8 g | 3% |
| Sugars | 0.1 g | 0% |
| Protein | 9.5 g | 19% |
Note: Nutritional information is an estimate and may vary based on specific ingredients and portion sizes.
Variations & Substitutions
- Gluten-Free: Substitute the all-purpose flour with a gluten-free all-purpose flour blend. Ensure the beer you use is also gluten-free.
- Spice it Up: Add a pinch of cayenne pepper or a dash of hot sauce to the batter for a spicy kick.
- Herb Infusion: Mix in finely chopped fresh herbs, such as parsley, thyme, or dill, to the batter for a more aromatic flavor.
- Buttermilk Variation: Substitute half of the beer with buttermilk for a tangier flavor and a slightly different texture.
- Coconut Shrimp: Use shredded coconut instead of flour for a sweeter, tropical twist.
FAQs (Frequently Asked Questions)
Q: Why do I need to let the batter sit for several hours?
A: Resting the batter allows the gluten in the flour to relax, resulting in a lighter and crispier fried shrimp. If you skip this step, the shrimp may be tougher.
Q: Can I use a different type of beer?
A: Yes, you can experiment with different types of beer to find your favorite flavor. However, avoid using overly hoppy beers, as they can become bitter when fried.
Q: How do I know when the shrimp are cooked through?
A: The shrimp are cooked through when they are golden brown and the internal temperature reaches 145 degrees F (63 degrees C). The flesh should be opaque and firm to the touch.
Q: Can I use frozen shrimp?
A: Yes, you can use frozen shrimp, but make sure to thaw them completely and pat them dry with paper towels before battering and frying.
Q: What dipping sauces go well with beer-battered shrimp?
A: Tartar sauce, cocktail sauce, remoulade, sweet chili sauce, and even a simple squeeze of lemon are all excellent choices.
Final Thoughts
Paula Deen’s beer-battered shrimp is a recipe that brings back memories of sunny days by the coast and the simple pleasures of perfectly fried seafood. Don’t be intimidated by the resting time for the batter; it’s the secret to achieving that craveable, crispy texture. I encourage you to try this recipe and share your own variations and experiences. Pair it with a refreshing glass of iced tea or your favorite brew for a truly satisfying Southern experience. Happy frying!