
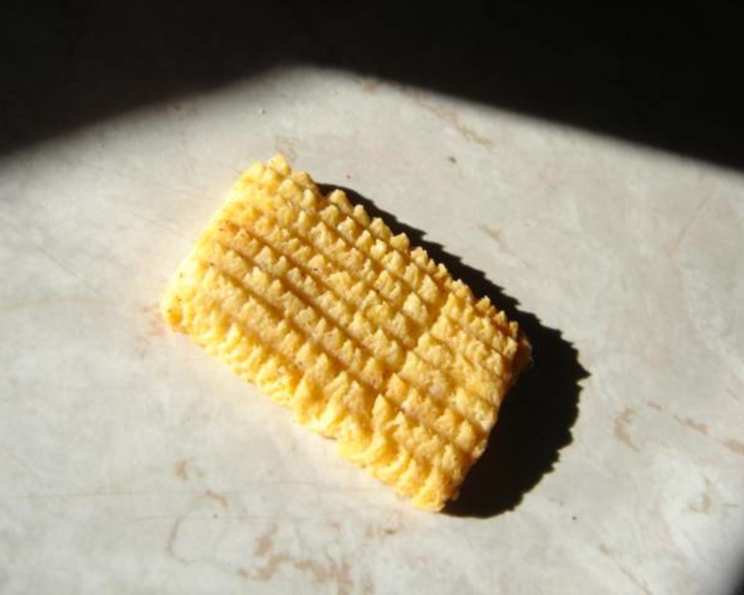
Paula Deen’s Zesty Cheese Straws: A Southern Classic
There’s something about the snap of a perfectly baked cheese straw that instantly transports me back to my grandmother’s kitchen. I can almost smell the warm, buttery aroma mingled with the sharp tang of cheddar filling the air. My cousins and I would hover impatiently as she pulled a tray of these golden, twisted delights from the oven, eager to snatch the crispiest ones before anyone else could. It wasn’t just the flavor; it was the love baked into every bite.
Recipe Overview
- Prep Time: 15 minutes
- Cook Time: 10-15 minutes
- Total Time: 45 minutes (includes chilling time)
- Yields: Approximately 5 dozen
- Dietary Type: Not Gluten-Free
Ingredients
- ½ cup butter, softened
- 1 lb sharp cheddar cheese, room temperature
- 1 ½ cups all-purpose flour
- 1 teaspoon salt
- ¼ teaspoon ground red pepper
- 2-3 teaspoons dried herbs (optional, such as dill, thyme, or sage)
Equipment Needed
- Mixing bowl
- Cookie press with a ridged tip
- Lightly greased cookie sheets
- Cooling racks
Instructions
-
Preheat your oven to 300 degrees Fahrenheit (150 degrees Celsius). This low temperature is key to achieving that delicate, crisp texture without burning the cheese straws.
-
Ensure both the butter and sharp cheddar cheese are at room temperature. This is crucial for creating a smooth, homogenous dough. The butter should be soft enough to cream easily, and the cheese should be pliable but not oily.
-
In a mixing bowl, cream the softened butter until it is light and fluffy. This incorporates air into the mixture, resulting in a more tender cheese straw.
-
Add the room temperature cheddar cheese to the creamed butter and mix until thoroughly blended. Continue mixing until the cheese is evenly distributed throughout the butter, creating a uniform mixture.
-
In the same bowl, add the all-purpose flour, salt, and ground red pepper. If desired, also add your chosen dried herbs at this stage. I personally love using ½ teaspoon of ground red pepper for a spicier kick. Mix all ingredients until a dough forms. Be careful not to overmix, as this can develop the gluten in the flour and result in tough cheese straws.
-
Wrap the dough and refrigerate it for at least 30 minutes. This chilling period allows the butter to firm up, making the dough easier to handle and preventing the cheese straws from spreading too much during baking.
-
After chilling, place the dough into a cookie press fitted with a ridged tip. This is what gives the cheese straws their characteristic shape.
-
Pipe the dough in approximately 2-inch strips onto a lightly greased cookie sheet. Ensure the strips are evenly spaced to allow for proper air circulation and even baking.
-
Bake in the preheated oven for 10 to 15 minutes, or until the cheese straws are lightly browned around the edges. Keep a close eye on them, as baking times may vary depending on your oven. The cheese straws should be firm to the touch and have a slightly golden color.
-
Remove the baked cheese straws from the cookie sheet and transfer them to cooling racks to cool completely. This prevents them from becoming soggy and allows them to crisp up further.
Expert Tips & Tricks
- Cheese Matters: Using high-quality, sharp cheddar cheese is essential for the best flavor. Pre-shredded cheese often contains cellulose, which can affect the texture. I recommend grating your own cheese for a superior result.
- Don’t Overbake: Overbaking can result in dry, brittle cheese straws. Watch them carefully during the last few minutes of baking and remove them from the oven as soon as they are lightly browned.
- Cookie Press Issues: If your cookie press is giving you trouble, try warming it slightly with hot water and drying it thoroughly before adding the dough. Also, make sure the dough is not too cold or too warm.
- Spice It Up: Experiment with different spices to customize the flavor. A pinch of cayenne pepper, garlic powder, or onion powder can add a delicious twist.
- Make-Ahead Magic: The dough can be made ahead of time and stored in the refrigerator for up to 3 days, or in the freezer for up to 1 month. Thaw completely before using.
Serving & Storage Suggestions
Serve these zesty cheese straws as a delightful appetizer, a savory snack, or a crunchy accompaniment to soups and salads. They are perfect for parties, potlucks, or simply enjoying with a glass of wine.
Store cooled cheese straws in an airtight container at room temperature for up to 1 week. For longer storage, freeze them in a freezer-safe bag or container for up to 2 months. Thaw completely before serving to restore their crispness. Reheating isn’t typically necessary, but you can warm them briefly in a low oven (250°F/120°C) for a few minutes if desired.
Nutritional Information
| Nutrient | Amount per Serving (approx. 5 straws) | % Daily Value |
|---|---|---|
| Calories | 110 kcal | 6% |
| Total Fat | 9g | 14% |
| Saturated Fat | 6g | 30% |
| Cholesterol | 24mg | 8% |
| Sodium | 193mg | 8% |
| Total Carbohydrate | 5g | 2% |
| Dietary Fiber | 0.1g | 0% |
| Sugars | 0.1g | 0% |
| Protein | 4.5g | 9% |
Note: Nutritional information is an estimate and may vary based on specific ingredients used.
Variations & Substitutions
- Gluten-Free Option: Substitute the all-purpose flour with a gluten-free all-purpose blend. Be sure to choose a blend that contains xanthan gum or another binder to help hold the cheese straws together.
- Vegan Cheese Straws: While this recipe traditionally relies on butter and cheddar cheese, you can attempt a vegan version by using vegan butter and vegan cheddar cheese. Keep in mind that the texture and flavor may differ slightly from the original.
- Herb Infusion: Get creative with your herb combinations! Try rosemary and thyme for a Mediterranean twist, or chives and parsley for a fresh, vibrant flavor.
- Spicy Cheese Straws: Increase the amount of ground red pepper for extra heat, or add a pinch of cayenne pepper to the dough.
- Smoked Paprika Cheese Straws: Replace some of the ground red pepper with smoked paprika for a smoky, savory flavor.
FAQs (Frequently Asked Questions)
Q: Why are my cheese straws not crispy?
A: Several factors can contribute to soggy cheese straws. Make sure your oven temperature is accurate, avoid overcrowding the baking sheet, and ensure the cheese straws are fully cooled on a wire rack.
Q: Can I make these cheese straws without a cookie press?
A: Yes, you can roll out the dough thinly and cut it into strips using a pizza cutter or knife. However, the cookie press creates a more uniform and professional-looking result.
Q: How do I prevent the cheese straws from spreading too much during baking?
A: Chilling the dough for at least 30 minutes before baking is crucial for preventing excessive spreading. Also, avoid overmixing the dough, as this can develop the gluten and lead to a less tender result.
Q: Can I use different types of cheese?
A: While sharp cheddar is the traditional choice, you can experiment with other hard cheeses such as Parmesan, Gruyere, or Asiago. Just be sure to adjust the salt level accordingly, as some cheeses are saltier than others.
Q: Why did my cheese straws turn out too hard?
A: Overbaking is the most common cause of hard cheese straws. Keep a close eye on them during baking and remove them from the oven as soon as they are lightly browned around the edges.
Final Thoughts
These zesty cheese straws are more than just a recipe; they’re a taste of Southern tradition and a reminder of simple pleasures. Whether you’re a seasoned baker or a kitchen novice, I encourage you to give this recipe a try. Experiment with different herbs and spices to create your own signature version, and don’t be afraid to share your creations with friends and family. After all, the best part of cooking is sharing the love and joy that comes with it. Pair them with a crisp Sauvignon Blanc for the perfect evening indulgence!