
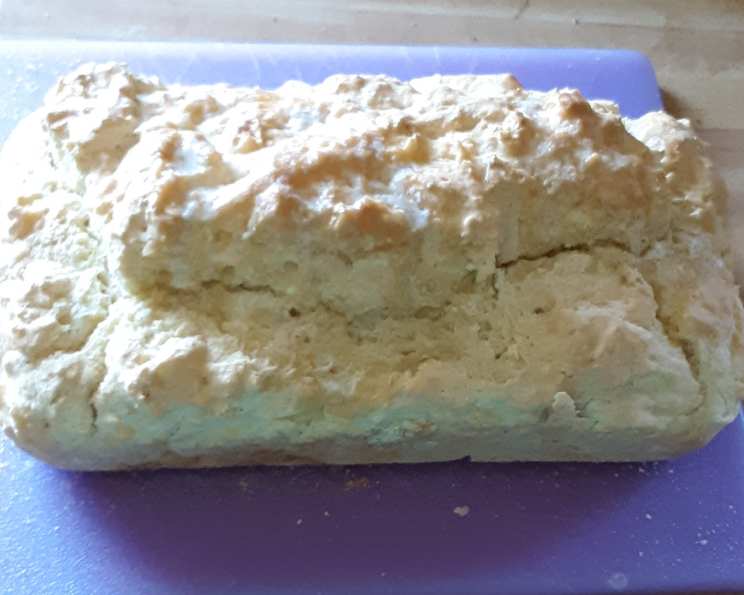
Paul’s (No Yeast) White Bread: A Simple Loaf for Everyone
My introduction to breadmaking wasn’t through sourdough starters and kneading techniques. It was born out of necessity, a mission to create a simple loaf that my dear friend’s son, Paul, could enjoy without triggering his yeast allergy. I remember the sheer joy on Paul’s face as he tore into that first slice, slathered with golden syrup. It wasn’t just bread; it was a gateway to flavors he had been missing. This recipe became a cherished cornerstone, not just for allergy-friendly baking, but for the memories it helped create.
Recipe Overview
- Prep Time: 10 minutes
- Cook Time: 40 minutes
- Total Time: 50 minutes
- Servings: Approximately 10 slices
- Yield: 1 small loaf
- Dietary Type: Yeast-Free
Ingredients
- 2 cups self-raising flour
- 2 eggs
- ¾ cup water
- ¼ teaspoon salt
- 2 tablespoons oil (vegetable or canola work well)
Equipment Needed
- Loaf tin
- Mixing bowl
- Measuring cups and spoons
- Whisk or fork
Instructions
-
Preheat your oven to 190°C (375°F). This ensures even baking and optimal rise.
-
Grease your loaf tin thoroughly. This step is crucial to prevent the bread from sticking and ensures easy removal after baking. Use oil or butter, and dust lightly with flour for best results.
-
In a mixing bowl, crack the eggs. Add the oil to the bowl with the eggs and beat well with a whisk or fork. Ensure the eggs and oil are fully combined for a consistent batter.
-
Add the water to the egg and oil mixture. Continue to beat the mixture until all the ingredients are well combined.
-
In a separate bowl, measure the self-raising flour and salt. Sift these dry ingredients together into the wet ingredients. Sifting helps to aerate the flour, resulting in a lighter and more tender bread.
-
Gently fold the wet and dry ingredients together until just combined. Avoid overmixing, as this can develop the gluten in the flour and result in a tough bread. A few lumps are perfectly acceptable.
-
Pour the batter into the prepared loaf tin, ensuring it’s evenly distributed.
-
Bake in the preheated oven for 40 minutes.
-
After 40 minutes, check for doneness. The bread should be golden brown on top and spring back when lightly pressed. A toothpick inserted into the center should come out clean. If the top is browning too quickly, you can loosely cover the loaf with foil during the last 10-15 minutes of baking.
-
Once baked, remove the loaf from the oven and let it cool in the tin for about 10 minutes before transferring it to a wire rack to cool completely. This prevents the bread from becoming soggy.
-
Slice and serve with your favorite toppings!
Expert Tips & Tricks
- For a richer flavor, try using melted butter instead of oil.
- If you don’t have self-raising flour, you can make your own by combining 1 cup of all-purpose flour with 1 ½ teaspoons of baking powder and ¼ teaspoon of salt.
- To add a touch of sweetness, add a tablespoon of honey or maple syrup to the batter.
- To prevent a soggy bottom, place a baking sheet on the rack below the loaf tin. This will help to distribute the heat evenly.
- If your oven runs hot, reduce the temperature by 10-15°C (25-50°F) and check the bread more frequently.
- Customize the flavor: Add a handful of chopped herbs like rosemary or thyme to the batter for an herby loaf.
Serving & Storage Suggestions
Serve this no-yeast white bread warm or at room temperature. It’s delicious on its own with butter, jam, or honey. It also makes a great base for sandwiches or toast.
- Room Temperature: Store the bread in an airtight container at room temperature for up to 2 days.
- Refrigerator: For longer storage, store the bread in an airtight container in the refrigerator for up to 5 days.
- Freezer: You can also freeze the bread for up to 2 months. Slice the bread before freezing for easy thawing. To reheat, thaw at room temperature or in the refrigerator. You can also toast frozen slices directly.
Nutritional Information
Note: Nutritional information is an estimate and may vary based on specific ingredients used.
| Nutrient | Amount per Serving | % Daily Value |
|---|---|---|
| Calories | 130 kcal | 7% |
| Total Fat | 7g | 9% |
| Saturated Fat | 2g | 10% |
| Cholesterol | 74mg | 25% |
| Sodium | 147mg | 6% |
| Total Carbohydrate | 28g | 9% |
| Dietary Fiber | 1g | 4% |
| Sugars | <1g | 0% |
| Protein | 4g | 8% |
Variations & Substitutions
- Dairy-Free: Replace the eggs with a commercial egg replacer or flax eggs (1 tablespoon of ground flaxseed mixed with 3 tablespoons of water, let sit for 5 minutes to thicken).
- Vegan: Use a vegan egg replacer as described above and ensure your oil is plant-based.
- Gluten-Free: Substitute the self-raising flour with a gluten-free self-raising flour blend. You may need to add a little xanthan gum to improve the texture.
- Sweet Version: Add ¼ cup of sugar and ½ teaspoon of vanilla extract to the batter for a sweeter loaf, perfect for breakfast or dessert.
- Cheesy Bread: Add ½ cup of shredded cheese (cheddar, mozzarella, or parmesan) to the batter for a savory, cheesy twist.
FAQs (Frequently Asked Questions)
Q: Can I use all-purpose flour if I don’t have self-raising flour?
A: Yes, you can make your own self-raising flour by combining 1 cup of all-purpose flour with 1 ½ teaspoons of baking powder and ¼ teaspoon of salt.
Q: My bread is browning too quickly on top. What should I do?
A: Loosely cover the loaf with foil during the last 10-15 minutes of baking to prevent the top from burning.
Q: The center of my bread is still doughy after 40 minutes. What did I do wrong?
A: Your oven temperature might be too low, or the bread might need more time to cook. Increase the baking time by 5-10 minutes and check for doneness with a toothpick.
Q: Can I add nuts or seeds to the batter?
A: Absolutely! Adding a handful of chopped nuts or seeds (like walnuts, almonds, or sunflower seeds) can add texture and flavor to the bread.
Q: How can I make the bread more moist?
A: Add a tablespoon of applesauce or plain yogurt to the batter for added moisture. Be sure not to overbake the bread.
Final Thoughts
This simple, no-yeast white bread recipe holds a special place in my heart. It’s a testament to how even the simplest ingredients can come together to create something truly comforting and satisfying. I encourage you to give it a try, experiment with different variations, and share the joy of freshly baked bread with your loved ones. Whether you have dietary restrictions or are simply looking for an easy bread recipe, this loaf is sure to become a staple in your kitchen. Enjoy!