
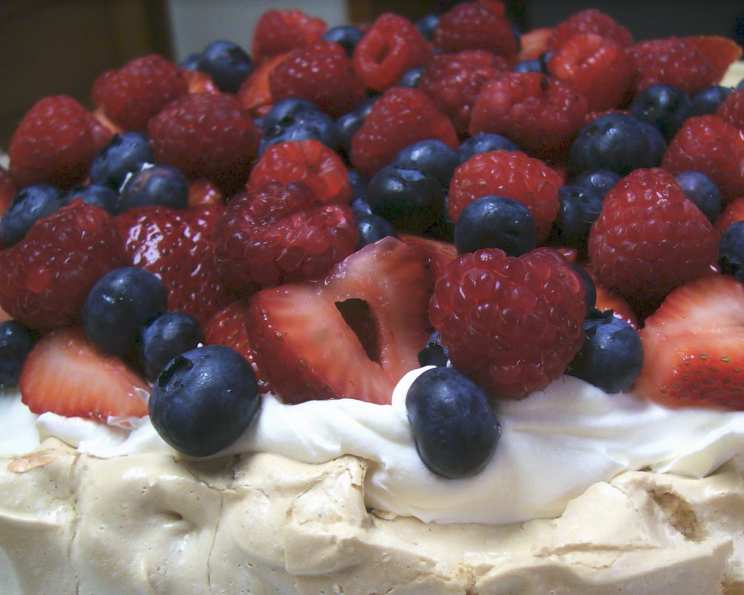
The Perfect Pavlova Shell: A Culinary Masterpiece
My earliest memory of pavlova involves a cloud of meringue, a sticky sweetness that tickled my nose, and the excited chatter of family gatherings. It wasn’t just dessert; it was a centerpiece, a symbol of celebration. My aunt, a formidable baker, always presented it with a flourish, laden with glistening berries and clouds of whipped cream. The pavlova was crisp on the outside, marshmallowy within, a textural symphony that instantly transported me to a place of pure joy. While I’ve since adapted the recipe to be less sweet than my aunt’s original, the essence remains the same – a show-stopping dessert that is surprisingly simple to create.
Recipe Overview
- Prep Time: 20 minutes
- Cook Time: 45 minutes
- Total Time: Several hours (including cooling time)
- Servings: 10-12
- Yield: 1 Pavlova Shell
- Dietary Type: Gluten-Free
Ingredients
- 4 egg whites
- 1 1/2 cups caster sugar (can reduce to 1/2 cup for less sweetness)
- 2 teaspoons vanilla extract
- 1 teaspoon white vinegar
- 1 teaspoon cornflour (cornstarch)
- 4 tablespoons boiling water
- Cornflour for dusting
For Serving (Optional):
- Whipped cream
- Sliced seasonal fruit (berries, kiwi, bananas, passionfruit, etc.)
Equipment Needed
- Mixer (stand or hand mixer)
- Small mixing bowl
- Pavlova plate or baking sheet
- Piping bag (optional)
Instructions
- Preheat your oven to 160°C (320°F). It’s crucial to have an accurate oven temperature, so using an oven thermometer is a good idea.
- Prepare your baking surface. Traditionally, a pavlova plate is used, but a regular baking sheet will work just as well. Grease the surface thoroughly with butter or cooking spray. This prevents the pavlova from sticking and ensures easy removal.
- Dust the prepared surface liberally with cornflour, ensuring complete coverage. Then, shake off any excess cornflour. This creates a barrier between the pavlova and the pan, further preventing sticking.
- In a small mixing bowl, combine the egg whites, caster sugar, vanilla extract, white vinegar, cornflour, and boiling water. It’s important to use a clean, dry bowl for the egg whites to whip up properly.
- Using a mixer, beat the ingredients at high speed for a full 15 minutes. This is a crucial step. The long mixing time incorporates air into the mixture, creating the meringue’s signature light and airy texture. The mixture should become stiff and glossy, forming firm peaks when the beaters are lifted.
- Gently place the meringue mixture in the center of the prepared plate or baking sheet. Spread it evenly into an 8- to 9-inch circle. Alternatively, for a more decorative presentation, pipe the meringue onto the plate using a piping bag fitted with a large nozzle. If piping, make the edges slightly thicker to create a well for the filling.
- Bake the pavlova for 15 minutes at 160°C (320°F). This initial burst of heat helps to set the outer crust.
- Reduce the oven temperature to 110°C (210°F) and continue baking for another 30 minutes. This lower temperature allows the inside of the pavlova to dry out gently, creating its characteristic marshmallowy texture.
- This is the most important part: LET THE PAVLOVA COOL COMPLETELY IN THE OVEN WITH THE OVEN DOOR CLOSED. Do not open the oven or remove the pavlova until it is completely cold. This gradual cooling prevents the pavlova from cracking or collapsing. This cooling process can take several hours, or even overnight.
- Once the pavlova is completely cool, it is ready to be filled and decorated. Gently transfer it to a serving plate.
- Generously fill the pavlova with whipped cream. Freshly whipped cream is best, but you can also use store-bought.
- Decorate with your choice of sliced seasonal fruit. Berries, kiwi, bananas, and passionfruit are all excellent options. Get creative with your arrangement to make a visually stunning dessert.
Expert Tips & Tricks
- Achieving Stiff Peaks: The key to a perfect pavlova is achieving stiff peaks with the egg whites. Make sure your bowl and beaters are completely clean and free of any grease. A tiny drop of fat can prevent the egg whites from whipping up properly.
- Preventing Cracks: The gradual cooling process is essential to prevent cracks. Avoid opening the oven door while the pavlova is cooling.
- Reducing Sweetness: If you prefer a less sweet pavlova, you can reduce the amount of caster sugar to 1/2 cup. However, keep in mind that sugar is essential for stabilizing the meringue, so reducing it too much may affect the texture.
- Meringue Tears: If the pavlova begins to “weep” (release liquid), it is a sign of overbaking or too much humidity.
Serving & Storage Suggestions
Serve the pavlova immediately after filling with whipped cream and fruit. The whipped cream will soften the meringue over time, so it’s best to assemble it shortly before serving.
Leftover pavlova shell can be stored in an airtight container at room temperature for up to 2 days. However, it will lose its crispness over time. Do not refrigerate the pavlova shell, as the humidity will cause it to become soggy. Once filled with whipped cream and fruit, the pavlova should be refrigerated and consumed within 24 hours.
Nutritional Information
Note: Nutritional information is an estimate and may vary based on specific ingredients and serving sizes.
| Nutrient | Amount per Serving | % Daily Value |
|---|---|---|
| Calories | 250 kcal | 13% |
| Total Fat | 5g | 8% |
| Saturated Fat | 3g | 15% |
| Cholesterol | 10mg | 3% |
| Sodium | 30mg | 1% |
| Total Carbohydrate | 50g | 17% |
| Dietary Fiber | 0g | 0% |
| Sugars | 45g | 90% |
| Protein | 2g | 4% |
Variations & Substitutions
- Citrus Zest: Add a teaspoon of lemon, lime, or orange zest to the meringue mixture for a bright, citrusy flavor.
- Chocolate Pavlova: Swirl melted chocolate into the meringue mixture before baking.
- Coffee Pavlova: Add a teaspoon of instant coffee powder to the meringue mixture for a coffee-flavored pavlova.
- Vegan Pavlova: While more challenging, aquafaba (the liquid from canned chickpeas) can be whipped to create a vegan meringue. Substitute the egg whites with an equal amount of chilled aquafaba and follow the recipe as directed. Note that results may vary.
FAQs (Frequently Asked Questions)
Q: Why did my pavlova crack?
A: Cracking is usually caused by a sudden temperature change. Make sure to cool the pavlova slowly in the oven with the door closed.
Q: My pavlova is sticky. What did I do wrong?
A: A sticky pavlova can be a sign of underbaking or high humidity. Ensure you bake it for the full amount of time at the correct temperature.
Q: Can I make pavlova ahead of time?
A: Yes, the pavlova shell can be made 1-2 days in advance and stored in an airtight container at room temperature.
Q: Can I freeze pavlova?
A: It’s not recommended to freeze the assembled pavlova. However, the plain pavlova shell can be frozen, well-wrapped, for up to a month. Thaw at room temperature before filling.
Q: What kind of fruit works best for pavlova?
A: Any fresh, seasonal fruit works well. Berries, kiwi, bananas, passionfruit, and stone fruits are all popular choices.
Final Thoughts
Creating a pavlova shell might seem daunting, but it’s actually a wonderfully straightforward process. With a little patience and attention to detail, you can create a show-stopping dessert that will impress your friends and family. Don’t be afraid to experiment with different flavors and toppings to create your own signature pavlova. And most importantly, have fun with it! Share your creations, and let the joy of this delightful dessert brighten your table.