
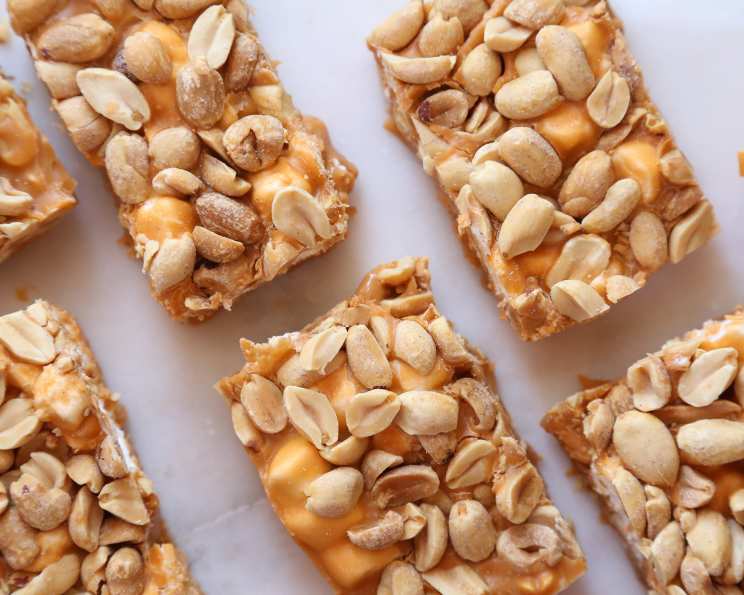
Homemade Payday Bars: A Sweet and Salty Symphony
There’s something truly magical about the combination of salty and sweet, a culinary dance that ignites the taste buds and leaves you craving more. My first encounter with this captivating duet was through a Payday candy bar, swiped from my grandpa’s candy dish (sorry, Grandpa!). The sticky caramel, the satisfying crunch of the peanuts – it was an instant love affair. Today, I’m thrilled to share my version of that classic treat: homemade Payday Bars that capture all the nostalgic joy of the original, but with a personal touch. Get ready for a sweet and salty symphony that will have everyone asking for seconds!
Recipe Overview
- Prep Time: 15 minutes
- Cook Time: 5 minutes
- Chill Time: 30 minutes
- Total Time: 50 minutes
- Servings: 36 squares
- Dietary Type: Not specified
Ingredients
- 1 (16 ounce) jar dry roasted peanuts
- 3 tablespoons margarine
- 1 (12 ounce) bag peanut butter chips
- 1 (14 ounce) can sweetened condensed milk
- 2 cups miniature marshmallows
Equipment Needed
- 9×13 inch baking pan
- Microwave-safe bowl
- Spatula or wooden spoon
Instructions
-
Begin by greasing a 9×13 inch baking pan. This will prevent the bars from sticking and make them easier to remove once chilled.
-
Pour half of the dry roasted peanuts evenly onto the bottom of the prepared pan. This forms the first layer of peanutty goodness.
-
In a microwave-safe bowl, melt the margarine and peanut butter chips. Microwave in 30-second intervals, stirring in between, until completely smooth. Be careful not to overheat the chips, as they can burn.
-
Once the margarine and peanut butter chips are melted and smooth, add the sweetened condensed milk and stir well to combine.
-
Next, add the miniature marshmallows. Stir gently to coat them in the peanut butter mixture. It’s important to note: Do not melt the marshmallows. The goal is to keep them intact for added texture in the final bars.
-
Pour the peanut butter and marshmallow mixture evenly over the layer of peanuts in the pan.
-
Pat the mixture down gently but firmly to create an even layer. A piece of parchment paper or plastic wrap placed over the mixture can help prevent sticking.
-
Sprinkle the remaining peanuts evenly over the top of the marshmallow layer.
-
Pat the top layer of peanuts down firmly, ensuring they adhere to the peanut butter mixture. Again, parchment paper or plastic wrap will be your friend here.
-
Chill the bars in the refrigerator for at least 30 minutes, or until firm. This allows the peanut butter mixture to set and the bars to be easily cut.
-
Once chilled, cut the bars into squares and serve.
Expert Tips & Tricks
- For a richer flavor, use salted butter instead of margarine. The extra salt complements the sweetness of the peanut butter chips and condensed milk beautifully.
- If you prefer a chewier texture, you can slightly melt the marshmallows before adding them to the peanut butter mixture. Just be careful not to overmelt them, or they will become too sticky.
- To make cutting easier, use a warm knife. Run the knife under hot water and dry it before each cut. This will help prevent the bars from sticking to the knife.
- For a festive touch, drizzle melted chocolate over the chilled bars before cutting them.
Serving & Storage Suggestions
These homemade Payday Bars are perfect for parties, potlucks, or a simple sweet treat. Serve them chilled or at room temperature, depending on your preference. To store, place the bars in an airtight container at room temperature for up to 3 days, or in the refrigerator for up to a week. For longer storage, freeze the bars for up to 2 months. Thaw in the refrigerator before serving.
Nutritional Information
| Nutrient | Amount per Serving | % Daily Value |
|---|---|---|
| Calories | 139 kcal | N/A |
| Calories from Fat | 76 kcal | 55% |
| Total Fat | 8.5 g | 13% |
| Saturated Fat | 1.9 g | 9% |
| Cholesterol | 5 mg | 1% |
| Sodium | 134.8 mg | 5% |
| Total Carbohydrate | 13.1 g | 4% |
| Dietary Fiber | 1 g | 4% |
| Sugars | 10.2 g | 40% |
| Protein | 4.2 g | 8% |
Note: Nutritional information is an estimate and can vary based on ingredient brands and portion sizes.
Variations & Substitutions
- Nut-Free Payday Bars: Substitute sunflower seeds for the peanuts for a nut-free version.
- Chocolate Peanut Butter Payday Bars: Add 1/2 cup of cocoa powder to the melted peanut butter mixture for a richer, chocolatey flavor.
- Salted Caramel Payday Bars: Drizzle salted caramel sauce over the top of the bars before chilling for an extra layer of sweetness and saltiness.
- White Chocolate Payday Bars: Use white chocolate chips instead of peanut butter chips for a different flavor profile.
- Vegan Payday Bars: Use dairy-free margarine, dairy-free peanut butter chips (check labels!), and a can of sweetened condensed coconut milk. Many marshmallows are not vegan due to gelatin, so be sure to look for vegan marshmallows or substitute with a thick homemade vegan caramel sauce.
FAQs (Frequently Asked Questions)
Q: Can I use a different size pan?
A: Yes, you can, but the thickness of the bars will vary. Using a smaller pan will result in thicker bars, while a larger pan will create thinner bars. Adjust the chilling time accordingly.
Q: Can I use natural peanut butter instead of peanut butter chips?
A: It is not recommended, the peanut butter chips provide the necessary sweetness and structure to the bars. Using natural peanut butter will result in a softer, less stable mixture.
Q: My peanut butter chips burned when I was melting them. What did I do wrong?
A: Peanut butter chips can burn easily if overheated. Microwave them in short intervals (30 seconds at a time), stirring well in between, until just melted.
Q: The marshmallows are melting even though I’m not microwaving them. What should I do?
A: Make sure that the peanut butter mixture has cooled slightly before adding the marshmallows. If the mixture is too hot, it will cause the marshmallows to melt.
Q: Can I freeze these bars?
A: Yes, these bars freeze well. Wrap them tightly in plastic wrap and then place them in an airtight container. They can be frozen for up to 2 months.
Final Thoughts
I truly hope you enjoy creating these homemade Payday Bars as much as I do. They’re a delightful treat that’s sure to satisfy any sweet and salty craving. Don’t be afraid to experiment with the variations and make them your own. If you try this recipe, please share your feedback – I’d love to hear how they turned out! And if you’re looking for a perfect pairing, try them with a cold glass of milk or a scoop of vanilla ice cream. Happy baking!