
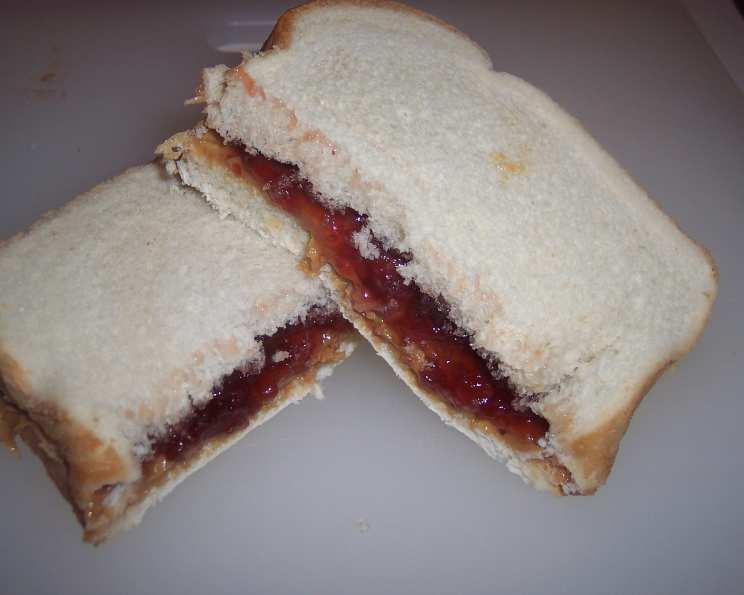
The Perfect Peanut Butter and Jelly Sandwich: A Culinary Classic
My earliest memories are filled with the comforting aroma of freshly baked bread and the sweet stickiness of homemade jam. But nestled amongst those gourmet sensations, there was always the undeniable allure of the humble peanut butter and jelly sandwich. It wasn’t just a quick lunch; it was a symbol of childhood freedom, a portable picnic, and a guaranteed smile after a long day of playing. There’s a simple joy in this combination, a perfect balance of savory and sweet that transcends generations and palates. It’s a reminder that sometimes, the simplest things truly are the best.
Recipe Overview
- Prep Time: 2 minutes
- Cook Time: 0 minutes
- Total Time: 2 minutes
- Servings: 3
- Yield: 3 sandwiches
- Dietary Type: Vegetarian (can be Vegan depending on bread and jelly)
Ingredients
- 6 slices bread
- 3 tablespoons jelly (grape, strawberry, or your favorite!)
- 3 tablespoons peanut butter (smooth or crunchy)
Equipment Needed
- Butter knife or spreader
- Cutting board (optional)
- Knife for cutting (optional)
Instructions
-
Start by gathering your ingredients: 6 slices of your favorite bread, 3 tablespoons of jelly, and 3 tablespoons of peanut butter.
-
Take 3 slices of bread and lay them on a clean surface.
-
Using a butter knife or spreader, evenly spread the peanut butter on these 3 slices. Ensure you reach the edges, but avoid applying it too thickly, as this can make the sandwich overly dense.
-
On the remaining 3 slices of bread, carefully spread the jelly. Again, aim for an even layer, covering the entire surface without using too much. Some people prefer to spread the jelly before the peanut butter, but we’re going for maximum flavor impact here!
-
Carefully place the jelly-covered slices of bread on top of the peanut butter-covered slices, creating 3 complete sandwiches.
-
If desired, use a knife to cut each sandwich into either 2 or 4 triangles. Cutting into triangles not only makes the sandwich visually appealing but also, dare I say, makes it taste a little better!
-
Serve immediately and enjoy!
Expert Tips & Tricks
- Warm the peanut butter: Slightly warming the peanut butter in the microwave for a few seconds makes it much easier to spread. Be careful not to overheat it, though – a quick 5-10 seconds is usually enough.
- Toast the bread: For a delightful textural contrast, lightly toast the bread before adding the peanut butter and jelly. This prevents the sandwich from becoming soggy and adds a pleasant crunch.
- Use high-quality ingredients: The quality of your peanut butter and jelly will significantly impact the taste of your sandwich. Opt for natural peanut butter without added sugar and a jelly made with real fruit.
- Layer Strategically: To prevent a soggy sandwich, you can spread a thin layer of peanut butter on both slices of bread before adding the jelly. This creates a barrier that helps keep the moisture from the jelly away from the bread.
- Don’t Overstuff: Resist the urge to pile on the peanut butter and jelly. Too much filling can make the sandwich messy and difficult to eat. A thin, even layer is all you need.
Serving & Storage Suggestions
The beauty of a peanut butter and jelly sandwich lies in its simplicity and immediate gratification. Serve it as a quick lunch, a satisfying snack, or a comforting treat any time of day.
- Serving: For a slightly elevated presentation, consider cutting the sandwich into fun shapes using cookie cutters. Serve with a glass of milk or a side of fresh fruit.
- Storage: While best enjoyed fresh, a peanut butter and jelly sandwich can be stored for a short period of time.
- Room Temperature: It’s best to eat the sandwich within a few hours of making it, especially if it’s a warm day.
- Refrigerator: If you need to store it for longer, wrap it tightly in plastic wrap or place it in an airtight container and refrigerate it for up to 24 hours. Be aware that the bread may become slightly soggy.
- Freezer: Freezing is not recommended, as the texture of the bread and jelly will change upon thawing.
Nutritional Information
| Nutrient | Amount per Serving | % Daily Value |
|---|---|---|
| Calories | 283 kcal | N/A |
| Total Fat | 9.7 g | 14% |
| Saturated Fat | 2 g | 10% |
| Cholesterol | 0 mg | 0% |
| Sodium | 420.2 mg | 17% |
| Total Carbohydrate | 43.1 g | 14% |
| Dietary Fiber | 2.4 g | 9% |
| Sugars | 14.4 g | 57% |
| Protein | 7.9 g | 15% |
Note: Nutritional information is an estimate and may vary based on specific ingredients used.
Variations & Substitutions
- Nut Butter Alternatives: Experiment with different nut butters, such as almond butter, cashew butter, or sunflower seed butter (sunbutter) for a nut-free option.
- Jelly Alternatives: Instead of traditional jelly, try using fruit preserves, jam, or even a thin layer of honey. Fresh fruit slices like bananas or strawberries also add a delicious twist.
- Bread Options: Explore different types of bread, such as whole wheat, sourdough, or even gluten-free bread. Croissants can also be used for a more decadent treat.
- Vegan PB&J: Ensure your bread and jelly are vegan-friendly. Many breads contain honey or dairy, and some jellies may use gelatin. Look for vegan alternatives to enjoy a fully plant-based PB&J.
- Grilled PB&J: For a warm and melty treat, butter the outside of the sandwich and grill it in a pan until golden brown and the peanut butter is slightly melted.
FAQs (Frequently Asked Questions)
Q: What’s the best type of peanut butter to use?
A: It depends on your preference! Creamy peanut butter provides a smooth texture, while crunchy adds a bit of bite. Natural peanut butter is often a healthier option, as it typically contains fewer additives.
Q: Can I use homemade jelly instead of store-bought?
A: Absolutely! Homemade jelly will add a unique and delicious flavor to your sandwich. Just make sure it has a good consistency and isn’t too runny.
Q: How can I prevent my sandwich from getting soggy?
A: Spread a thin layer of peanut butter on both slices of bread before adding the jelly to create a moisture barrier. You can also lightly toast the bread before assembly.
Q: Is it okay to add other ingredients to my PB&J?
A: Of course! Some popular additions include sliced bananas, chocolate chips, or even a sprinkle of granola for added texture.
Q: Can I make a PB&J ahead of time?
A: It’s best to enjoy PB&Js fresh, but you can make them a few hours in advance. Wrap them tightly and store them in the refrigerator to prevent them from drying out.
Final Thoughts
The peanut butter and jelly sandwich is more than just a simple meal; it’s a nostalgic reminder of simpler times and a testament to the enduring power of comfort food. Don’t be afraid to experiment with different ingredients and variations to create your perfect PB&J masterpiece. Whether you’re a seasoned chef or a kitchen novice, this recipe is sure to bring a smile to your face. Share your creations with loved ones and rediscover the joy of this classic culinary creation!