
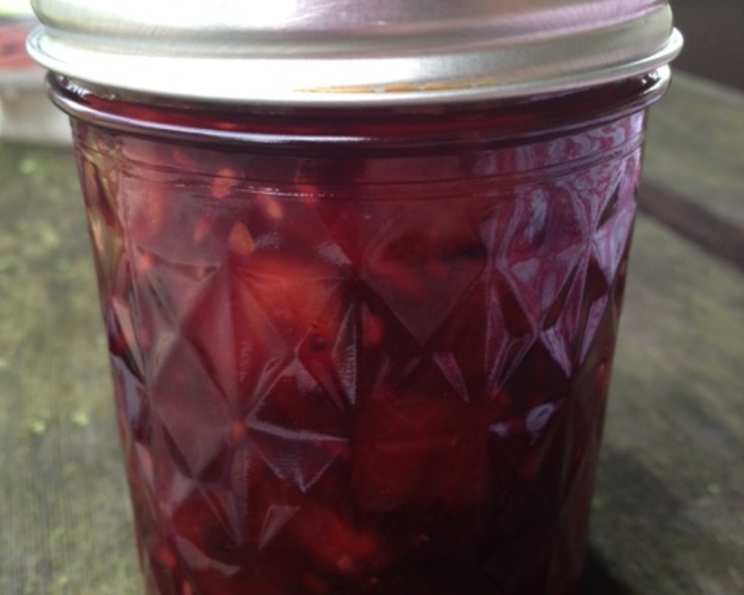
Peach Blackberry Jam: A Taste of Summer Sunshine
I remember the first time I tasted peach blackberry jam. My grandmother, a true Southern matriarch with a garden overflowing with sun-ripened bounty, had jars lined up on her pantry shelves like soldiers. That first spoonful, spread thick on a warm biscuit, was an explosion of sweet and tart, a symphony of late-summer flavors that danced on my tongue. The juicy sweetness of the peaches perfectly complemented the slightly tangy blackberries, creating a jam that was both comforting and incredibly addictive. This recipe is my attempt to recreate that cherished memory, bringing a little bit of Grandma’s magic into my own kitchen.
Recipe Overview
- Prep Time: 30 minutes
- Cook Time: 25 minutes
- Total Time: 55 minutes
- Yields: 6 pints
- Dietary Type: Vegetarian, Gluten-Free
Ingredients
- 4 lbs peaches
- 1 quart blackberries
- 1 tablespoon lemon juice
- 5 1/2 cups sugar
- 1 teaspoon ground cinnamon
- 1 (1 2/3 ounce) box powdered fruit pectin
Equipment Needed
- Large pot (at least 6-quart capacity)
- Wooden spoon or heat-resistant spatula
- Ladle
- Hot, sterilized 8 oz jars
- Jar lifter
- Water-bath canner
- Jar funnel (optional but recommended)
Instructions
- Begin by preparing your fruit. Thoroughly wash the peaches and blackberries.
- Peel the peaches. An easy way to do this is to blanch the peaches for 30-60 seconds in boiling water, then immediately transfer them to an ice bath. The skins should slip right off.
- Chop the peeled peaches into approximately 1/2-inch pieces.
- In a large pot, combine the chopped peaches, blackberries, and lemon juice. The lemon juice helps to brighten the flavors and acts as a natural preservative.
- Stir the mixture to ensure that the fruit is well coated with the lemon juice.
- Place the pot over medium-high heat and bring to a boil. This initial boil helps to soften the fruit and release its natural juices.
- Once the mixture is boiling, add the powdered fruit pectin. Stir constantly to ensure the pectin is fully dissolved and there are no clumps. Undissolved pectin can result in a gritty texture.
- Bring to a boil again after adding the pectin, stirring continuously.
- Now, add the sugar and ground cinnamon. The cinnamon adds a warm, comforting spice note that complements the fruit beautifully.
- Bring the mixture to a hard, rolling boil. A hard, rolling boil is defined as a boil that cannot be stirred down.
- Boil for 15 minutes, stirring often. This is a crucial step for thickening the jam. Stirring prevents the jam from sticking to the bottom of the pot and scorching.
- While the jam is cooking, ensure your jars are sterilized. To sterilize, place clean jars in a boiling water bath for 10 minutes. Keep the jars hot until ready to fill.
- After boiling for 15 minutes, remove the pot from the heat. To check if the jam is ready, place a small spoonful on a chilled plate. If it sets up quickly and doesn’t run, it’s ready. If it’s still too runny, continue boiling for a few more minutes, testing periodically.
- Carefully ladle the hot jam into the hot, sterilized 8 oz jars, leaving about 1/4 inch of headspace. Use a jar funnel to minimize spills.
- Wipe the rims of the jars with a clean, damp cloth to remove any drips of jam. This ensures a proper seal.
- Place the lids on the jars and screw on the bands fingertip-tight. Do not overtighten.
- Process the filled jars in a water-bath canner for 10 minutes. Ensure the water covers the jars by at least 1 inch. Processing ensures a proper seal and extends the shelf life of the jam.
- After processing, carefully remove the jars from the canner using a jar lifter and place them on a towel-lined surface to cool.
- As the jars cool, you should hear a popping sound, which indicates that the jars have sealed properly.
- Let the jars cool completely, undisturbed, for 12-24 hours.
- After cooling, check the seals by pressing down on the center of the lid. If the lid doesn’t flex, the jar is sealed. If the lid flexes, the jar is not sealed and should be refrigerated and used promptly or reprocessed with a new lid.
Expert Tips & Tricks
- Use ripe but firm peaches: Overripe peaches will result in a mushy jam.
- Don’t skip the lemon juice: It brightens the flavors and acts as a natural preservative.
- Stir frequently: Prevent sticking and scorching by stirring regularly, especially during the boiling process.
- Adjust sugar to taste: If your peaches are very sweet, you may want to reduce the amount of sugar slightly. However, sugar is important for preservation, so don’t reduce it too much.
- Test for doneness: The chilled plate test is the most reliable way to check if the jam has reached the proper consistency.
- Ensure a good seal: A proper seal is essential for long-term storage. Carefully follow the canning instructions to ensure the jars are properly sealed.
Serving & Storage Suggestions
Peach blackberry jam is delicious spread on toast, biscuits, scones, or muffins. It’s also a wonderful accompaniment to cheese and crackers. You can even use it as a glaze for roasted meats or poultry.
Properly sealed jars of peach blackberry jam can be stored in a cool, dark place for up to 1 year. Once opened, the jam should be stored in the refrigerator. Refrigerated jam will last for several weeks.
Nutritional Information
| Nutrient | Amount per Serving (approx. 2 tbsp) | % Daily Value* |
|---|---|---|
| Calories | 75 kcal | 4% |
| Total Fat | 0 g | 0% |
| Saturated Fat | 0 g | 0% |
| Cholesterol | 0 mg | 0% |
| Sodium | 2 mg | 0% |
| Total Carbohydrate | 19 g | 7% |
| Dietary Fiber | 1 g | 4% |
| Sugars | 17 g | N/A |
| Protein | 0 g | 0% |
*Percent Daily Values are based on a 2,000 calorie diet.
Variations & Substitutions
- Spice it up: Add a pinch of ground ginger or a dash of vanilla extract for a more complex flavor.
- Use different berries: Substitute raspberries, blueberries, or strawberries for the blackberries.
- Low-sugar jam: Use a sugar substitute specifically designed for jam making. Be sure to follow the manufacturer’s instructions.
- Peach variety: Feel free to experiment with different varieties of peaches, such as white peaches or donut peaches, to achieve a unique flavor profile.
FAQs (Frequently Asked Questions)
Q: Can I use frozen blackberries?
A: Yes, you can use frozen blackberries. Thaw them slightly before adding them to the pot. Be aware that frozen berries may release more liquid, so you may need to cook the jam for a longer time to reach the desired consistency.
Q: Do I have to peel the peaches?
A: While you can leave the skins on, the jam will have a smoother texture if you peel the peaches.
Q: Why is my jam not setting?
A: Several factors can prevent jam from setting, including using too little pectin, not boiling the mixture long enough, or using underripe fruit. Ensure you follow the recipe carefully and test for doneness using the chilled plate test.
Q: Can I double this recipe?
A: It’s generally not recommended to double jam recipes, as it can be more difficult to achieve a proper set. It’s better to make multiple batches.
Q: How do I know if my jars are properly sealed?
A: After cooling, the lid should be concave and not flex when pressed. If the lid flexes, the jar is not properly sealed and should be refrigerated and used promptly or reprocessed with a new lid.
Final Thoughts
Peach blackberry jam is a delightful way to capture the flavors of summer and enjoy them throughout the year. Don’t be intimidated by the canning process – it’s simpler than you might think! Gather your ingredients, follow the steps carefully, and savor the satisfaction of creating your own homemade jam. This recipe is more than just a list of instructions; it’s an invitation to connect with the seasons, to share the fruits of your labor with loved ones, and to create memories that will last a lifetime. I hope you enjoy making and sharing this special jam as much as I do. Please feel free to share your results and any variations you try! It’s wonderful to exchange ideas and see everyone’s creative takes on this classic recipe.