
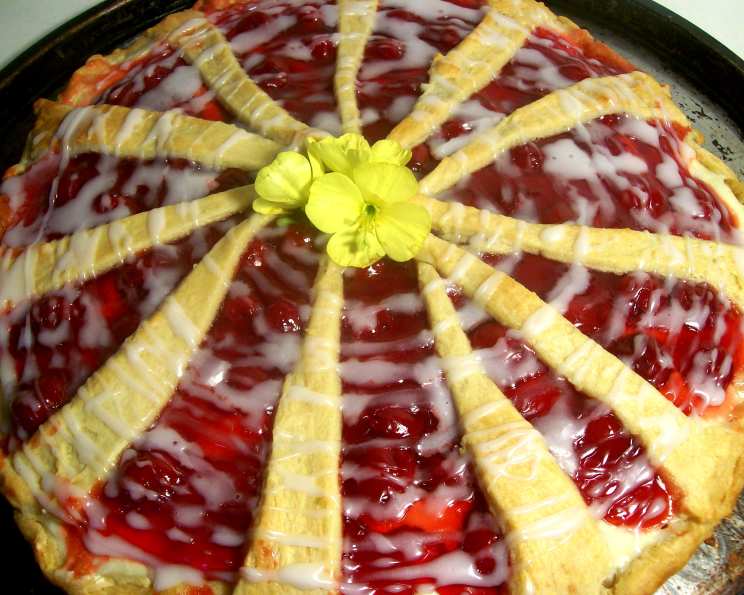
Peachy Cheese Coffee Cake: A Slice of Sunshine
The aroma of warm peaches and sweet cream cheese still brings me back to Sunday mornings at my grandmother’s house. Nana always had a knack for making the ordinary feel extraordinary, and this coffee cake was a testament to that. I remember sitting at her kitchen table, sunlight streaming through the window, as she sliced into the golden pastry. The flaky crust, the tangy-sweet filling, and the delicate drizzle of glaze – it was pure comfort on a plate. More than just a dessert, it was a symbol of family, love, and the simple joys of life. This recipe, adapted from Pampered Chef, captures that same warmth and ease, allowing you to create your own cherished memories.
Recipe Overview
- Prep Time: 20 minutes
- Cook Time: 25-30 minutes
- Total Time: 45-50 minutes
- Servings: 12
- Yield: 1 coffee cake
- Dietary Type: Not Gluten-Free
Ingredients
- 2 (8 ounce) packages crescent roll dough
- 1 (8 ounce) package cream cheese, softened
- ¼ cup powdered sugar
- 1 egg yolk
- ½ teaspoon vanilla extract (or almond extract)
- 1 (21 ounce) can peach pie filling (or cherry, apple or blueberry pie filling)
Glaze
- ½ cup powdered sugar
- 2-3 teaspoons milk (or orange juice)
Equipment Needed
- Large round pizza pan (or baking stone)
- Rolling pin
- Mixing bowl
- Whisk
- Pizza cutter
Instructions
- Preheat your oven to 350°F (175°C). This ensures the coffee cake bakes evenly and the crust turns a beautiful golden brown.
- Unroll both packages of crescent roll dough. Separate each package into 8 triangles, for a total of 16 triangles. Reserve 4 triangles for decoration. These will become the spoke-like design on top.
- On a large round pizza pan (or baking stone), arrange 12 of the crescent roll triangles in a circle. Place the wide ends of the triangles toward the outside edge of the pan, and the points toward the center. The points will not meet – this is expected.
- Using a rolling pin, gently roll the dough into a 14″ circle. Be sure to press the seams together to seal them, creating a solid base. Aim for about a 3″ diameter opening in the center of the circle. This opening helps the coffee cake bake evenly.
- Form a slightly raised rim along both the inner and outer edges of the dough circle. This will help contain the filling and create a visually appealing border.
- In a medium-sized bowl, combine the softened cream cheese, powdered sugar, egg yolk, and vanilla extract (or almond extract). Use a whisk to mix the ingredients until the mixture is smooth and creamy. Make sure the cream cheese is truly softened to avoid lumps.
- Spread the cream cheese mixture evenly over the dough base, leaving a ½” border around the edge. This prevents the filling from overflowing and ensures a crisp crust.
- Spoon the peach pie filling evenly over the cream cheese mixture. Distribute the peaches so that each bite is bursting with flavor.
- Using a pizza cutter, cut each of the remaining 4 dough triangles lengthwise into three strips. This will give you 12 strips to create the decorative topping.
- Arrange the dough strips evenly in a spoke-like fashion over the filling. Press the ends of each strip to seal them at the center and outer edges. This creates a visually appealing design and helps secure the strips in place.
- Bake for 25-30 minutes, or until the crust is golden brown. Keep an eye on it towards the end to prevent burning. The internal temperature of the crust should reach around 200°F (93°C).
- Remove the coffee cake from the oven and let it cool for 15 minutes on the pizza pan or baking stone. This allows the filling to set slightly before glazing.
- While the coffee cake cools, prepare the glaze. In a small bowl, combine the powdered sugar and milk (or orange juice). Mix until smooth and free of lumps. Adjust the amount of liquid to achieve your desired consistency – you want it thick enough to drizzle but thin enough to spread easily.
- Drizzle the glaze evenly over the coffee cake. You can use a spoon or a piping bag for more precise application.
- Cut into wedges and serve warm. Enjoy!
Expert Tips & Tricks
- Softened Cream Cheese is Key: Make sure your cream cheese is completely softened to avoid a lumpy filling. Leave it at room temperature for at least an hour.
- Don’t Overbake: Overbaking can lead to a dry crust. Keep a close eye on the coffee cake during the last few minutes of baking.
- Customize the Filling: Get creative with your fillings! Cherry, apple, or blueberry pie filling are all excellent alternatives. You can even use fresh fruits like sliced strawberries or raspberries.
- Add a Sprinkle of Nuts: Toast some chopped almonds or pecans and sprinkle them over the coffee cake before baking for added texture and flavor.
- Almond Extract Boost: If you’re a fan of almond flavor, use almond extract instead of vanilla extract in both the filling and the glaze.
- Make Ahead: Prepare the coffee cake (unbaked) and store it in the refrigerator overnight. Add the glaze just before serving.
Serving & Storage Suggestions
Serve the Peachy Cheese Coffee Cake warm, either on its own or with a dollop of whipped cream or a scoop of vanilla ice cream. It pairs perfectly with a cup of coffee, tea, or a glass of cold milk.
To store leftovers, allow the coffee cake to cool completely, then wrap it tightly in plastic wrap or place it in an airtight container. It can be stored at room temperature for up to 2 days, in the refrigerator for up to 4 days, or in the freezer for up to 2 months.
To reheat, warm individual slices in the microwave for 15-20 seconds or bake the entire coffee cake in a preheated oven at 300°F (150°C) for 10-15 minutes, or until heated through.
Nutritional Information
| Nutrient | Amount per Serving | % Daily Value |
|---|---|---|
| Calories | 216 kcal | – |
| Calories from Fat | 84 kcal | – |
| Total Fat | 9.4 g | 14% |
| Saturated Fat | 4.9 g | 24% |
| Cholesterol | 55.6 mg | 18% |
| Sodium | 263.2 mg | 10% |
| Total Carbohydrate | 27.8 g | 9% |
| Dietary Fiber | 1.4 g | 5% |
| Sugars | 9 g | – |
| Protein | 5.2 g | – |
Note: Nutritional information is an estimate and may vary based on specific ingredients and portion sizes.
Variations & Substitutions
- Gluten-Free Version: Use gluten-free crescent roll dough or make your own gluten-free crust using a blend of gluten-free flours.
- Dairy-Free Option: Substitute the cream cheese with a plant-based cream cheese alternative and use non-dairy milk in the glaze.
- Seasonal Fruit Swaps: Experiment with different seasonal fruits like strawberries in the spring, blueberries in the summer, apples in the fall, or cranberries in the winter.
- Citrus Zest: Add a teaspoon of lemon or orange zest to the cream cheese filling for a brighter flavor.
- Spice It Up: Incorporate a pinch of cinnamon, nutmeg, or cardamom into the filling for a warm, comforting twist.
FAQs (Frequently Asked Questions)
Q: Can I use a different size pizza pan?
A: Yes, but you may need to adjust the baking time. A smaller pan might require a slightly longer baking time, while a larger pan might require a shorter time. Keep a close eye on the crust to prevent burning.
Q: Can I use fresh peaches instead of canned pie filling?
A: Absolutely! Just peel and slice the peaches, then toss them with a little sugar and cornstarch before adding them to the coffee cake.
Q: Can I freeze the unbaked coffee cake?
A: Yes, you can freeze the unbaked coffee cake for up to 2 months. Wrap it tightly in plastic wrap and then in aluminum foil. Thaw it in the refrigerator overnight before baking as directed.
Q: My cream cheese filling is lumpy. What did I do wrong?
A: The most common cause of lumpy cream cheese filling is using cream cheese that isn’t fully softened. Make sure to let it sit at room temperature for at least an hour before mixing.
Q: Can I add chocolate chips to the filling?
A: Yes, a handful of chocolate chips would be a delicious addition to the cream cheese filling!
Final Thoughts
This Peachy Cheese Coffee Cake is more than just a recipe; it’s an invitation to create moments of joy and connection. It’s a reminder that sometimes, the simplest things in life are the most satisfying. So, gather your ingredients, preheat your oven, and embark on a culinary adventure. Don’t be afraid to experiment with different fillings and toppings to make it your own. And most importantly, share your creation with loved ones and savor the sweet moments together. I encourage you to try this recipe and would love to hear your feedback and any variations you come up with! Perhaps you’ll serve it with a scoop of vanilla ice cream and a sprinkle of cinnamon for an extra touch of indulgence. Happy baking!