
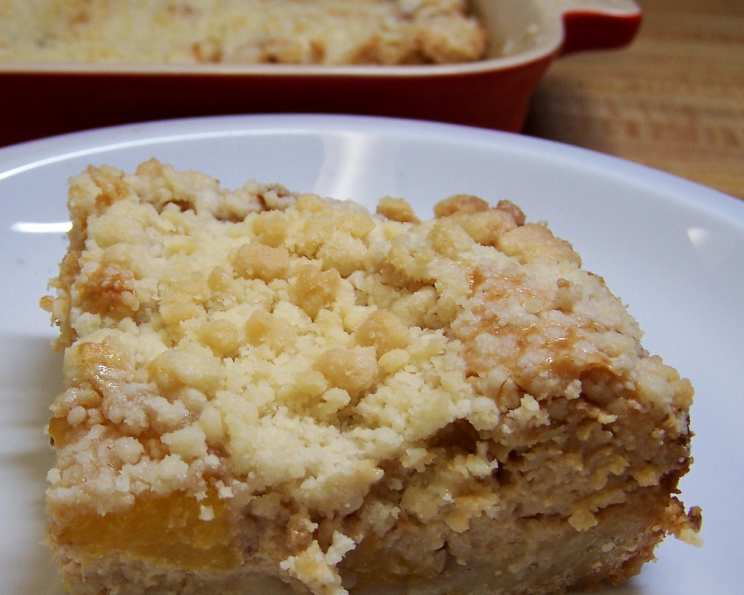
Peachy Cheesecake Squares: A Taste of Summer Sunshine
My summers growing up were always synonymous with the explosion of fruit at our local farmer’s market, and nothing quite signaled the season like the arrival of perfectly ripe peaches. I remember one particular summer, when I was around ten, my grandmother made a dessert with those peaches that etched itself into my memory. It wasn’t a pie or a cobbler, but something altogether more decadent and delightful—a cheesecake, but with a twist. The juicy peaches nestled within a creamy cheesecake filling, all supported by a buttery crust. The first bite transported me to pure summer bliss. This recipe for Peachy Cheesecake Squares captures that very same magic, bringing back those cherished memories with every delicious bite.
Recipe Overview
- Prep Time: 30 minutes
- Cook Time: 45-50 minutes
- Total Time: 1 hour 15 minutes
- Servings: 20 squares
- Yield: 1 (9×13 inch) pan
- Dietary Type: Not specified
Ingredients
- 2 cups ripe peaches, peeled and sliced (about 4 large or 7-8 small)
- 2 teaspoons cinnamon sugar
- 2 ½ cups flour
- 1 ½ cups powdered sugar
- 1 cup chilled butter (2 sticks)
- 1 (8 ounce) package cream cheese, softened
- 1 (14 ounce) can sweetened condensed milk
- 1 egg
- 2 teaspoons vanilla extract
Equipment Needed
- 9×13 inch baking pan
- Large bowl
- Sifter
- Mixer (hand or stand)
- Fork
Instructions
- Preheat your oven to 350 degrees Fahrenheit (175 degrees Celsius).
- Prepare the peaches: Peel, core, and thinly slice the peaches. Alternatively, you can chop them if you prefer a chunkier texture.
- In a medium bowl, gently toss the sliced peaches with the cinnamon sugar. Set them aside. The cinnamon sugar will draw out some of the peach’s natural juices, which will add even more flavor to the dessert.
- Prepare the crust mixture: In a large bowl, sift together the flour and powdered sugar. Sifting ensures that there are no lumps in your crust, giving it a smoother texture.
- Cut in the chilled butter into the flour and sugar mixture. You can use a pastry blender for this, or simply use your fingertips. The goal is to break the butter into small pieces that are evenly distributed throughout the flour mixture. The mixture should resemble coarse crumbs and be a bit dry.
- Remove 2 cups of the flour/sugar mixture and set it aside. This reserved mixture will be used for the topping.
- Press the remaining flour mixture into the bottom of an ungreased 9×13 inch pan. Distribute the mixture evenly and press firmly to form the bottom crust. You can use the bottom of a measuring cup to help you achieve a smooth, even surface.
- Bake the crust in the preheated oven for 15 minutes. This pre-baking step helps to set the crust and prevent it from becoming soggy once the filling is added.
- While the crust is baking, prepare the cheesecake filling: In a large mixing bowl, beat the softened cream cheese until it is light and fluffy. This will ensure that your cheesecake filling has a smooth, creamy texture.
- Pour in the sweetened condensed milk and beat until the mixture is smooth and well combined.
- Add the egg and vanilla extract to the cream cheese mixture and mix until just combined. Be careful not to overmix, as this can result in a tough cheesecake.
- Once the crust has baked for 15 minutes, remove it from the oven.
- Arrange the cinnamon-sugar coated peaches over the baked crust in an even layer.
- Pour any accumulated peach juice from the bowl over the peaches. This will add extra flavor and moisture to the dessert.
- Gently pour the prepared cream cheese mixture over the peaches, spreading it evenly. Try to smooth over any peaches that might be “poking” up through the cream. This will ensure an even topping.
- Sprinkle the reserved flour/sugar mixture over the cream cheese filling.
- Use a fork to break up any large chunks in the topping mixture, ensuring that it is evenly distributed over the cream cheese filling.
- Bake in the oven for 30-35 minutes, or until the peaches are bubbling and the outer crust is just beginning to brown on top. The center of the cheesecake should be set but still have a slight jiggle.
- Remove the Peachy Cheesecake Squares from the oven and let them cool completely before cutting into squares. It is easier to cut cleanly when the dessert is fully cooled.
- Store any leftovers in the refrigerator.
Expert Tips & Tricks
- For a richer crust, use European-style butter, which has a higher fat content.
- If your peaches are not very sweet, you can add a little extra sugar to the cinnamon-sugar mixture.
- To prevent the crust from browning too quickly, you can cover the edges with foil during the last 10-15 minutes of baking.
- If you want to add a little extra flavor to the topping, you can mix in some chopped nuts, such as pecans or walnuts.
- For a more intense peach flavor, consider using a peach extract in the cream cheese filling.
- Don’t overbake the cheesecake! It’s better to have a slightly jiggly center than an overbaked, dry cheesecake. The cheesecake will continue to set as it cools.
Serving & Storage Suggestions
These Peachy Cheesecake Squares are delicious served chilled or at room temperature. For an elegant presentation, dust the squares with a light coating of powdered sugar or garnish with fresh peach slices and a sprig of mint. A dollop of whipped cream or a scoop of vanilla ice cream also makes a lovely accompaniment.
Store leftovers in an airtight container in the refrigerator for up to 3-4 days. For longer storage, you can freeze the squares for up to 2-3 months. Wrap them individually in plastic wrap and then place them in a freezer-safe container. To thaw, transfer the squares to the refrigerator overnight.
Nutritional Information
| Nutrient | Amount per Serving | % Daily Value |
|---|---|---|
| Calories | 289.7 kcal | N/A |
| Calories from Fat | 138 g | 48% |
| Total Fat | 15.3 g | 23% |
| Saturated Fat | 9.5 g | 47% |
| Cholesterol | 54.2 mg | 18% |
| Sodium | 128.1 mg | 5% |
| Total Carbohydrate | 34.1 g | 11% |
| Dietary Fiber | 0.7 g | 2% |
| Sugars | 21.6 g | 86% |
| Protein | 4.6 g | 9% |
Note: Nutritional information is an estimate and may vary based on specific ingredients and portion sizes.
Variations & Substitutions
- Gluten-Free: Use a gluten-free flour blend for the crust. Be sure to choose a blend that is designed for baking and that contains xanthan gum or another binding agent.
- Dairy-Free: Substitute the cream cheese with a dairy-free cream cheese alternative and use a dairy-free butter substitute for the crust.
- Other Fruits: Feel free to experiment with other fruits, such as blueberries, raspberries, or strawberries. Adjust the amount of cinnamon sugar accordingly.
- Spice It Up: Add a pinch of nutmeg or cardamom to the flour mixture for a warm, spiced flavor.
- Citrus Zest: Add the zest of a lemon or orange to the cream cheese filling for a brighter, more citrusy flavor.
FAQs (Frequently Asked Questions)
Q: Can I use frozen peaches for this recipe?
A: Yes, you can use frozen peaches. Be sure to thaw them completely and drain off any excess liquid before using them.
Q: Can I make this recipe ahead of time?
A: Absolutely! These Peachy Cheesecake Squares are a great make-ahead dessert. They can be stored in the refrigerator for up to 3 days.
Q: How do I prevent the crust from getting soggy?
A: Pre-baking the crust helps to prevent it from getting soggy. Also, be sure to drain off any excess liquid from the peaches before adding them to the crust.
Q: Can I use a different size pan?
A: Yes, but you may need to adjust the baking time. If you use a smaller pan, the cheesecake will be thicker and may require a longer baking time.
Q: What if my cheesecake cracks?
A: Cracking is usually caused by rapid temperature changes. To prevent cracking, avoid opening the oven door frequently during baking and allow the cheesecake to cool slowly in the oven with the door slightly ajar.
Final Thoughts
Now, it’s your turn to create some summer sunshine with these Peachy Cheesecake Squares! Don’t be intimidated by the steps; the reward is well worth the effort. This dessert is not only delicious but also a wonderful way to share the flavors of summer with friends and family. I encourage you to try this recipe, experiment with variations, and, most importantly, share your feedback and creations! Pair these squares with a glass of iced tea or a light white wine for the perfect summer treat. Enjoy!