
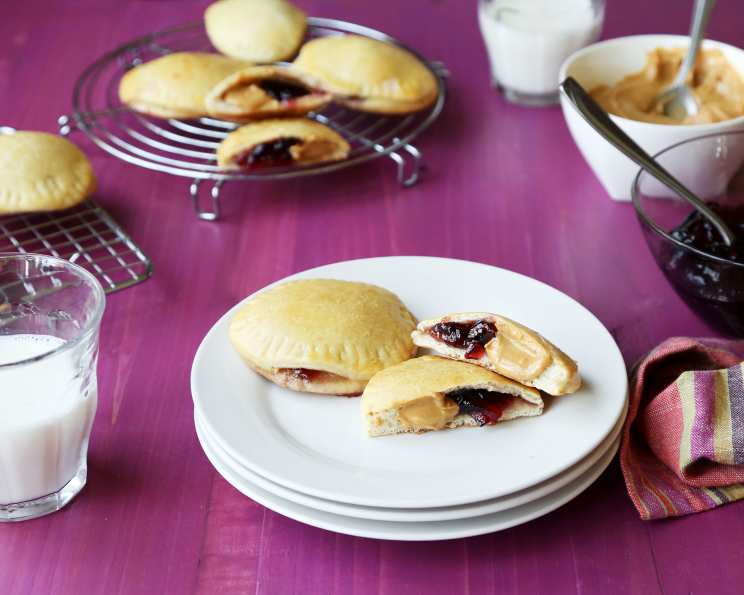
Peanut Butter and Jelly Puffs for Small (And Big) Kids
There’s something so magical about peanut butter and jelly. The creamy, nutty sweetness mingling with the fruity tang is a flavor combination that transports me right back to childhood. I remember rainy afternoons spent in my grandmother’s kitchen, the comforting aroma of freshly baked bread filling the air. She’d let me help spread the peanut butter and jelly on slices of still-warm bread, and somehow, that simple sandwich always tasted like pure love. Now, making these PB&J puffs for my nieces and nephews evokes that same heartwarming feeling and creates new memories with each delicious bite.
Recipe Overview
- Prep Time: 20 minutes
- Cook Time: 15-17 minutes
- Total Time: 35-37 minutes
- Yields: 12-14 Puffs
- Serves: 4
- Dietary Type: Vegetarian
Ingredients
- 1 (10 ounce) can refrigerated pizza dough
- ¼ cup peanut butter
- ¼ cup jelly (any flavor)
- 1 tablespoon cinnamon-sugar mixture (optional)
Equipment Needed
- Baking sheet
- Rolling pin
- 3-inch round cookie cutter or glass
- Small bowls or spoons for peanut butter and jelly
- Pastry brush (optional)
Instructions
-
Begin by preheating your oven to 375°F (190°C). This ensures that the puffs will bake evenly and develop a golden-brown crust.
-
Lightly flour a clean, flat surface. Unroll the pizza dough and use a rolling pin to roll it out to approximately 1/8-inch thickness. The thinner the dough, the crispier the puffs will be.
-
Using a 3-inch round cookie cutter or a similarly sized glass, cut circles out of the rolled-out dough. Don’t discard the leftover dough scraps; gather them together, reroll, and cut out more circles until you’ve used up all the dough.
-
Now comes the fun part: adding the fillings! Place about ½ teaspoon of peanut butter in the center of each dough circle, followed by ½ teaspoon of jelly. Be careful not to overfill them, as this can make the puffs difficult to seal and cause the filling to leak out during baking. Avoid spreading the peanut butter and jelly. Keeping them contained in the center will make sealing easier.
-
Carefully wrap the dough around the peanut butter and jelly filling. Pinch the edges firmly to seal each puff completely. Make sure there are no gaps or holes to prevent the filling from escaping during baking. Place the sealed puffs seam-side down on a greased cookie sheet.
-
For a beautiful, golden finish, you can brush the tops of the puffs lightly with water or an egg wash. To make an egg wash, whisk 1 egg with 1 tablespoon of water. This will help the puffs brown nicely in the oven.
-
If desired, sprinkle the tops of the puffs with a cinnamon-sugar mixture before baking. This adds a touch of sweetness and warmth to the finished product.
-
Bake the peanut butter and jelly puffs for 15 to 17 minutes, or until they are lightly browned. Keep a close eye on them during the last few minutes of baking to prevent them from burning.
-
Once the puffs are golden brown, remove them from the oven and let them cool on the baking sheet for at least 10 minutes before serving. Be extremely careful, as the jelly filling can be extremely hot!
-
To reheat any leftover puffs, place them in the microwave oven on medium heat for about 5 seconds per puff. This will warm them through without making them soggy.
Expert Tips & Tricks
- Preventing Leaks: A common problem with filled pastries is filling leakage. Make sure to pinch the dough edges together very firmly to create a solid seal. You can also brush the edges of the dough with a little water before sealing to help them stick together better.
- Elevated Flavor: Toast the peanut butter lightly in a dry pan before using. This intensifies the nutty flavor and adds a lovely depth. Let it cool completely before adding it to the puffs.
- Dough Consistency: If your pizza dough seems too sticky to work with, try chilling it in the refrigerator for about 15 minutes before rolling it out. This will make it easier to handle.
- Customization: Don’t be afraid to experiment with different flavors of jelly! Grape, strawberry, raspberry, and even apricot jam all work well in these puffs.
- Baking Sheet Tip: Line your baking sheet with parchment paper for easy cleanup and to prevent the puffs from sticking.
- Egg Wash Substitute: If you don’t want to use an egg wash, you can brush the puffs with melted butter or milk instead. This will still help them brown nicely in the oven.
Serving & Storage Suggestions
These Peanut Butter and Jelly Puffs are best served warm, straight from the oven, when the filling is gooey and delicious. They make a fantastic snack, dessert, or even a fun addition to a brunch spread. You can arrange them artfully on a platter or simply pile them high in a basket for a more casual presentation.
Leftover puffs can be stored in an airtight container at room temperature for up to 2 days, or in the refrigerator for up to 4 days. To reheat, microwave them briefly or warm them in a low oven until heated through. For longer storage, you can freeze the baked puffs. Wrap them individually in plastic wrap, then place them in a freezer-safe bag or container. They can be stored in the freezer for up to 2 months. Thaw them completely before reheating.
Nutritional Information
| Nutrient | Amount per Serving | % Daily Value |
|---|---|---|
| Calories | 150.7 kcal | N/A |
| Calories from Fat | N/A | 49% |
| Total Fat | 8.1 g | 12% |
| Saturated Fat | 1.7 g | 8% |
| Cholesterol | 0 mg | 0% |
| Sodium | 80.3 mg | 3% |
| Total Carbohydrate | 17.8 g | 5% |
| Dietary Fiber | 1.2 g | 4% |
| Sugars | 12.2 g | 48% |
| Protein | 4.1 g | 8% |
Note: Nutritional information is an estimate and may vary depending on specific ingredients and portion sizes.
Variations & Substitutions
- Gluten-Free: Use a gluten-free pizza dough for a gluten-free version. Several brands offer pre-made gluten-free pizza doughs in the refrigerated section of grocery stores.
- Different Nut Butters: Experiment with different nut butters like almond butter, cashew butter, or sunflower seed butter for a unique flavor twist.
- Homemade Dough: If you’re feeling ambitious, you can make your own pizza dough from scratch. There are countless recipes available online.
- Savory Option: For a savory variation, try using pesto and mozzarella cheese as fillings instead of peanut butter and jelly.
- Jam Selection: Explore using different types of jam or preserves for a unique flavor profile. Consider using fig jam, or even a spicy pepper jelly for adults!
- Vegan Option: Most store-bought pizza doughs are already vegan, but double-check the ingredient list to be sure. Use a vegan peanut butter and your favorite jelly!
FAQs (Frequently Asked Questions)
Q: Can I make these ahead of time?
A: Yes, you can assemble the puffs ahead of time and store them in the refrigerator for a few hours before baking. However, it’s best to bake them fresh for the best flavor and texture.
Q: Can I use puff pastry instead of pizza dough?
A: Absolutely! Puff pastry will create a flakier, more delicate puff. Just be sure to adjust the baking time accordingly, as puff pastry may cook faster than pizza dough.
Q: What if my dough is too sticky?
A: Try chilling the dough in the refrigerator for about 15 minutes before rolling it out. This will make it easier to handle. You can also lightly flour your work surface to prevent the dough from sticking.
Q: How do I prevent the filling from leaking out?
A: Be sure to pinch the edges of the dough together very firmly to create a tight seal. Avoid overfilling the puffs, as this can also cause the filling to leak out during baking.
Q: Can I freeze these puffs?
A: Yes, you can freeze the baked puffs for up to 2 months. Wrap them individually in plastic wrap, then place them in a freezer-safe bag or container. Thaw them completely before reheating.
Final Thoughts
These Peanut Butter and Jelly Puffs are a delightful treat that both kids and adults will adore. They’re easy to make, endlessly customizable, and guaranteed to bring a smile to everyone’s face. Don’t be afraid to get creative with your fillings and toppings, and have fun experimenting with different flavor combinations. Whether you’re making them for a special occasion or simply as a fun weekend activity, I hope you enjoy this recipe as much as my family and I do! Let me know what variations you try – I’d love to hear about your culinary adventures!