
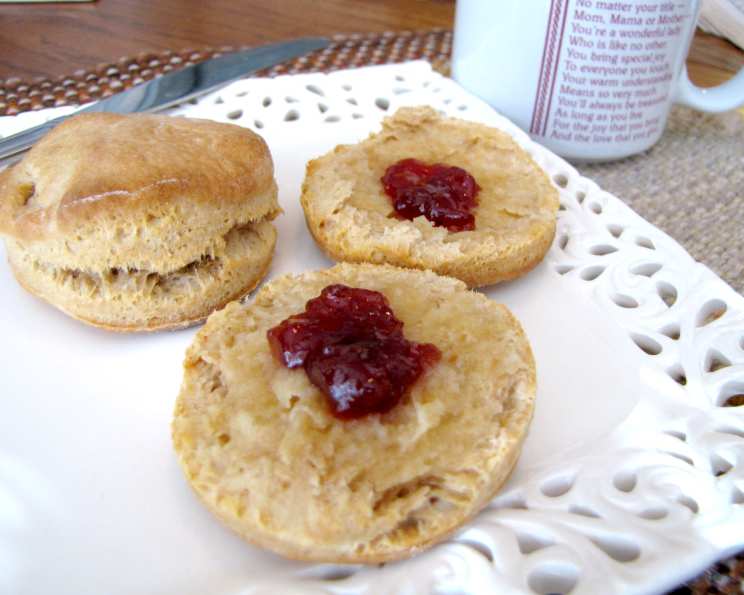
Peanut Butter Biscuits: A Nostalgic Comfort
The scent of peanut butter has always transported me back to childhood. I remember sneaking spoonfuls straight from the jar, a forbidden treat that felt deliciously rebellious. These Peanut Butter Biscuits evoke that same comforting nostalgia. Their slightly savory, subtly sweet flavor and tender crumb make them irresistible, a perfect homemade indulgence. They’re simple enough for a weekday breakfast, yet special enough to serve alongside a holiday meal.
Recipe Overview
- Prep Time: 10 minutes
- Cook Time: 10-12 minutes
- Total Time: 22 minutes
- Servings: 12
- Yield: 12 biscuits
- Dietary Type: Vegetarian
Ingredients
- 2 cups flour (sifted)
- ¾ teaspoon salt
- 2 ½ teaspoons baking powder
- 2 tablespoons shortening (or substitute butter for shortening)
- ¼ cup peanut butter (smooth or crunchy)
- ¾ cup milk (about)
Equipment Needed
- Large Mixing Bowl
- Measuring Cups and Spoons
- Pastry Blender or Two Knives
- Pastry Cloth (optional)
- Rolling Pin
- Biscuit Cutter (or knife)
- Baking Sheet
Instructions
-
Begin by preheating your oven to 450 degrees Fahrenheit (232 degrees Celsius). Ensure your oven rack is positioned in the center for even baking.
-
In a large mixing bowl, combine the sifted flour, salt, and baking powder. Sifting the flour is crucial for achieving a light and airy texture.
-
Now, the fun part! Using a pastry blender or two knives, cut in the shortening (or butter) and peanut butter into the dry ingredients. Continue working the mixture until it resembles coarse crumbs. This step is important for creating flaky layers in the finished biscuits. You should still see small pieces of fat throughout.
-
Create a well in the center of the crumbly mixture. Pour in the milk, adding it gradually. Stir the ingredients together just until a soft dough forms. Be careful not to overmix, as this will result in tough biscuits. The dough should be slightly shaggy and sticky.
-
Lightly flour a pastry cloth or your work surface. Gently turn the dough out onto the floured surface. Knead the dough very gently for about 30 seconds. The goal is simply to bring the dough together, not to develop the gluten.
-
Using a rolling pin, roll out the dough to approximately ½-inch thickness. Alternatively, you can pat the dough out with your hands to the desired thickness.
-
Cut out the biscuits using a biscuit cutter. If you don’t have a biscuit cutter, a sharp knife will work just fine. Aim for about 12 biscuits. Re-roll any scraps to get as many biscuits as possible, but be aware that these “second-generation” biscuits might not be as tender.
-
Place the biscuits on an ungreased baking sheet. For soft-sided biscuits, place them close together. For crusty-sided biscuits, space them apart. The choice is yours!
-
Bake in the preheated oven for 10-12 minutes, or until the biscuits are golden brown on top. Keep a close eye on them towards the end of the baking time to prevent burning.
-
For drop biscuits: If you prefer drop biscuits, increase the milk to 1 cup. Drop spoonfuls of the dough onto a greased baking sheet. Bake for 10-12 minutes, or until golden brown.
Expert Tips & Tricks
- Cold Ingredients are Key: Use cold shortening or butter and cold milk for the flakiest biscuits. You can even chill the dry ingredients beforehand.
- Don’t Overmix: Overmixing develops gluten, resulting in tough biscuits. Mix only until the ingredients are just combined.
- High Heat is Important: Baking at a high temperature creates steam, which helps the biscuits rise and become light and fluffy.
- Peanut Butter Choice: While smooth peanut butter will give you a more even texture, crunchy peanut butter adds a delightful bit of surprise and texture.
- Egg Wash: For a shinier, more golden crust, brush the tops of the biscuits with a beaten egg before baking.
- Make Ahead: You can prepare the dough ahead of time, cut out the biscuits, and store them in the refrigerator for up to 24 hours before baking. This is perfect for a leisurely weekend breakfast.
- Buttermilk Substitute: If you don’t have milk, you can use buttermilk for a tangier flavor.
Serving & Storage Suggestions
Serve these Peanut Butter Biscuits warm, straight from the oven. They are delicious on their own, but also pair well with:
- Butter and jam
- Honey
- Peanut butter (of course!)
- Breakfast meats like bacon or sausage
- As a side for soups or stews
Leftover biscuits can be stored in an airtight container at room temperature for up to 2 days, or in the refrigerator for up to 5 days. To reheat, wrap the biscuits in foil and warm them in a 350°F (175°C) oven for about 10 minutes. You can also microwave them briefly, but be careful not to overheat them, as they can become tough. For longer storage, freeze the biscuits in an airtight container for up to 2 months. Thaw them overnight in the refrigerator before reheating.
Nutritional Information
| Nutrient | Amount per Serving | % Daily Value |
|---|---|---|
| Calories | 150 kcal | 8% |
| Total Fat | 7g | 9% |
| Saturated Fat | 2g | 10% |
| Cholesterol | 1mg | 0% |
| Sodium | 260mg | 11% |
| Total Carbohydrate | 20g | 7% |
| Dietary Fiber | 1g | 4% |
| Sugars | 1g | 2% |
| Protein | 4g | 8% |
Nutritional information is an estimate and may vary based on specific ingredients and portion sizes.
Variations & Substitutions
- Gluten-Free: Substitute the all-purpose flour with a gluten-free all-purpose flour blend. You may need to add a little more milk to achieve the right consistency.
- Dairy-Free: Use your favorite plant-based milk alternative, such as almond milk, soy milk, or oat milk.
- Sweet Biscuits: Add 1-2 tablespoons of sugar to the dry ingredients for a sweeter biscuit.
- Savory Biscuits: Add herbs like rosemary, thyme, or chives to the dry ingredients for a savory twist.
- Cheese Biscuits: Add ½ cup of shredded cheddar cheese to the dry ingredients for a cheesy biscuit.
- Spicy Biscuits: Add a pinch of cayenne pepper or red pepper flakes to the dry ingredients for a bit of heat.
FAQs (Frequently Asked Questions)
Q: Can I use natural peanut butter in this recipe?
A: Yes, you can use natural peanut butter. However, it tends to be oilier than processed peanut butter, so you may need to reduce the amount of shortening or butter slightly.
Q: What if I don’t have shortening?
A: You can substitute an equal amount of butter or lard for the shortening. Butter will add a richer flavor, while lard will create a very tender biscuit.
Q: My biscuits are flat and dense. What did I do wrong?
A: Overmixing the dough is the most common cause of flat, dense biscuits. Be sure to mix only until the ingredients are just combined. Also, make sure your baking powder is fresh.
Q: Can I freeze the biscuit dough before baking?
A: Yes, you can freeze the biscuit dough. Cut out the biscuits and place them on a baking sheet lined with parchment paper. Freeze for 1-2 hours, or until solid. Then, transfer the frozen biscuits to an airtight container and store them in the freezer for up to 2 months. Bake directly from frozen, adding a few minutes to the baking time.
Q: Can I make these biscuits in a cast iron skillet?
A: Absolutely! A cast iron skillet will create a crispy, golden-brown crust. Preheat the skillet in the oven while you prepare the dough. Then, carefully place the biscuits in the hot skillet and bake as directed.
Final Thoughts
These Peanut Butter Biscuits are a testament to the simple pleasures of homemade baking. They are a comforting treat that will warm your heart and satisfy your cravings. I encourage you to try this recipe and experience the joy of creating something delicious from scratch. Feel free to experiment with different variations and substitutions to make these biscuits your own. Don’t hesitate to share your creations and feedback – I’d love to hear about your peanut butter biscuit adventures! These biscuits pair beautifully with a warm cup of coffee or a glass of cold milk. Enjoy!