
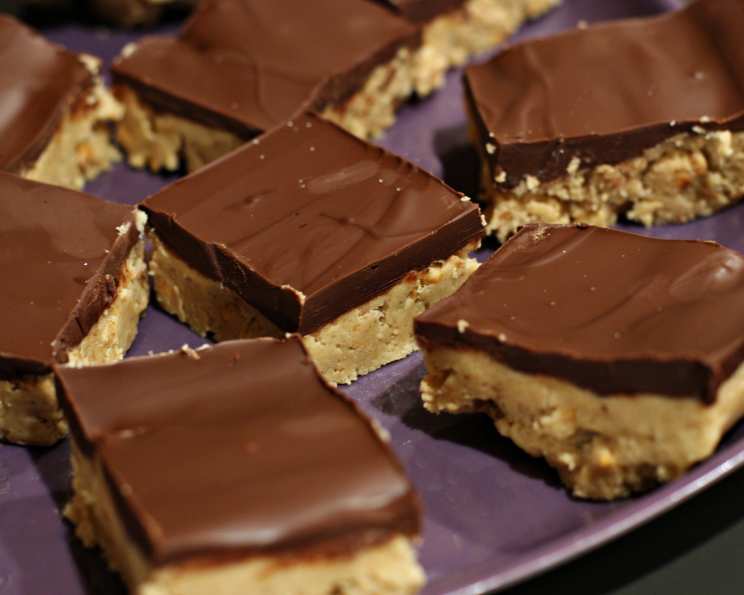
Peanut Butter Bites: A Sweet Memory
The aroma of peanut butter and chocolate always transports me back to childhood, to after-school snacks and rainy-day baking sessions with my grandmother. I remember the pure joy of licking the spoon, coated in a swirl of nutty sweetness and rich, melted chocolate. It wasn’t just about the taste; it was the feeling of being loved and cared for, a tangible expression of home. These Peanut Butter Bites capture that same comforting essence – a bite-sized piece of pure happiness.
Recipe Overview
- Prep Time: 15 minutes
- Cook Time: 0 minutes (Chill Time Required)
- Total Time: 15 minutes (plus chilling time)
- Yields: 24 bites
- Dietary Type: Vegetarian
Ingredients
- 3/4 cup brown sugar
- 3 3/4 cups confectioners’ sugar
- 13 tablespoons unsalted butter (softened)
- 2 cups chunky peanut butter
- 1 1/2 cups good quality chocolate chips
Equipment Needed
- Double boiler or heat-safe bowl and saucepan
- Mixer with dough attachment (optional)
- 9×12 inch pan
- Wax paper
- Rolling pin or glass
Instructions
-
First, you will want to melt the chocolate chips using a double boiler. If you don’t have a double boiler, create one by placing a heat-safe bowl over a saucepan filled with simmering water, ensuring the bottom of the bowl doesn’t touch the water. This gentle heat prevents the chocolate from burning. Stir the chocolate chips constantly until they are completely melted and smooth. Remove from heat and set aside.
-
In a large mixing bowl, combine the brown sugar, confectioners’ sugar, softened unsalted butter, and chunky peanut butter.
-
Use a mixer with a dough attachment to thoroughly mix these ingredients together. If you don’t have a mixer, you can mix everything by hand. It will require some elbow grease, but the result will be just as delicious! Continue mixing until the ingredients are well combined and form a cohesive dough.
-
Press the peanut butter mixture into a 9×12 inch pan. The mixture will be quite thick, so work in sections to evenly distribute it across the pan.
-
Place a sheet of wax paper over the top of the peanut butter mixture.
-
Using a rolling pin or the flat bottom of a glass, roll the mixture flat and even within the pan. The wax paper prevents the dough from sticking to the rolling pin or glass. Aim for a uniform thickness across the entire pan for consistent bites.
-
Now it’s time to spread the melted chocolate evenly over the peanut butter base. Work quickly while the chocolate is still melted and smooth.
-
Cool the entire pan in the refrigerator. This allows the chocolate to set and the peanut butter base to firm up, making it easier to cut into neat pieces. This will take at least an hour, but longer chilling times (2-3 hours or even overnight) will make cutting easier.
-
Once the chocolate is set and the peanut butter has firmed, cut the mixture into approximately 2-inch squares or smaller, depending on your desired bite size. For cleaner cuts, use a warm knife. Simply dip the knife in hot water, dry it thoroughly, and then slice through the dessert. Repeat as needed.
Expert Tips & Tricks
- Softened butter is key: Make sure your butter is properly softened before mixing. It should be soft to the touch but not melted. This ensures the ingredients combine smoothly and creates a tender texture.
- Prevent Chocolate Bloom: To prevent chocolate bloom (the white coating that sometimes appears on chocolate), melt the chocolate slowly and avoid rapid temperature changes.
- Warm Knife, Clean Cuts: As mentioned earlier, a warm knife is your best friend when cutting these bars. The heat helps the knife glide through the chocolate without cracking it.
- Customize your chunks: Feel free to adjust the amount or type of chunks in your peanut butter. Smooth peanut butter works well too if you prefer a smoother texture. Other mix-ins, like chopped nuts or pretzels, can also be added to the peanut butter mixture for extra crunch and flavor.
Serving & Storage Suggestions
These Peanut Butter Bites are best served chilled or at room temperature. For an elegant presentation, arrange them on a platter and garnish with a sprinkle of sea salt or a drizzle of extra melted chocolate.
Store leftover bites in an airtight container in the refrigerator. They will keep for up to a week. You can also freeze them for longer storage – they will last for up to 2 months. Thaw them in the refrigerator before serving.
Nutritional Information
(Please note that these values are estimates and may vary based on specific ingredient brands and portion sizes.)
| Nutrient | Amount per Serving | % Daily Value |
|---|---|---|
| Calories | 330 kcal | 17% |
| Total Fat | 20 g | 31% |
| Saturated Fat | 8 g | 40% |
| Cholesterol | 17 mg | 6% |
| Sodium | 109 mg | 5% |
| Carbohydrates | 37 g | 13% |
| Fiber | 2 g | 7% |
| Sugar | 33 g | N/A |
| Protein | 6 g | 12% |
Variations & Substitutions
- Chocolate Choice: Experiment with different types of chocolate. Dark chocolate will add a more intense flavor, while white chocolate will create a sweeter, creamier bite.
- Peanut Butter Swaps: While classic peanut butter is the star, you could try using almond butter, cashew butter, or even sunflower seed butter for a different nutty flavor.
- Mix-Ins: Add chopped nuts, pretzels, mini marshmallows, or even a swirl of caramel to the peanut butter base for extra flavor and texture.
- Salted Caramel: A layer of salted caramel between the peanut butter layer and the chocolate topping is an amazing addition.
- Espresso Boost: Add a teaspoon of instant espresso powder to the melted chocolate for a mocha-inspired flavor.
FAQs (Frequently Asked Questions)
Q: Can I use smooth peanut butter instead of chunky peanut butter?
A: Yes, you can! Using smooth peanut butter will result in a smoother texture overall, but the flavor will still be fantastic.
Q: Do I have to use a mixer?
A: No, you don’t! While a mixer makes the process easier, you can definitely mix the ingredients by hand. Just be prepared to use a little elbow grease.
Q: How do I prevent the chocolate from cracking when I cut the bites?
A: Using a warm knife is the best way to prevent the chocolate from cracking. Dip the knife in hot water, dry it thoroughly, and then slice through the dessert. Repeat as needed.
Q: Can I freeze these Peanut Butter Bites?
A: Yes, you can! They freeze well for up to 2 months. Just store them in an airtight container in the freezer and thaw them in the refrigerator before serving.
Q: Can I make these ahead of time?
A: Absolutely! In fact, making them ahead of time is recommended. The chilling time is necessary for the chocolate to set and the peanut butter to firm up.
Final Thoughts
These Peanut Butter Bites are more than just a dessert; they’re a reminder of simple pleasures and cherished memories. I encourage you to try this recipe and create your own sweet moments. Whether you’re sharing them with loved ones or enjoying them as a personal treat, I hope these bites bring you as much joy as they’ve brought me. Feel free to experiment with variations, add your own personal touch, and most importantly, have fun in the kitchen! I’d love to hear your feedback and see your creations, so please share your thoughts and photos! Consider serving these with a cold glass of milk or a warm cup of coffee for the perfect pairing.