
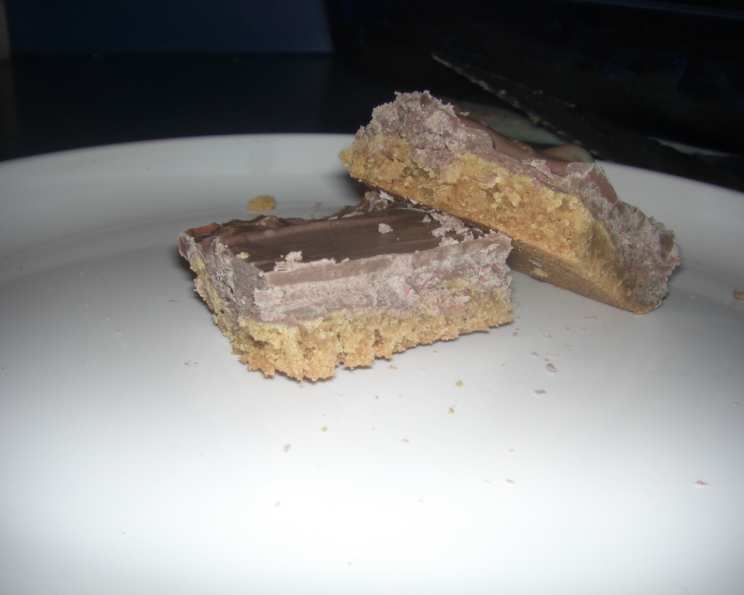
Peanut Butter Candy Bar Bliss (Cookie Mix Magic)
There’s something almost nostalgic about a perfectly executed candy bar. I remember being a kid and carefully unwrapping those rectangular treasures, the crinkling cellophane a prelude to pure, unadulterated joy. But sometimes, the homemade versions fall short – too dry, too crumbly, or just plain… wrong. That’s why I was thrilled when I stumbled upon this recipe – it delivers all the candy bar satisfaction with a surprising secret weapon: peanut butter cookie mix! These bars are chewy, rich, and intensely peanut buttery with a decadent chocolate-butterscotch swirl on top. One bite, and you’ll be transported back to those carefree childhood moments, only this time, you made the magic happen.
Recipe Overview
- Prep Time: 15 minutes
- Cook Time: 18 minutes
- Cooling Time: 40 minutes
- Total Time: 1 hour 13 minutes
- Yields: 36 bars
- Serves: 36
- Dietary Type: Vegetarian
Ingredients
- 1 (17 1/2 ounce) package Betty Crocker Peanut Butter Cookie Mix (1 lb 1.5 oz)
- 3 tablespoons vegetable oil
- 1 tablespoon water
- 1 egg
- 1 cup chocolate chips
- 1 cup butterscotch chips
Equipment Needed
- 13×9-inch baking pan
- Cooking spray
- Large mixing bowl
- Microwave-safe bowl
- Rubber spatula
- Measuring cups and spoons
Instructions
- Preheat your oven to 350°F (175°C). Make sure your oven rack is in the center position for even baking.
- Spray the bottom of a 13×9-inch baking pan generously with cooking spray. This will prevent the bars from sticking and make them easy to remove later.
- In a large mixing bowl, combine the entire pouch of Betty Crocker Peanut Butter Cookie Mix, vegetable oil, water, and egg.
- Stir the ingredients together with a spoon or spatula until a soft dough forms. Be careful not to overmix, as this can lead to a tougher final product.
- Press the peanut butter dough evenly into the prepared baking pan. Ensure the dough is distributed uniformly to ensure even baking.
- Bake in the preheated oven for 15 to 18 minutes, or until the edges are lightly golden brown. Keep a close eye on the bars to prevent overbaking. The center may still appear slightly soft, but it will firm up as it cools.
- Remove the pan from the oven and let it cool for 10 minutes on a wire rack. This allows the bars to set slightly before adding the topping.
- While the base is cooling, prepare the topping. In a small, microwave-safe bowl, combine the chocolate chips and butterscotch chips.
- Microwave the chocolate and butterscotch chips on high for 1 to 1 1/2 minutes, stirring every 30 seconds, until melted and smooth. Be cautious not to burn the chocolate; microwave in short intervals and stir frequently.
- Pour the melted chocolate-butterscotch mixture evenly over the warm peanut butter base.
- Use a spatula or the back of a spoon to spread the melted chocolate-butterscotch topping smoothly and evenly across the surface. If desired, create a decorative swirl pattern using a toothpick or knife.
- Refrigerate the pan for 30 minutes, or until the topping is completely set. This will make it easier to cut the bars neatly.
- Once the bars are firm, remove them from the refrigerator.
- Use a sharp knife to cut the bars into 9 rows by 4 rows, creating 36 individual bars. For clean cuts, you can run the knife under hot water and dry it between each cut.
Expert Tips & Tricks
- Don’t overbake: Overbaking will result in dry, crumbly bars. Keep a close eye on them and remove them from the oven when the edges are lightly golden brown.
- Even distribution: Ensure the peanut butter dough is pressed evenly into the pan for consistent baking.
- Microwave melting: When melting the chocolate and butterscotch chips, microwave in short intervals (30 seconds) and stir to prevent burning.
- Swirl design: Create a beautiful swirl pattern in the topping by dragging a toothpick or knife through the melted chocolate-butterscotch mixture.
- Chill time: Allow sufficient time for the bars to chill in the refrigerator before cutting. This will make them easier to handle and prevent the topping from smearing.
Serving & Storage Suggestions
These peanut butter candy bars are best served chilled or at room temperature. They make a delightful treat on their own, or you can serve them with a scoop of vanilla ice cream or a glass of cold milk.
To store, keep the bars in an airtight container at room temperature for up to 3 days, in the refrigerator for up to a week, or in the freezer for up to 2 months. If freezing, wrap the bars individually in plastic wrap before placing them in a freezer-safe container. Thaw frozen bars in the refrigerator before serving.
Nutritional Information
| Nutrient | Amount per Serving | % Daily Value |
|---|---|---|
| Calories | 160 kcal | 8% |
| Total Fat | 9g | 12% |
| Saturated Fat | 4g | 20% |
| Cholesterol | 5mg | 2% |
| Sodium | 70mg | 3% |
| Total Carbohydrate | 18g | 7% |
| Dietary Fiber | 1g | 4% |
| Sugars | 12g | |
| Protein | 2g | 4% |
Note: Nutritional information is an estimate and may vary based on specific ingredients used.
Variations & Substitutions
- Different chips: Experiment with different types of chips, such as white chocolate chips, dark chocolate chips, or peanut butter chips.
- Add nuts: Sprinkle chopped peanuts, walnuts, or pecans over the melted chocolate-butterscotch topping for added crunch and flavor.
- Salted caramel drizzle: Drizzle salted caramel sauce over the cooled bars for a sweet and salty twist.
- Gluten-free: While this recipe uses a traditional cookie mix, you could try substituting with a gluten-free peanut butter cookie mix. Note that the texture and baking time may need adjustments.
FAQs (Frequently Asked Questions)
Q: Can I use a different size pan?
A: While a 13×9-inch pan is recommended for the best results, you can use an 8×8-inch pan for thicker bars. Note that the baking time may need to be increased slightly.
Q: Can I use a stand mixer instead of mixing by hand?
A: Yes, you can use a stand mixer with the paddle attachment to combine the peanut butter cookie mix, oil, water, and egg. Be careful not to overmix the dough.
Q: How do I prevent the chocolate-butterscotch topping from cracking?
A: Avoid sudden temperature changes. Allow the bars to cool gradually at room temperature before refrigerating.
Q: Can I make these bars ahead of time?
A: Yes, these bars can be made ahead of time and stored in the refrigerator for up to a week.
Q: My bars are too soft. What did I do wrong?
A: Make sure you bake the bars for the specified time and temperature. If they are still too soft, you can bake them for a few more minutes. Also, ensure they are fully chilled before cutting.
Final Thoughts
These Peanut Butter Candy Bars are a delightful treat that’s surprisingly easy to make, thanks to the magic of cookie mix! I encourage you to give this recipe a try and experience the simple joy of creating a homemade candy bar that rivals anything you can buy in a store. Whether you’re baking for a special occasion or just craving a sweet indulgence, these bars are sure to be a hit. Feel free to experiment with different variations and let your creativity shine. And, of course, don’t forget to share your delicious creations with friends and family!