
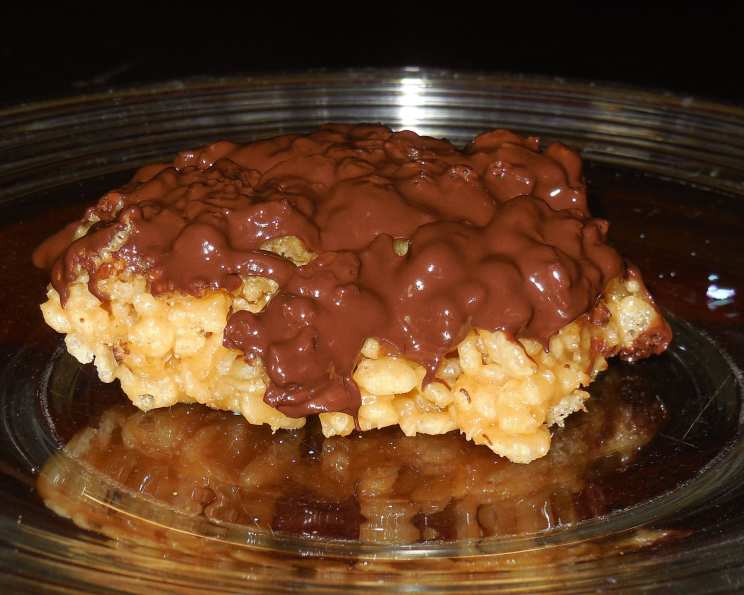
Peanut Butter Chocolate Dream Bars: Elevating the Classic Rice Krispie Treat
I remember being a kid, standing on a wobbly chair in my grandma’s kitchen, the air thick with the scent of melting butter and marshmallows. We were making Rice Krispie treats, of course, but they were always just okay. A little too bland, a little too…ordinary. I always dreamed of a version that truly sang – something rich, decadent, and packed with flavor. It wasn’t until years later, experimenting in my own kitchen, that I finally unlocked the secret: peanut butter and chocolate. The combination elevates the humble Rice Krispie treat into a truly unforgettable indulgence.
Recipe Overview
- Prep Time: 15 minutes
- Cook Time: 5 minutes
- Total Time: 2 hours 20 minutes
- Servings: 35
- Yield: 1 (9×13 inch) pan
- Dietary Type: Vegetarian (easily adaptable to gluten-free by using gluten-free Rice Krispies)
Ingredients
- 6 cups rice krispie cereal
- 1 cup Karo syrup
- 2 cups peanut butter, separated
- 1 cup sugar
- 1 cup chocolate chips
Equipment Needed
- 9×13 inch baking pan
- Large mixing bowl
- Microwave-safe bowl
- Rubber spatula or wooden spoon
- Measuring cups and spoons
Instructions
-
In a large mixing bowl, measure out 6 cups of rice krispie cereal and set aside.
-
In a medium saucepan, combine 1 cup of peanut butter, 1 cup of Karo syrup, and 1 cup of sugar.
-
Place the saucepan over medium heat and bring the mixture to a boil, stirring constantly to prevent burning. It’s crucial to stir continuously as the sugar can easily scorch.
-
Once the mixture reaches a boil, remove it immediately from the heat.
-
Pour the hot peanut butter mixture over the rice krispie cereal in the large mixing bowl.
-
Using a rubber spatula or wooden spoon, gently mix the cereal and peanut butter mixture together until the cereal is evenly coated. Be careful not to crush the cereal.
-
Transfer the mixture to a greased 9×13 inch baking pan.
-
Gently press the mixture into the pan. Do not smash it down too much! Pressing too firmly will result in a dense and hard-to-cut treat. A light, even press is all you need.
-
In a separate microwave-safe bowl, combine the remaining 1 cup of peanut butter and 1 cup of chocolate chips.
-
Microwave in 30-second intervals, stirring after each interval, until the chocolate chips and peanut butter are completely melted and smooth. Be patient and avoid overheating. Microwaving in short bursts prevents the chocolate from seizing.
-
Pour the melted peanut butter chocolate mixture evenly over the rice krispie treats in the pan.
-
Spread the chocolate topping smoothly over the surface using a spatula.
-
Place the pan in the refrigerator and let it set for at least 2 hours, or until the chocolate topping is firm. This chilling period is essential for easy cutting and a clean presentation.
-
Once set, remove the rice krispie treats from the refrigerator and cut them into squares.
-
Serve and enjoy!
Expert Tips & Tricks
-
Peanut Butter Perfection: For the best flavor, use a creamy peanut butter. Avoid using natural peanut butter that separates easily, as this can affect the texture of the treats.
-
Karo Syrup Substitute: If you don’t have Karo syrup on hand, you can substitute it with corn syrup or golden syrup. The result will be slightly different, but still delicious.
-
Microwave Mastery: When melting the chocolate chips and peanut butter, make sure to use a microwave-safe bowl. Glass or ceramic works best.
-
Pan Prep: To prevent the rice krispie treats from sticking to the pan, grease the pan thoroughly with butter or cooking spray. You can also line the pan with parchment paper, leaving an overhang on the sides for easy removal.
-
Soft and Chewy Secret: The key to soft and chewy rice krispie treats is to avoid over-mixing and over-compressing the mixture in the pan. A light touch is essential.
-
Make Ahead Magic: These treats can be made a day or two in advance. Simply store them in an airtight container at room temperature.
-
Chocolate Swirl: For a more visually appealing treat, swirl the melted chocolate and peanut butter mixture with a toothpick or knife before chilling.
Serving & Storage Suggestions
These Peanut Butter Chocolate Rice Krispie Treats are best served chilled or at room temperature. They’re perfect for parties, potlucks, or a simple afternoon snack.
To store, cut the treats into squares and place them in an airtight container. They will keep at room temperature for up to 3 days or in the refrigerator for up to a week. For longer storage, you can freeze the treats for up to 2 months. Wrap them individually in plastic wrap before placing them in a freezer-safe container. Let them thaw at room temperature before serving.
Nutritional Information
| Nutrient | Amount per Serving | % Daily Value |
|---|---|---|
| Calories | 156.7 kcal | N/A |
| Calories from Fat | 79 kcal | N/A |
| Total Fat | 8.9 g | 13% |
| Saturated Fat | 2.4 g | 11% |
| Cholesterol | 0 mg | 0% |
| Sodium | 68.4 mg | 2% |
| Total Carbohydrate | 18.4 g | 6% |
| Dietary Fiber | 1.2 g | 4% |
| Sugars | 12 g | 48% |
| Protein | 3.9 g | 7% |
Note: Nutritional information is an estimate and may vary based on specific ingredients and portion sizes.
Variations & Substitutions
- Gluten-Free Goodness: Use gluten-free rice krispie cereal to make these treats gluten-free.
- Nut-Free Option: Substitute sunflower seed butter or tahini for the peanut butter for a nut-free version.
- White Chocolate Dream: Use white chocolate chips instead of semi-sweet chocolate chips for a sweeter treat.
- Sprinkle Sensation: Add sprinkles to the melted chocolate topping for a festive touch.
- Mini Marshmallow Magic: Stir mini marshmallows into the rice krispie cereal mixture for an extra gooey treat.
- Pretzel Power: Add crushed pretzels to the rice krispie cereal mixture for a salty-sweet combination.
FAQs (Frequently Asked Questions)
Q: Can I use natural peanut butter in this recipe?
A: While you can, we don’t recommend it. Natural peanut butter tends to separate, which can make the treats greasy. If you do use it, make sure to stir it very well before measuring.
Q: My chocolate is seizing up when I melt it. What am I doing wrong?
A: Chocolate seizes when it comes into contact with even a small amount of water. Make sure your bowl and spatula are completely dry. Also, avoid overheating the chocolate. Microwave in short bursts, stirring frequently.
Q: My rice krispie treats are too hard. How can I prevent this?
A: The most common reason for hard rice krispie treats is over-compressing the mixture in the pan. Press gently, just enough to even out the surface. Overcooking the peanut butter mixture can also contribute to hardness.
Q: Can I freeze these treats?
A: Yes! Wrap the treats individually in plastic wrap and store them in a freezer-safe container for up to 2 months. Thaw at room temperature before serving.
Q: Can I use marshmallows instead of Karo syrup and sugar?
A: While you can adapt a classic Rice Krispie recipe this way, this recipe is specifically formulated to create the best peanut butter flavor and texture using Karo syrup and sugar. We recommend sticking to the recipe for optimal results.
Final Thoughts
These Peanut Butter Chocolate Rice Krispie Treats are a nostalgic classic elevated to a whole new level of deliciousness. They’re easy to make, incredibly satisfying, and sure to be a crowd-pleaser. So, gather your ingredients, put on your favorite music, and get ready to create a batch of these irresistible treats. Don’t be afraid to experiment with variations and substitutions to make them your own. And most importantly, have fun! Share your creations with friends and family, and let us know what you think. Happy baking!