
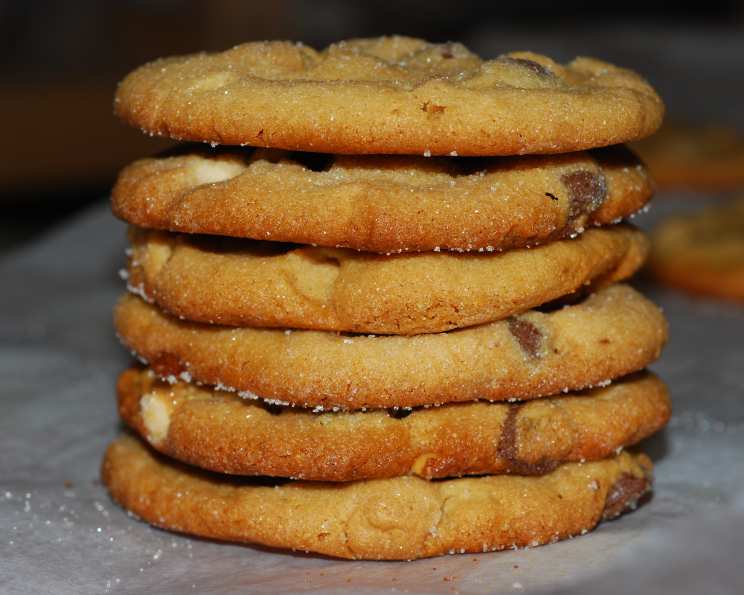
The Ultimate Peanut Butter Cookie: A Magnolia Bakery Classic
The scent of warm peanut butter still evokes such vivid memories. I remember being about eight years old, sneaking into my grandmother’s kitchen while she baked. The air was thick with the aroma of peanuts and sugar, and I’d tiptoe to the counter, hoping to snag a still-warm cookie, its edges slightly crispy and its center a perfect, melt-in-your-mouth dream. Those cookies, made with love and a secret ingredient (or so I thought!), were the epitome of comfort. This recipe, a tribute to those cherished moments, brings back all those warm, fuzzy feelings.
Recipe Overview
- Prep Time: 25 minutes
- Cook Time: 10-12 minutes
- Total Time: 35-37 minutes
- Yields: Approximately 36 cookies
- Serves: 18
- Dietary Type: Not Gluten-Free
Ingredients
- 1 1⁄4 cups all-purpose flour
- 3⁄4 teaspoon baking soda
- 1⁄2 teaspoon baking powder
- 1⁄4 teaspoon salt
- 1⁄2 cup (1 stick) unsalted butter, at room temperature
- 1 cup creamy peanut butter (such as Skippy)
- 3⁄4 cup granulated sugar
- 1⁄2 cup firmly packed light brown sugar
- 1 large egg
- 1 tablespoon milk
- 1 teaspoon vanilla extract
- 1⁄2 cup peanut butter morsels (peanut butter chips)
- 1⁄2 cup semisweet chocolate, chopped very coarsely
- 1⁄4 cup chopped peanuts
- 1⁄4 cup granulated sugar (approximately, for rolling)
Equipment Needed
- Medium mixing bowl
- Large mixing bowl
- Electric mixer (stand or hand-held)
- Measuring cups and spoons
- Rubber spatula
- Cookie sheets
- Cooling rack
- Small bowl for rolling
Instructions
-
Preheat your oven to 350 degrees Fahrenheit (175 degrees Celsius). Ensure your oven rack is in the center position for even baking.
-
In a medium bowl, whisk together the all-purpose flour, baking soda, baking powder, and salt. This ensures that the leavening agents are evenly distributed throughout the flour, resulting in a consistent texture in your cookies. Set aside.
-
In a large bowl, using an electric mixer, beat together the softened butter and creamy peanut butter until the mixture is light and fluffy. This process is crucial for incorporating air into the dough, which contributes to the cookies’ tender crumb.
-
Add the granulated sugar and light brown sugar to the butter and peanut butter mixture. Continue to beat until the sugars are fully incorporated and the mixture is smooth. Scraping down the sides of the bowl periodically ensures even mixing.
-
Add the egg, milk, and vanilla extract to the bowl. Mix well until all ingredients are thoroughly combined and the batter is homogenous. Don’t overmix at this stage; just ensure everything is nicely incorporated.
-
Gradually add the dry ingredients (the flour mixture) to the wet ingredients. Beat until just combined. Be careful not to overmix, as this can develop the gluten in the flour and result in tough cookies. A few streaks of flour are okay at this point.
-
Stir in the peanut butter chips, coarsely chopped chocolate, and chopped peanuts. Distribute these evenly throughout the dough. The combination of peanut butter chips and chopped chocolate adds a wonderful textural and flavor contrast.
-
Refrigerate the dough for 10-20 minutes. This step is important because it allows the fats in the dough to solidify slightly, which prevents the cookies from spreading too thin during baking.
-
While the dough chills, pour the granulated sugar for rolling into a small bowl.
-
Remove the dough from the refrigerator. Using a teaspoon or small cookie scoop, drop rounded teaspoonfuls of the dough into the bowl of granulated sugar. Roll each dough ball in the sugar until it’s evenly coated.
-
Place the sugar-coated dough balls onto ungreased cookie sheets, spacing them at least two inches apart. This spacing allows for proper air circulation and prevents the cookies from sticking together as they bake.
-
Using a fork, lightly indent each cookie with a criss-cross pattern. Do not over-flatten the cookies, as they will spread during baking. The criss-cross pattern not only looks appealing but also helps the cookies bake evenly.
-
Bake for 10 to 12 minutes. The cookies may appear to be underdone in the center, but they will continue to bake after being removed from the oven. It’s better to slightly underbake than overbake these cookies to maintain their soft and chewy texture.
-
Cool the cookies on the baking sheets for 1 minute before transferring them to a wire rack to cool completely. This brief cooling period allows the cookies to set slightly, preventing them from breaking when moved.
Expert Tips & Tricks
- For an extra nutty flavor, lightly toast the chopped peanuts before adding them to the dough. This intensifies their flavor and adds a pleasant crunch.
- If you prefer a more uniform cookie shape, use a cookie scoop to portion the dough.
- Don’t skip the chilling step! Chilling the dough is essential for preventing the cookies from spreading too much during baking.
- To easily chop the semi-sweet chocolate, use a serrated knife.
Serving & Storage Suggestions
These cookies are delicious served warm or at room temperature. They pair perfectly with a glass of cold milk, a cup of hot coffee, or even a scoop of vanilla ice cream. Store leftover cookies in an airtight container at room temperature for up to 3 days. For longer storage, freeze the cookies in a single layer on a baking sheet, then transfer them to a freezer-safe bag or container. Frozen cookies will keep for up to 2 months and can be thawed at room temperature before serving. To refresh slightly stale cookies, microwave them for a few seconds.
Nutritional Information
| Nutrient | Amount per Serving | % Daily Value |
|---|---|---|
| Calories | 287 kcal | N/A |
| Calories from Fat | 153 kcal | N/A |
| Total Fat | 17 g | 26% |
| Saturated Fat | 6.8 g | 34% |
| Cholesterol | 24 mg | 8% |
| Sodium | 181 mg | 7% |
| Total Carbohydrate | 30 g | 10% |
| Dietary Fiber | 2.1 g | 8% |
| Sugars | 20 g | N/A |
| Protein | 6.8 g | 13% |
Variations & Substitutions
- For a gluten-free version, substitute the all-purpose flour with a gluten-free all-purpose flour blend. Be sure to check that the blend contains xanthan gum or add it separately for a better texture.
- Use crunchy peanut butter instead of creamy, but consider reducing or omitting the chopped peanuts.
- Substitute chocolate chips for the coarsely chopped chocolate for a classic twist.
- Add a sprinkle of coarse sea salt on top of the cookies before baking for a delightful sweet and salty contrast.
- Experiment with different extracts, such as almond or maple, for a unique flavor profile.
FAQs (Frequently Asked Questions)
Q: Can I use natural peanut butter in this recipe?
A: While you can use natural peanut butter, keep in mind that it may result in a slightly drier cookie due to the lower fat content. You may need to add a bit more milk to compensate.
Q: Why is it important to chill the dough?
A: Chilling the dough helps to prevent the cookies from spreading too much during baking. It also allows the flavors to meld together, resulting in a more flavorful cookie.
Q: Can I freeze the cookie dough instead of baking it right away?
A: Yes! You can freeze the cookie dough in individual portions. Just place the dough balls on a baking sheet and freeze until solid. Then, transfer them to a freezer-safe bag or container. When ready to bake, simply thaw the dough slightly and bake as directed.
Q: My cookies came out flat. What did I do wrong?
A: Flat cookies can be caused by a few factors, such as using softened butter that was too warm, not chilling the dough, or overmixing the dough. Make sure to follow the recipe carefully and avoid these common mistakes.
Q: Can I reduce the amount of sugar in this recipe?
A: While you can reduce the sugar slightly, keep in mind that sugar not only adds sweetness but also contributes to the cookies’ texture and structure. Reducing it too much may result in a less tender cookie.
Final Thoughts
These peanut butter cookies, inspired by the beloved Magnolia Bakery, are more than just a dessert; they’re a warm hug in cookie form. The perfect blend of peanut butter, chocolate, and a touch of salty goodness makes them irresistible. So, gather your ingredients, preheat your oven, and embark on a baking adventure that will fill your kitchen with the comforting aroma of homemade goodness. Don’t be afraid to experiment with variations to make them your own, and most importantly, enjoy the process! And, when you’re done, share a cookie (or two!) with someone you love.