
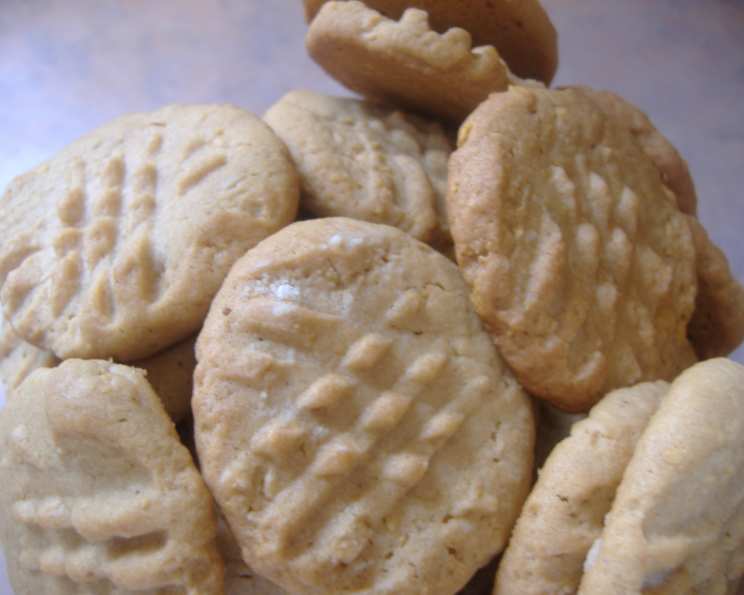
Peanut Butter Cookies (With a Corn Flake Crunch!)
The scent of peanut butter cookies baking always transports me back to my grandmother’s kitchen. She had a seemingly endless supply of them in a ceramic jar shaped like a squirrel, and I would sneak one (or three) every chance I got. While her recipe was a closely guarded family secret, I’ve spent years developing my own version, and this one, with its delicate peanut flavor and surprisingly delightful cornflake crunch, comes closest to capturing that nostalgic magic. It’s a simple cookie, but the corn flakes elevate it to something truly special.
Recipe Overview
- Prep Time: 20 minutes
- Cook Time: 10-12 minutes
- Total Time: 30-32 minutes
- Yields: Approximately 36 cookies
- Dietary Type: Not Gluten-Free
Ingredients
- 1 cup butter, softened
- ¾ cup firmly packed brown sugar
- ¾ cup granulated sugar
- 1 cup peanut butter (I use all natural, the kind that is just peanuts & salt)
- 2 eggs
- 1 teaspoon vanilla
- 2 ½ cups flour (generous)
- 1 teaspoon baking soda
- 1 cup finely crushed corn flakes
Equipment Needed
- Electric mixer
- Large mixing bowl
- Cookie sheets
- Measuring cups and spoons
- Cooling rack
- Fork
Instructions
-
Preheat your oven to 375°F (190°C). Make sure your oven rack is in the center position.
-
In the bowl of an electric mixer, cream together the softened butter and both the brown sugar and granulated sugar. Beat until the mixture is light and fluffy. This usually takes about 3-5 minutes. Don’t rush this step; it’s crucial for achieving a good cookie texture.
-
Add the peanut butter to the creamed mixture and mix well until fully incorporated. Scrape down the sides of the bowl to ensure everything is evenly combined.
-
Add the eggs, one at a time, to the peanut butter mixture, mixing well after each addition. Then, stir in the vanilla. The batter should now be smooth and creamy.
-
In a separate bowl, whisk together the flour and baking soda. This helps distribute the baking soda evenly throughout the flour, preventing clumps.
-
Gradually add the dry ingredients (flour and baking soda) to the wet ingredients (peanut butter mixture), mixing on low speed until just combined. Be careful not to overmix, as this can result in tough cookies.
-
Stir in the finely crushed corn flakes until they are evenly distributed throughout the dough. The corn flakes add a wonderful textural contrast to the soft, chewy cookie.
-
Roll the dough into 1-inch balls and place them about two inches apart on ungreased cookie sheets. If the dough is too tacky to handle, add a little more flour, one tablespoon at a time, until it reaches a manageable consistency. A slightly sticky dough is okay, but it shouldn’t be so sticky that it clings to your hands.
-
Press down each ball with a fork to create a criss-cross pattern. For best results, dip the fork in flour between pressing each cookie to prevent sticking. This also creates a nice visual appeal.
-
Bake at 375°F (190°C) for 10-12 minutes, or until the edges are set and lightly golden brown. Keep a close eye on them, as baking times can vary depending on your oven. The cookies should be firm to the touch but still slightly soft in the center.
-
Immediately transfer the cookies to a wire rack to cool completely. Allowing them to cool on the baking sheet will cause them to continue baking and potentially become too hard.
Expert Tips & Tricks
- Soft Butter is Key: Ensure your butter is properly softened, not melted. It should be soft enough to easily press a finger into, but still hold its shape. This ensures the cookies are tender.
- Natural Peanut Butter Considerations: If using natural peanut butter (the kind with just peanuts and salt), make sure to stir it well before measuring. The oil tends to separate, and you want to ensure you get the right peanut-to-oil ratio.
- Crush Corn Flakes Finely: The finer the corn flakes are crushed, the better they will incorporate into the dough and provide a uniform crunch. You can use a food processor or place them in a zip-top bag and crush them with a rolling pin.
- Adjust Flour as Needed: The amount of flour may need to be adjusted slightly depending on humidity and the type of flour used. Add more flour, one tablespoon at a time, if the dough is too sticky.
- Prevent Overbaking: Overbaked peanut butter cookies can be dry and crumbly. Keep a close eye on them during the last few minutes of baking and remove them from the oven as soon as the edges are set and lightly golden.
- Freeze for Later: Cookie dough can be rolled into balls and frozen for up to 2 months. Bake directly from frozen, adding a few extra minutes to the baking time.
Serving & Storage Suggestions
Serve these peanut butter cookies with a cold glass of milk, a scoop of vanilla ice cream, or alongside a cup of coffee or tea. They’re perfect for afternoon snacks, lunchbox treats, or a simple dessert.
Store the cooled cookies in an airtight container at room temperature for up to 5 days. To keep them fresh longer, store them in the refrigerator for up to 2 weeks. For longer storage, you can freeze them in an airtight container or freezer bag for up to 2 months. Thaw them at room temperature before serving. They can also be reheated in a low-temperature oven (around 200°F) for a few minutes to restore their warm, freshly baked texture.
Nutritional Information
| Nutrient | Amount per Serving | % Daily Value |
|---|---|---|
| Calories | 120 kcal | 6% |
| Total Fat | 6g | 8% |
| Saturated Fat | 3g | 15% |
| Cholesterol | 15mg | 5% |
| Sodium | 50mg | 2% |
| Total Carbohydrate | 15g | 5% |
| Dietary Fiber | 1g | 4% |
| Sugars | 8g | 16% |
| Protein | 2g | 4% |
Nutritional information is an estimate and may vary based on specific ingredients and portion sizes.
Variations & Substitutions
- Chocolate Peanut Butter Cookies: Add ½ cup of chocolate chips to the dough for a chocolatey twist.
- Peanut Butter Blossoms: Roll the dough balls in granulated sugar before baking and press a chocolate kiss into the center of each cookie immediately after removing them from the oven.
- Gluten-Free: Substitute the all-purpose flour with a gluten-free blend. Ensure the blend contains xanthan gum for binding.
- Maple Syrup: Replace the granulated sugar with an equal amount of maple syrup. It will slightly alter the taste and texture but still delicious.
- Different Nut Butters: Experiment with other nut butters like almond butter or cashew butter for a unique flavor profile.
- Spice it Up: Add ½ teaspoon of cinnamon or nutmeg to the dough for a warm, spiced flavor.
FAQs (Frequently Asked Questions)
Q: Why are my cookies flat?
A: This can happen if your butter is too soft or melted, or if you haven’t measured the flour correctly. Ensure your butter is softened, but not melted, and use the spoon-and-level method for measuring flour.
Q: My cookies are dry and crumbly. What did I do wrong?
A: You may have overbaked them or added too much flour. Reduce the baking time and measure your flour accurately.
Q: Can I use crunchy peanut butter instead of smooth?
A: Yes, you can use crunchy peanut butter. It will add even more texture to the cookies.
Q: Can I make the dough ahead of time?
A: Absolutely! The dough can be made ahead of time and stored in the refrigerator for up to 2 days. Let it come to room temperature slightly before rolling into balls.
Q: What if I don’t have corn flakes?
A: The corn flakes add a unique crunch, but you can omit them. The cookies will still be delicious peanut butter cookies. Consider adding chopped peanuts for an alternative crunch.
Final Thoughts
There’s something undeniably comforting about a warm, freshly baked peanut butter cookie. The combination of the nutty flavor and the satisfying crunch of corn flakes makes these cookies a delightful treat for any occasion. Don’t hesitate to experiment with variations and make them your own. Share them with friends and family, and watch their faces light up with joy. And if you happen to find yourself with a ceramic squirrel cookie jar, well, all the better! I hope you love baking (and eating!) these as much as I do.