
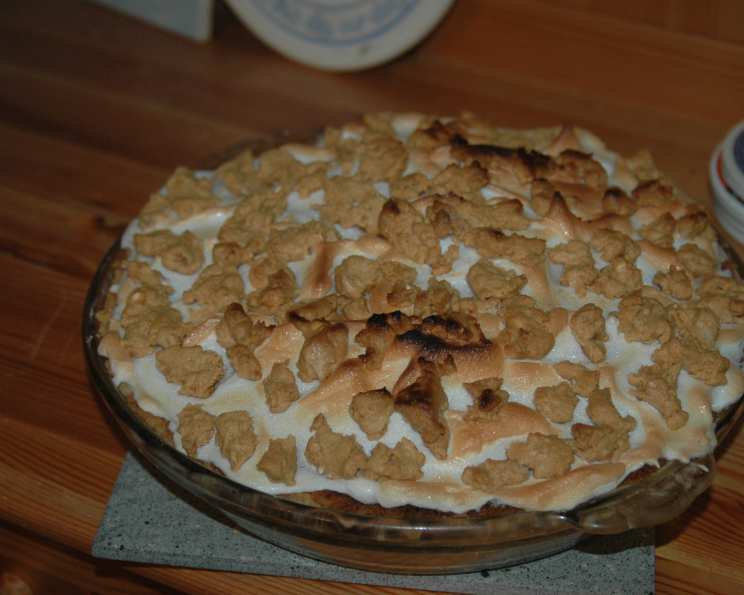
The Peanut Butter Dream Pie: A Taste of Nostalgia
My grandmother, Nana Betty, was the queen of simple pleasures. She didn’t fuss over fancy ingredients or complicated techniques. Her magic lay in taking everyday staples and transforming them into moments of pure joy. I remember, as a child, the sheer delight of walking into her kitchen and catching a whiff of this pie baking – the unmistakable aroma of peanut butter mingling with vanilla, a scent that promised comfort and happiness in every bite. It was her Peanut Butter Cream Pie, and it was, quite simply, the best thing ever. It was, and still is, the embodiment of a warm hug on a plate, and I’m so excited to share this treasured recipe with you.
Recipe Overview
- Prep Time: 20 minutes
- Cook Time: 7 minutes
- Total Time: 2 hours 27 minutes (includes chilling time)
- Servings: 8
- Yield: 1 pie
- Dietary Type: Not Gluten-Free
Ingredients
- 1/4 cup creamy peanut butter
- 1/3 cup confectioners’ sugar
- 1 baked and cooled 9-inch pie shell
- 3/4 cup granulated sugar, divided
- 1/4 cup cornstarch
- 1 (12 ounce) can evaporated milk
- 4 large eggs, yolks and whites separated (cover whites and leave at room temperature until used)
- 1 1/2 cups hot water
- 1/4 cup butter or margarine, at room temperature
- 1 teaspoon vanilla
- 1/4 teaspoon cream of tartar
- 1/2 teaspoon salt
Equipment Needed
- Medium saucepan
- Whisk
- Electric mixer
- Small bowl
- Fork
- Spatula
- Plastic wrap
- Oven
- Cooling rack
Instructions
-
In a small bowl, mix the peanut butter and confectioners’ sugar with a fork until the mixture is crumbly but well combined. Don’t worry if it’s not perfectly smooth – the texture adds a delightful element to the pie.
-
Sprinkle this peanut butter mixture evenly over the bottom of the pre-baked pie shell. This creates a delicious, nutty base for the creamy filling.
-
In a medium-size heavy (not aluminum) saucepan, mix 1/2 cup of the granulated sugar, the cornstarch, and the salt. The heavy-bottomed saucepan will help to prevent scorching as the filling thickens.
-
Using a whisk, stir in the evaporated milk and egg yolks until thoroughly blended. Make sure there are no lumps of cornstarch remaining.
-
Place the saucepan over medium heat and gradually whisk in the hot water. Whisking constantly is crucial to prevent the eggs from scrambling and ensuring a smooth, creamy texture.
-
Stirring constantly, bring the mixture to a boil and boil for 2 minutes until it is very thick. Don’t stop stirring! The mixture should thicken noticeably during this time.
-
Remove the saucepan from the heat; add the butter and vanilla. Beat until smooth and the butter is fully incorporated. The butter adds richness and a glossy sheen to the filling.
-
Pour the hot filling over the peanut butter mixture in the pie shell.
-
Cover the surface of the filling with plastic wrap, pressing it directly onto the surface to prevent a skin from forming. This is an important step to maintain a smooth and appealing texture.
-
Refrigerate for at least 2 hours, or until the pie is completely cool. This allows the filling to set properly and the flavors to meld together beautifully. Patience is key here!
-
Preheat oven to 425 degrees Fahrenheit (220 degrees Celsius).
-
In a large bowl, beat the egg whites and cream of tartar with an electric mixer until soft peaks form when the beaters are lifted. The cream of tartar helps to stabilize the egg whites and create a more stable meringue.
-
Gradually beat in the remaining 1/4 cup of granulated sugar, 1 tablespoon at a time, until the whites are thick and glossy. This step is crucial for creating a meringue that is both stable and sweet.
-
Spread the meringue over the pie filling with a spatula, making sure it touches the crust all around the edge. This helps to seal the meringue to the crust and prevent it from shrinking during baking.
-
Bake for 5 to 7 minutes, or until the meringue is lightly browned. Watch it carefully to prevent burning!
-
Place the pie on a rack to cool to room temperature before serving. Cooling slowly helps to prevent the meringue from shrinking and cracking.
Expert Tips & Tricks
- Perfect Peanut Butter Base: For an extra nutty kick, toast the pie shell lightly before adding the peanut butter layer.
- Scorched Filling Savior: If your filling starts to scorch, immediately remove the saucepan from the heat and transfer the mixture to a clean bowl. Continue stirring and proceed with the recipe. The flavor will be slightly affected, but you can still salvage the pie.
- Meringue Mastery: Ensure your mixing bowl and beaters are completely clean and free of grease before whipping the egg whites. Even a tiny bit of fat can prevent the whites from whipping properly.
- Prevent Weeping Meringue: Make sure the meringue is spread evenly over the warm filling and touches the crust all the way around. This creates a seal that helps prevent weeping.
- Elevate the Flavor: A pinch of sea salt sprinkled on top of the finished pie enhances the sweetness and brings out the nutty flavor of the peanut butter.
Serving & Storage Suggestions
Serve this pie chilled, directly from the refrigerator. A dollop of whipped cream or a drizzle of melted chocolate can elevate the presentation. Leftover pie should be stored in the refrigerator, covered, for up to 3 days. The meringue may soften slightly over time. While it’s best enjoyed fresh, it can be frozen for up to 1 month. Thaw in the refrigerator overnight before serving.
Nutritional Information
| Nutrient | Amount per Serving | % Daily Value |
|---|---|---|
| Calories | 398 kcal | 20% |
| Total Fat | 20.9 g | 32% |
| Saturated Fat | 9.0 g | 45% |
| Cholesterol | 120.6 mg | 40% |
| Sodium | 404.4 mg | 17% |
| Total Carbohydrate | 44.4 g | 15% |
| Dietary Fiber | 1.2 g | 5% |
| Sugars | 25.3 g | – |
| Protein | 9.4 g | 19% |
Note: Nutritional information is an estimate and may vary based on specific ingredients and portion sizes.
Variations & Substitutions
- Gluten-Free Delight: Use a gluten-free pie crust to make this recipe suitable for those with gluten sensitivities.
- Dairy-Free Dream: Substitute the evaporated milk with coconut milk and the butter with a plant-based butter alternative. Be aware that the flavor profile will be slightly different.
- Chocolate Peanut Butter Swirl: Add 2 tablespoons of unsweetened cocoa powder to the filling mixture for a rich, chocolatey twist.
- Peanut Butter Cup Pie: Top the finished pie with chopped peanut butter cups for an extra decadent treat.
- Salted Caramel Drizzle: Drizzle salted caramel over the meringue before baking for a sweet and salty masterpiece.
FAQs (Frequently Asked Questions)
Q: Can I use natural peanut butter instead of creamy peanut butter?
A: Yes, but the texture of the peanut butter layer may be slightly different. Stir the natural peanut butter well to ensure it’s evenly distributed.
Q: Can I make this pie ahead of time?
A: Yes! The filling can be made a day ahead and stored in the refrigerator. Add the meringue just before baking.
Q: My meringue is weeping. What did I do wrong?
A: Weeping can occur if the meringue is not properly sealed to the crust, or if the egg whites were not whipped to stiff peaks. Make sure the meringue touches the crust all around the edge and that you’ve beaten the egg whites until they hold their shape firmly.
Q: Can I use a store-bought graham cracker crust?
A: Absolutely! A graham cracker crust is a delicious and convenient alternative to a traditional pie crust.
Q: How do I prevent the pie crust from getting soggy?
A: Blind bake your pie crust before adding the filling. This means pre-baking the crust before adding the filling. You can use pie weights or dried beans to prevent the crust from puffing up.
Final Thoughts
This Peanut Butter Cream Pie is more than just a dessert; it’s a taste of home, a slice of comfort, and a reminder of simpler times. I encourage you to give it a try and create your own memories with this classic recipe. Don’t be afraid to experiment with variations and make it your own. And when you do, please share your creations and feedback – I’d love to hear about your peanut butter pie adventures! Pair this pie with a cold glass of milk or a steaming cup of coffee for the ultimate indulgence. Happy baking!