
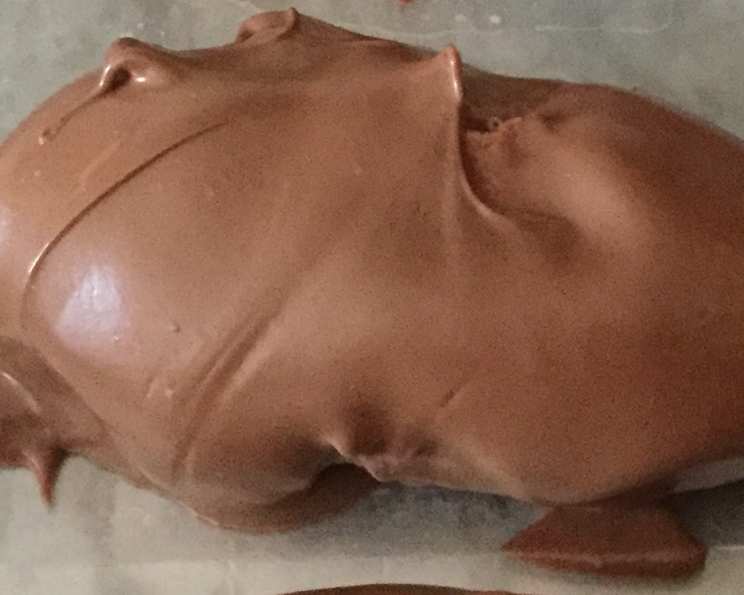
Peanut Butter Easter Eggs: An Easy, No-Cream-Cheese Delight
Growing up, Easter wasn’t just about egg hunts and chocolate bunnies; it was about Mom’s homemade peanut butter eggs. I remember watching her in the kitchen, a whirlwind of softened butter, peanut butter, and confectioners’ sugar. The anticipation was almost unbearable as she shaped the “dough” into perfect egg shapes, each destined for a bath in rich, melted chocolate. Those eggs were the taste of Easter, a sweet and nutty reminder of family and springtime joy. And the best part? No cream cheese, so they were perfect for leaving out in our baskets without worry.
Recipe Overview
- Prep Time: 15 minutes
- Cook Time: 5 minutes (for melting chocolate)
- Total Time: 20 minutes + 30 minutes chilling
- Servings: Varies (Yields 1-24 candies depending on size)
- Yield: 1-24 eggs
- Dietary Type: Vegetarian
Ingredients
- ½ cup butter, softened slightly
- 1 ½ cups peanut butter
- 1 lb confectioners’ sugar
- 1 tablespoon vanilla extract
- 1 (24 ounce) bag semi-sweet chocolate chips (or milk chocolate chips)
Equipment Needed
- Mixing Bowl
- Electric Mixer (optional, but recommended)
- Waxed Paper
- Double Boiler or Microwave-Safe Bowl
- Spoon or Fork for Dipping
- Fluted Cupcake Papers (optional)
Instructions
- In a large mixing bowl, cream together the softened butter and peanut butter until smooth and well combined. This step is crucial for a smooth and creamy texture.
- Gradually add the confectioners’ sugar and vanilla extract to the butter and peanut butter mixture. Blend thoroughly until a thick dough forms. You may need to use your hands towards the end to incorporate all the sugar. The mixture will be quite stiff, but that’s what gives the eggs their shape.
- Shape the peanut butter “dough” into egg shapes. The size is up to you! You can make several smaller eggs, one or two large ones, or anything in between. Use your hands to gently mold the dough into the desired egg shape.
- Place the shaped eggs on a sheet of waxed paper. This prevents them from sticking to the surface while chilling.
- Refrigerate the eggs on the waxed paper for at least 30 minutes. This chilling time is important for firming up the eggs, making them easier to dip in chocolate.
- While the eggs are chilling, melt the chocolate chips using a double boiler or in the microwave. If using a double boiler, heat water in the bottom pot until simmering, then place the bowl with the chocolate chips on top, stirring occasionally until melted and smooth. If using the microwave, heat the chocolate chips in 30-second intervals, stirring in between, until melted and smooth. Be careful not to overheat the chocolate, as it can seize up.
- Once the eggs are chilled and the chocolate is melted, it’s time to dip the eggs. Using a fork or dipping tool, carefully lower each egg into the melted chocolate, covering it completely. Gently tap off any excess chocolate.
- Place the chocolate-covered eggs back on the waxed paper to cool and set.
- Let the chocolate cool completely at room temperature. This usually takes about an hour, but you can speed up the process by placing them in the refrigerator.
- Decorate or personalize the eggs, if desired. You can use sprinkles, melted white chocolate, colored sugar, or even write names on them with icing.
- (Optional) Place the finished eggs in fluted cupcake papers for a festive presentation.
Expert Tips & Tricks
- Soften your butter properly: Make sure the butter is softened to room temperature, but not melted. This will ensure a smooth and creamy base for your peanut butter mixture.
- Don’t overheat the chocolate: When melting the chocolate, be careful not to overheat it, as it can become grainy and seize up. Use low heat and stir frequently. If using the microwave, heat in short intervals (30 seconds) and stir in between.
- Chill for dipping success: Chilling the peanut butter eggs before dipping them in chocolate is crucial. This helps them hold their shape and prevents them from melting into the chocolate.
- Thin the chocolate (if needed): If the melted chocolate is too thick, you can thin it out by adding a teaspoon of vegetable oil or shortening at a time, stirring until smooth.
- Get creative with decorations: Let your imagination run wild with decorations! Use different colored sprinkles, melted white chocolate, chopped nuts, or even edible glitter to create unique and festive eggs.
- Add a touch of salt: A pinch of salt to the peanut butter mixture can enhance the flavors and balance the sweetness.
- Make mini eggs: For smaller, bite-sized treats, shape the dough into mini eggs. These are perfect for snacking or adding to Easter baskets.
Serving & Storage Suggestions
Serve these Peanut Butter Easter Eggs chilled or at room temperature. They are a delightful treat to enjoy on their own or as part of an Easter dessert platter. Store leftover eggs in an airtight container in the refrigerator for up to a week. You can also freeze them for longer storage, up to 2 months. To thaw, simply place them in the refrigerator overnight.
Nutritional Information
(Note: Estimated values will vary based on specific ingredients and portion sizes.)
| Nutrient | Amount per Serving (approx. 1 egg) | % Daily Value |
|---|---|---|
| Calories | 350 kcal | 18% |
| Total Fat | 20g | 31% |
| Saturated Fat | 10g | 50% |
| Cholesterol | 15mg | 5% |
| Sodium | 50mg | 2% |
| Total Carbohydrate | 40g | 13% |
| Dietary Fiber | 2g | 8% |
| Sugars | 30g | – |
| Protein | 5g | 10% |
Variations & Substitutions
- Dairy-Free: Use a dairy-free butter substitute and dairy-free chocolate chips to make this recipe dairy-free.
- Nut-Free: Substitute the peanut butter with sunflower seed butter (sunbutter) for a nut-free option. Ensure your chocolate chips are also nut-free.
- Dark Chocolate: Use dark chocolate chips for a richer, less sweet flavor.
- White Chocolate: Use white chocolate chips for a completely different flavor profile and appearance.
- Add-Ins: Mix in chopped nuts, pretzels, or chocolate candies into the peanut butter mixture for added texture and flavor.
- Flavored Extracts: Experiment with different extracts, such as almond or peppermint, to create unique flavor combinations.
FAQs (Frequently Asked Questions)
Q: Can I use natural peanut butter?
A: While you can use natural peanut butter, the texture may be slightly different. Natural peanut butter tends to be oilier, so you may need to add a bit more confectioners’ sugar to achieve the right consistency.
Q: How do I prevent the chocolate from seizing up?
A: The key is to melt the chocolate slowly and gently. Avoid overheating it, and make sure no water gets into the chocolate.
Q: Can I make these ahead of time?
A: Yes! These Peanut Butter Easter Eggs can be made a few days in advance. Simply store them in an airtight container in the refrigerator.
Q: What if my peanut butter dough is too soft?
A: If your dough is too soft, add more confectioners’ sugar, a tablespoon at a time, until it reaches a workable consistency. Then, chill the dough for a longer period before shaping.
Q: How do I decorate the eggs without making a mess?
A: Use a piping bag or a small spoon to drizzle melted chocolate over the eggs. You can also sprinkle decorations over the wet chocolate for them to adhere.
Final Thoughts
These Peanut Butter Easter Eggs are more than just a sweet treat; they’re a nostalgic journey back to childhood Easters filled with family, laughter, and homemade goodies. The simplicity of this recipe, combined with the ability to personalize each egg, makes it a perfect project for both seasoned bakers and beginners. So, gather your ingredients, put on some music, and create your own batch of delicious memories this Easter season. And don’t forget to share your creations with family and friends – they’re sure to be a hit!