
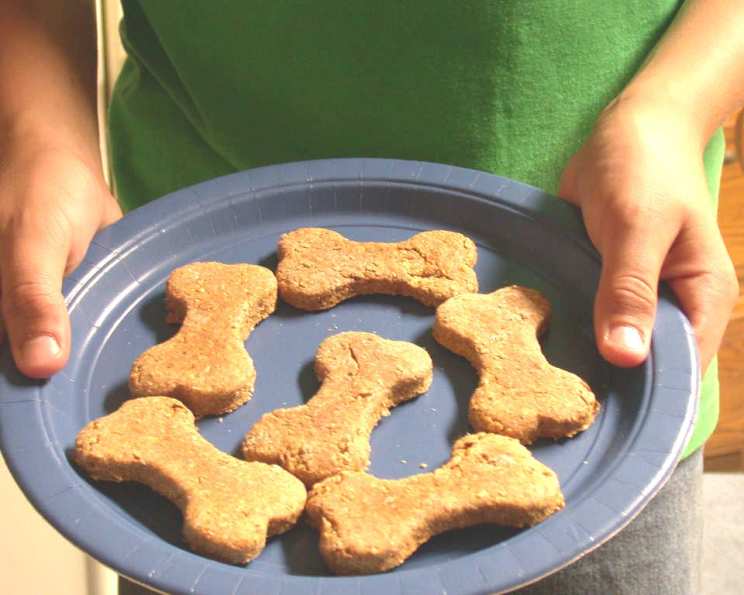
Peanut Butter Graham Dog Biscuits: A Homemade Treat for Your Furry Friend
My old golden retriever, Gus, was the inspiration behind these biscuits. He had the biggest sweet tooth—or rather, a peanut butter tooth! He’d sit patiently by the pantry, those big brown eyes pleading for just a lick of the spoon after I made myself a sandwich. I wanted to create a treat that was both delicious and healthy for him, a way to indulge his cravings without the added sugars and preservatives found in store-bought options. These Peanut Butter Graham Dog Biscuits were the result, and Gus absolutely adored them. I hope your furry friend loves them just as much!
Recipe Overview
- Prep Time: 2 hours
- Cook Time: 2 hours 15 minutes
- Total Time: 4 hours 15 minutes
- Yields: Approximately 75 average-sized biscuits
- Dietary Type: Dog-Friendly
Ingredients
- 2 Eggs
- ⅛ cup Oil (Vegetable or Olive)
- ½ cup Peanut Butter (make sure to use a brand that does NOT contain xylitol, as this is toxic to dogs)
- 1 cup Graham Wafer Crumbs
- 1 cup Milk (dairy or non-dairy)
- ¼ cup Wheat Germ
- ¼ cup Natural Bran
- ¼ cup Cracked Wheat
- ½ cup Oats (rolled or quick)
- 2 cups Whole Wheat Flour
Equipment Needed
- Mixer with a dough hook
- Cookie sheet(s)
- Rolling pin (optional)
- Glass or measuring cup (for flattening)
- Cooling rack
- Oven
Instructions
- In a large mixing bowl (or the bowl of your stand mixer fitted with a dough hook), combine the eggs, oil, peanut butter, graham wafer crumbs, and milk. Mix thoroughly until well combined.
- Add the wheat germ, natural bran, cracked wheat, and oats to the mixture. Mix again until evenly distributed.
- Gradually add the whole wheat flour, mixing on low speed (or by hand) until the dough becomes stiff enough to handle. The dough should be firm and not too sticky. You may need to adjust the amount of flour slightly depending on humidity.
- Preheat your oven to 300°F (150°C). Place the lower oven rack slightly above the middle rack position.
- Roll the dough out to about ¼ inch thickness. Use cookie cutters to create fun shapes, or simply cut into squares or rectangles. Alternatively, you can roll the dough into small balls and flatten them slightly with the bottom of a glass or your fingers.
- Place the biscuits onto one or two large cookie sheets, leaving a little space between each.
- Place the cookie sheet(s) on the top rack of the preheated oven.
- Bake for 90 minutes, then turn the biscuits over and continue baking for another 45 minutes.
- Reduce the oven temperature to 225°F (107°C) and bake for another 45 minutes, or until the biscuits are crisp and hard.
- Test for doneness by removing one biscuit, letting it cool completely, and then breaking it apart. It should be crisp and hard, similar to the texture of milk bones. If it’s still soft, bake for a little longer, checking every 10-15 minutes.
- Once the biscuits are done, remove them from the oven and let them cool completely on a cooling rack. This is crucial for achieving maximum crispness.
- Store the cooled biscuits in an airtight container at room temperature to maintain their crunch.
Expert Tips & Tricks
- Peanut Butter Power: Make sure to use a high-quality peanut butter that is free of xylitol, an artificial sweetener that is highly toxic to dogs. Look for peanut butter with only peanuts and maybe salt as ingredients.
- Dough Consistency: If the dough is too sticky, add a little more flour, one tablespoon at a time, until it reaches the desired consistency. If it’s too dry, add a splash of milk.
- Even Baking: To ensure even baking, rotate the cookie sheets halfway through the baking time, especially if you’re using two sheets. If using two sheets, when turning the biscuits over, also alternate the oven racks you had the sheets on.
- Baking Time Variations: Baking times may vary depending on your oven. Keep a close eye on the biscuits and adjust the time as needed. The key is to achieve a hard, crunchy texture.
- Freezing for Freshness: You can freeze the baked biscuits for longer storage. Just make sure they are completely cooled before freezing. Thaw at room temperature before serving.
- Cookie Cutter Fun: Get creative with cookie cutters! Use dog-bone shapes, paw prints, or any other fun designs to make the biscuits more appealing.
- Customize for your Dog: Consider adding dog-safe ingredients like pureed pumpkin, shredded carrots, or unsweetened apple sauce to the dough for added flavor and nutrients.
Serving & Storage Suggestions
These Peanut Butter Graham Dog Biscuits can be given to your dog as a reward, a training treat, or simply a tasty snack. Always ensure fresh water is available for your dog. Store the cooled biscuits in an airtight container at room temperature. Properly stored, they should last for 2-3 weeks. For longer storage, freeze them in a freezer-safe bag or container for up to 3 months. No need to reheat – serve them straight from the container or freezer.
Nutritional Information
Please note that this is an estimate, and actual values may vary based on specific ingredients used.
| Nutrient | Amount per Biscuit (approx.) | % Daily Value (for a medium-sized dog) |
|---|---|---|
| Calories | 40 kcal | N/A |
| Total Fat | 2 g | N/A |
| Saturated Fat | 0.5 g | N/A |
| Cholesterol | 6 mg | N/A |
| Sodium | 20 mg | N/A |
| Total Carbohydrate | 5 g | N/A |
| Dietary Fiber | 1 g | N/A |
| Sugars | 1 g | N/A |
| Protein | 2 g | N/A |
Variations & Substitutions
- Gluten-Free: Substitute the whole wheat flour with a gluten-free blend designed for baking. You may need to adjust the liquid content slightly.
- Dairy-Free: Use almond milk, soy milk, or another plant-based milk alternative in place of cow’s milk.
- Grain-Free: Replace the graham wafer crumbs, wheat germ, cracked wheat, and oats with a blend of almond flour and coconut flour. Adjust the liquid content as needed.
- Savory Option: Reduce or eliminate the graham wafer crumbs and add a small amount of dog-friendly herbs like parsley or rosemary.
- Sweet Potato Boost: Replace 1/4 cup of the peanut butter with mashed cooked sweet potato for extra vitamins and a subtle sweetness.
FAQs (Frequently Asked Questions)
Q: Can I use a different type of flour?
A: While whole wheat flour provides the best texture and nutritional value, you can experiment with other flours like oat flour or spelt flour. Keep in mind that you may need to adjust the liquid content depending on the flour you use.
Q: My dog is allergic to peanuts. What can I use instead of peanut butter?
A: Sunflower seed butter (sunbutter) is a great alternative to peanut butter for dogs with allergies. Ensure it doesn’t contain xylitol.
Q: How long do these biscuits last?
A: When stored in an airtight container at room temperature, these biscuits should last for about 2-3 weeks. You can extend their shelf life by freezing them for up to 3 months.
Q: Can I add sugar to make them sweeter?
A: It is not recommended to add sugar to dog biscuits. Dogs don’t need added sugar in their diet, and it can be harmful to their health. The peanut butter and graham cracker crumbs provide enough sweetness.
Q: My biscuits are burning on the bottom. What can I do?
A: Make sure your oven rack is positioned correctly (slightly above the middle rack). You can also try placing a baking sheet underneath the cookie sheet with the biscuits to provide extra insulation and prevent burning.
Final Thoughts
These Peanut Butter Graham Dog Biscuits are a simple and rewarding way to show your furry friend some love. They’re packed with wholesome ingredients and free of artificial additives, making them a much healthier alternative to store-bought treats. I encourage you to try this recipe and experiment with different variations to find your dog’s favorite flavor combination. And, of course, I’d love to hear about your experience and any adaptations you make. Happy baking, and happy treating!