
Peanut Butter-Hershey’s Kisses Cookies: A Sweet Nostalgia
The scent alone transports me back to childhood Christmases. My grandmother, a whirlwind of flour and sugar, would always have a plate piled high with these peanut butter blossoms. The combination of the slightly salty peanut butter cookie and the sweet chocolate Hershey’s Kiss was, and still is, pure magic. They are simple, unassuming, yet intensely satisfying – the perfect embodiment of holiday cheer and the warmth of family.
Recipe Overview
- Prep Time: 15 minutes
- Cook Time: 8-10 minutes
- Total Time: 23-25 minutes
- Yield: 3 dozen cookies
- Dietary Type: Not specified
Ingredients
- ½ cup sugar
- ½ cup brown sugar, packed
- ½ cup creamy peanut butter
- ¼ cup butter, softened
- ¼ cup shortening
- 1 egg
- 1 ½ cups flour
- ¾ teaspoon baking soda
- ½ teaspoon baking powder
- Granulated sugar, for rolling
- 3 dozen Hershey’s Chocolate Kisses
Equipment Needed
- Mixing Bowls
- Measuring Cups and Spoons
- Electric Mixer (optional, but recommended)
- Cookie Sheets
- Cooling Rack
Instructions
-
Preheat your oven to 375°F (190°C). Ensure the oven rack is positioned in the center. An accurate oven temperature is crucial for even baking.
-
In a large mixing bowl, cream together ½ cup of sugar, ½ cup of packed brown sugar, ½ cup of creamy peanut butter, ¼ cup of softened butter, and ¼ cup of shortening. Beat until the mixture is light and fluffy. Using an electric mixer, either a stand mixer or a hand mixer, will make this process much easier and faster. If you’re mixing by hand, make sure your butter is properly softened (but not melted) to avoid lumps.
-
Beat in 1 egg until fully incorporated. Make sure to scrape down the sides of the bowl to ensure even mixing.
-
In a separate bowl, whisk together 1 ½ cups of flour, ¾ teaspoon of baking soda, and ½ teaspoon of baking powder. This step ensures the leavening agents are evenly distributed throughout the flour, which will help the cookies rise properly.
-
Gradually add the dry ingredients to the wet ingredients, mixing until just combined. Be careful not to overmix, as this can result in tough cookies. The dough will be somewhat stiff, which is normal.
-
Roll the dough into 1-inch balls. A small cookie scoop can help ensure uniformity.
-
Roll each ball in granulated sugar until evenly coated. The sugar coating adds a delightful sweetness and a slightly crunchy texture to the cookies.
-
Place the sugared cookie dough balls about 2 inches apart on ungreased cookie sheets. Leaving enough space between the cookies is essential, as they will spread during baking.
-
Bake for 8 to 10 minutes, or until the edges are lightly browned. Keep a close eye on the cookies during the last few minutes of baking to prevent them from burning. The baking time may vary slightly depending on your oven.
-
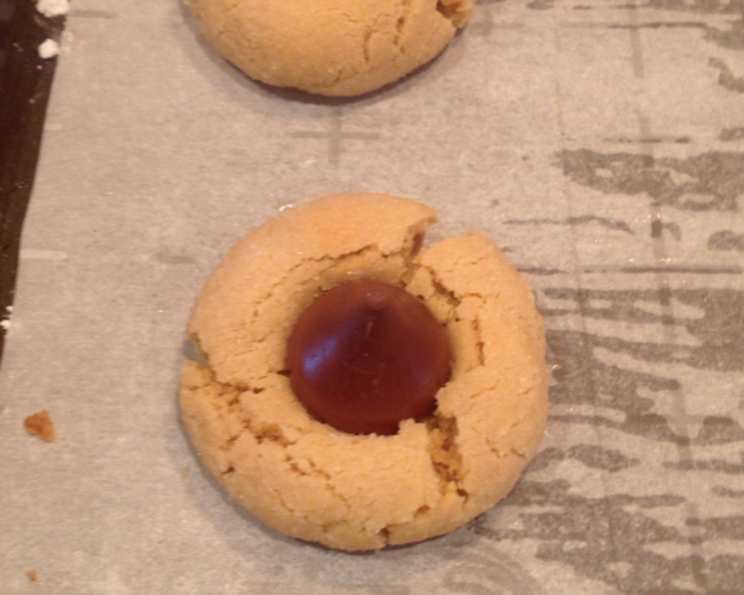
Immediately after removing the cookies from the oven, press a Hershey’s Chocolate Kiss firmly into the center of each cookie. Work quickly while the cookies are still soft. The heat from the cookie will slightly melt the chocolate, helping it adhere.
-
Allow the cookies to cool completely on the cookie sheet before transferring them to a wire cooling rack. This will prevent them from breaking. Once cooled, the chocolate will firm up, securing the Kiss in place.
Expert Tips & Tricks
- Soften Butter Properly: Softened butter is key for a smooth batter. Take the butter out of the fridge an hour before baking, or microwave it in 5-second intervals, being careful not to melt it.
- Chill the Dough: If your kitchen is warm or the dough seems too soft, chill it in the refrigerator for 30 minutes before rolling into balls. This will prevent the cookies from spreading too much during baking.
- Use a Cookie Scoop: A cookie scoop ensures uniform size, resulting in evenly baked cookies.
- Don’t Overbake: Overbaking will result in dry, crumbly cookies. Look for light golden brown edges as your cue.
- Make Ahead: The cookie dough can be made ahead of time and stored in the refrigerator for up to 2 days. Bring to room temperature slightly before rolling and baking.
Serving & Storage Suggestions
These peanut butter blossoms are perfect served warm or at room temperature. They make a delightful addition to holiday cookie platters, afternoon tea, or a simple sweet treat after dinner.
To store, keep them in an airtight container at room temperature for up to 5 days. For longer storage, freeze the baked cookies for up to 2 months. Thaw at room temperature before serving. You can also freeze the unbaked cookie dough balls for up to 3 months. When ready to bake, thaw them overnight in the refrigerator and bake as directed.
Nutritional Information
(Note: Nutritional information is an estimate and may vary based on specific ingredients and portion sizes.)
| Nutrient | Amount per Serving | % Daily Value |
|---|---|---|
| Calories | 115 kcal | 6% |
| Total Fat | 6.5g | 8% |
| Saturated Fat | 2.8g | 14% |
| Cholesterol | 9mg | 3% |
| Sodium | 66mg | 3% |
| Total Carbohydrate | 12.5g | 4% |
| Dietary Fiber | 0.2g | 1% |
| Sugars | 7.7g | |
| Protein | 1.3g | 3% |
Variations & Substitutions
- Chocolate Variations: Instead of Hershey’s Kisses, try using other small chocolate candies like miniature peanut butter cups or chocolate stars.
- Nut Butter Variations: Experiment with different nut butters, such as almond butter or cashew butter, for a unique flavor profile.
- Gluten-Free Option: Substitute the all-purpose flour with a gluten-free blend for a gluten-free version of these cookies.
- Add Sprinkles: Decorate the cookies with sprinkles before baking for a festive touch.
- Sea Salt: Sprinkle a tiny bit of sea salt on the cookies after adding the Hershey’s Kiss to enhance the sweet and salty flavour.
FAQs (Frequently Asked Questions)
Q: Can I use natural peanut butter for these cookies?
A: Yes, but be aware that natural peanut butter tends to be oilier, which may affect the texture of the cookies. You might need to add a tablespoon or two of flour to compensate. Make sure to stir the natural peanut butter well before measuring.
Q: Can I make these cookies without shortening?
A: Yes, you can substitute the shortening with an equal amount of butter. However, shortening helps to create a softer, more tender cookie, so the texture may be slightly different.
Q: How do I prevent the cookies from spreading too much?
A: Chilling the dough before baking can help prevent excessive spreading. Also, make sure your oven temperature is accurate.
Q: My Hershey’s Kisses melted and lost their shape. What did I do wrong?
A: This usually happens when the cookies are too hot when the Kisses are pressed in. Let the cookies cool slightly for a minute or two after removing them from the oven before adding the Kisses.
Q: Can I freeze the baked cookies?
A: Yes, these cookies freeze very well. Store them in an airtight container or freezer bag for up to 2 months. Thaw at room temperature before serving.
Final Thoughts
These Peanut Butter-Hershey’s Kisses Cookies are more than just a recipe; they’re a celebration of simple pleasures and cherished memories. I encourage you to try this recipe and experience the joy these delightful treats can bring. Don’t hesitate to experiment with variations and make them your own. Share your creations with friends and family, and let the sweet aroma of baking fill your home with warmth and happiness. Happy baking!