
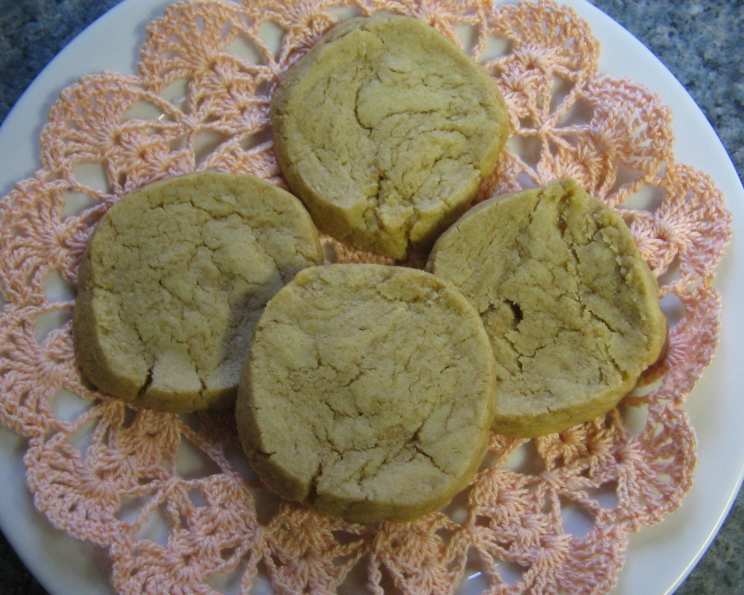
Peanut Butter Icebox Cookies: A Slice-and-Bake Delight
I remember the first time I tasted these cookies. It was during a particularly hectic holiday season, and my aunt, ever the organized baker, pulled out a neatly wrapped log from her freezer. Slicing off rounds of dough, she popped them into the oven, and minutes later, the aroma of peanut butter filled the kitchen. Warm and slightly chewy, those cookies were a revelation – a perfect blend of convenience and homemade goodness. The nutty flavor was intense, yet surprisingly balanced, and the whole process felt like a little bit of magic amidst the holiday rush.
Recipe Overview
- Prep Time: 20 minutes
- Freeze Time: 3 hours
- Cook Time: 8-10 minutes
- Total Time: 3 hours 30 minutes
- Servings: 24 cookies
- Dietary Type: Vegetarian
Ingredients
- 1 cup flour
- 1/4 teaspoon baking soda
- 1/8 teaspoon salt
- 3 tablespoons stick margarine, softened
- 2 tablespoons chunky peanut butter
- 1/2 cup packed brown sugar
- 1/4 cup granulated sugar
- 1 teaspoon vanilla extract
- 1 egg white
- Cooking spray
Equipment Needed
- Mixing Bowls
- Electric Mixer
- Wax Paper
- Baking Sheet
- Wire Rack
Instructions
-
In a medium bowl, combine the flour, baking soda, and salt. Set aside. This ensures the dry ingredients are evenly distributed for a consistent texture.
-
In a larger mixing bowl, beat the softened margarine and chunky peanut butter together using an electric mixer until light and fluffy. This step is crucial for incorporating air into the dough, resulting in a more tender cookie.
-
Gradually add the packed brown sugar and granulated sugar to the margarine mixture, beating until well-blended. The sugars should be fully incorporated, creating a smooth and even base for the dough.
-
Add the vanilla extract and egg white to the mixture and beat well. The egg white helps bind the ingredients together without adding excessive richness, while the vanilla enhances the overall flavor profile.
-
Add the flour mixture to the wet ingredients and stir until just combined. Be careful not to overmix, as this can lead to tough cookies.
-
Turn the dough out onto a sheet of wax paper.
-
Shape the dough into a 6-inch log, ensuring it’s uniformly thick for even slicing and baking.
-
Wrap the log tightly in wax paper.
-
Freeze the dough for at least 3 hours. This allows the dough to firm up, making it easier to slice and preventing the cookies from spreading too much during baking.
-
Preheat your oven to 350°F (175°C). Ensure your oven is properly preheated for even baking.
-
Cut the frozen dough log into 24 (1/4-inch) slices. A sharp knife and a gentle sawing motion will help prevent the dough from crumbling.
-
Place the slices about 1 inch apart on a baking sheet that has been lightly coated with cooking spray. This spacing allows for even heat circulation and prevents the cookies from sticking together.
-
Bake at 350°F (175°C) for 8 to 10 minutes, or until the edges are lightly golden brown. Keep a close eye on the cookies to prevent them from burning. The exact baking time may vary depending on your oven.
-
Remove the cookies from the baking sheet immediately and cool them completely on wire racks. This prevents the cookies from continuing to cook on the hot baking sheet and ensures a crispier texture.
Expert Tips & Tricks
- For a richer flavor, consider using brown butter in place of the softened margarine. Brown the butter slowly over medium heat until it develops a nutty aroma, then let it cool slightly before using.
- If you prefer a smoother cookie, use creamy peanut butter instead of chunky.
- To prevent the dough from sticking to the wax paper, lightly dust it with flour before shaping the log.
- If you find the frozen dough log difficult to slice, let it sit at room temperature for a few minutes to soften slightly.
- For extra flavor, add a sprinkle of sea salt to the tops of the cookies before baking.
- If the cookies spread too thin during baking, try chilling the dough log for an additional hour before slicing.
Serving & Storage Suggestions
These Peanut Butter Icebox Cookies are delicious served warm with a glass of cold milk or as a sweet treat alongside a cup of coffee or tea. They also make a wonderful addition to a dessert platter or a homemade gift for friends and family.
To store, keep the cooled cookies in an airtight container at room temperature for up to 3 days. For longer storage, freeze the baked cookies in a freezer-safe container for up to 2 months. You can also freeze the unbaked dough log for up to 3 months. Simply thaw the dough in the refrigerator overnight before slicing and baking.
Nutritional Information
| Nutrient | Amount per Serving | % Daily Value |
|---|---|---|
| Calories | 66 kcal | N/A |
| Calories from Fat | 19 kcal | 29% |
| Total Fat | 2.1 g | 3% |
| Saturated Fat | 0.4 g | 1% |
| Cholesterol | 0 mg | 0% |
| Sodium | 52.5 mg | 2% |
| Total Carbohydrate | 10.8 g | 3% |
| Dietary Fiber | 0.2 g | 1% |
| Sugars | 6.7 g | N/A |
| Protein | 1 g | 2% |
Note: Percent Daily Values are based on a 2,000 calorie diet. These values are estimates.
Variations & Substitutions
- Gluten-Free: Substitute the all-purpose flour with a gluten-free blend. Be sure to choose a blend that contains xanthan gum for binding.
- Dairy-Free: Ensure your margarine is dairy-free. Many plant-based margarines are available and work well in this recipe.
- Vegan: Substitute the egg white with 1 tablespoon of aquafaba (the liquid from a can of chickpeas).
- Chocolate Peanut Butter: Add 1/4 cup of cocoa powder to the flour mixture for a chocolatey twist.
- Different Nut Butters: Experiment with other nut butters, such as almond butter or cashew butter, for a unique flavor.
FAQs (Frequently Asked Questions)
Q: Can I use natural peanut butter for this recipe?
A: Yes, you can use natural peanut butter, but make sure to stir it well before measuring, as the oil tends to separate.
Q: How can I prevent the cookies from spreading too much?
A: Ensure the dough is thoroughly chilled and the oven is properly preheated. You can also try adding a tablespoon of flour to the dough if it seems too soft.
Q: Can I make the dough ahead of time?
A: Absolutely! The dough can be made several days in advance and stored in the freezer until you’re ready to bake.
Q: What if my cookies are browning too quickly?
A: If the cookies are browning too quickly, lower the oven temperature by 25 degrees and continue baking until done.
Q: How do I know when the cookies are done?
A: The cookies are done when the edges are lightly golden brown and the centers are set. They will continue to firm up as they cool.
Final Thoughts
These Peanut Butter Icebox Cookies are a testament to the fact that delicious homemade treats don’t have to be complicated or time-consuming. With their intensely peanut buttery flavor and perfectly chewy texture, they’re sure to become a family favorite. So, go ahead, whip up a batch of this easy-to-make dough, stash it in your freezer, and enjoy freshly baked cookies whenever the craving strikes. Don’t forget to share your baking adventures and any creative variations you try – happy baking!