
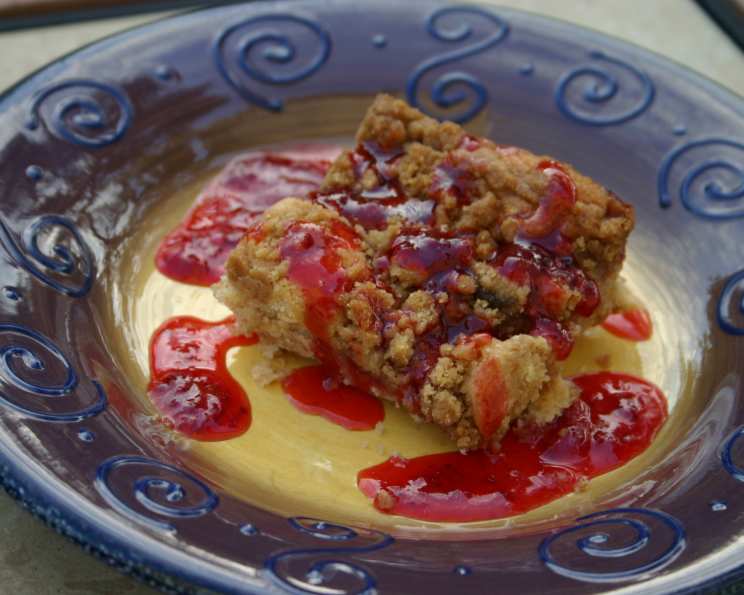
Peanut Butter & Jelly Snack Cake: A Nostalgic Treat for All Ages
The scent of peanut butter and jelly takes me straight back to childhood, to simpler times filled with after-school snacks and carefree days. There’s something so inherently comforting about that classic combination, and transforming it into a snack cake elevates it to a shareable, celebratory treat. This Peanut Butter & Jelly Snack Cake isn’t just a dessert; it’s a warm hug in every bite, a nostalgic reminder of home, and a surefire way to bring a smile to anyone’s face.
Recipe Overview
- Prep Time: 15 minutes
- Cook Time: 30-35 minutes
- Total Time: 45-50 minutes
- Servings: 12
- Yield: 1 cake
- Dietary Type: Can be adapted to be gluten-free
Ingredients
- 2 cups flour
- ¾ cup brown sugar, packed
- 2 teaspoons baking powder
- ¼ teaspoon baking soda
- ¼ teaspoon salt
- 1 cup milk
- 1 cup butter
- ½ cup peanut butter
- 2 eggs
- ¼ cup butter, softened
- 1 cup strawberry jelly or 1 cup grape jelly
Equipment Needed
- Large mixing bowl
- Small mixing bowl
- Electric mixer
- 13x9x2-inch baking pan
- Measuring cups and spoons
Instructions
-
Preheat your oven to 350°F (175°C). Grease a 13x9x2-inch baking pan thoroughly. This will prevent the cake from sticking and ensure easy removal.
-
In a large mixing bowl, combine the dry ingredients: flour, brown sugar, baking powder, baking soda, and salt. Whisk them together to ensure even distribution and eliminate any clumps.
-
Add the wet ingredients to the dry ingredients: milk, peanut butter, eggs, and butter. Use an electric mixer to beat the mixture on low speed until just combined. Then, increase the speed to medium and beat for one minute, scraping down the sides of the bowl constantly to ensure everything is incorporated evenly. The batter should be smooth and well-mixed.
-
Spread approximately two-thirds of the cake batter evenly into the prepared baking pan.
-
In a separate small bowl, stir the jelly to loosen it up slightly. This makes it easier to spread and prevents it from being too dense in the cake. Spoon the jelly evenly over the batter in the pan.
-
Drop the remaining one-third of the cake batter in small mounds on top of the jelly. This creates a marbled effect and ensures that every bite has a perfect balance of cake, peanut butter, and jelly.
-
Prepare the Crumb Topping: In a small mixing bowl, combine ½ cup packed brown sugar and ½ cup flour. Cut in ¼ cup peanut butter and 3 tablespoons butter using a pastry blender or your fingers until the mixture resembles coarse crumbs.
-
Sprinkle the Crumb Topping evenly over the batter and jelly in the pan.
-
Bake in the preheated oven for 30-35 minutes, or until the cake is golden brown and a toothpick inserted into the center comes out clean. Start checking for doneness around the 30-minute mark to avoid overbaking. Ovens can vary, so adjust baking time as needed.
-
Let the cake cool slightly before serving. It’s delicious served warm!
Expert Tips & Tricks
- For a more intense peanut butter flavor, use natural peanut butter (the kind you need to stir) instead of processed peanut butter.
- If you’re short on time, you can use a store-bought crumb topping.
- To prevent the jelly from sinking to the bottom of the cake, try chilling the batter for 30 minutes before adding the jelly. This will thicken the batter slightly and help suspend the jelly.
- If the crumb topping starts to brown too quickly during baking, tent the cake loosely with aluminum foil.
- Don’t overmix the batter! Overmixing can develop the gluten in the flour, resulting in a tough cake. Mix until just combined.
Serving & Storage Suggestions
This Peanut Butter & Jelly Snack Cake is best served warm, either on its own or with a scoop of vanilla ice cream. It’s also delicious with a glass of cold milk or a cup of coffee.
To store leftovers, cover the cake tightly with plastic wrap or place it in an airtight container. It will keep at room temperature for up to 2 days, in the refrigerator for up to 5 days, or in the freezer for up to 2 months.
To reheat, warm individual slices in the microwave for 15-20 seconds or bake the entire cake in a preheated oven at 350°F (175°C) for 10-15 minutes.
Nutritional Information
| Nutrient | Amount per Serving | % Daily Value |
|---|---|---|
| Calories | 461 kcal | N/A |
| Total Fat | 26 g | 40% |
| Saturated Fat | 14 g | 70% |
| Cholesterol | 85 mg | 28% |
| Sodium | 388 mg | 16% |
| Total Carbohydrate | 52 g | 17% |
| Dietary Fiber | 2 g | 5% |
| Sugars | 29 g | N/A |
| Protein | 7 g | 13% |
Note: Nutritional information is an estimate and may vary based on specific ingredients and portion sizes.
Variations & Substitutions
- Gluten-Free: Use a gluten-free flour blend in place of the all-purpose flour. Ensure the baking powder is also gluten-free.
- Dairy-Free: Substitute the butter with a dairy-free butter alternative and the milk with almond milk, soy milk, or oat milk.
- Nut-Free: Replace the peanut butter with sunflower seed butter or tahini.
- Jelly Variations: Experiment with different flavors of jelly, such as raspberry, blackberry, or apricot.
- Chocolate Chip Addition: Add ½ cup of chocolate chips to the batter for a chocolate peanut butter and jelly twist.
FAQs (Frequently Asked Questions)
Q: Can I use a different size baking pan?
A: While a 13×9-inch pan is recommended, you can use a different size pan, but the baking time may need to be adjusted. Watch the cake closely to prevent overbaking.
Q: Can I make this cake ahead of time?
A: Yes, this cake can be made a day ahead of time. Store it covered at room temperature or in the refrigerator.
Q: Can I freeze this cake?
A: Yes, this cake freezes well. Wrap it tightly in plastic wrap and then in aluminum foil. Thaw it overnight in the refrigerator before serving.
Q: What if I don’t have brown sugar?
A: You can substitute white sugar for brown sugar, but the brown sugar adds a richer flavor and helps keep the cake moist. If substituting, consider adding a tablespoon of molasses to the white sugar.
Q: Why is my cake dry?
A: Overbaking is the most common cause of a dry cake. Be sure to check for doneness around the 30-minute mark and adjust the baking time as needed. Also, avoid overmixing the batter.
Final Thoughts
This Peanut Butter & Jelly Snack Cake is more than just a recipe; it’s an invitation to create a sweet memory. Whether you’re baking it for a family gathering, a potluck with friends, or simply to treat yourself, this cake is sure to be a hit. So go ahead, preheat your oven, and let the aroma of peanut butter and jelly fill your kitchen. Don’t hesitate to add your own personal touch to the recipe – a sprinkle of sea salt on top, a swirl of extra jelly, or a handful of your favorite nuts. And most importantly, share your creations and experiences! Happy baking!