
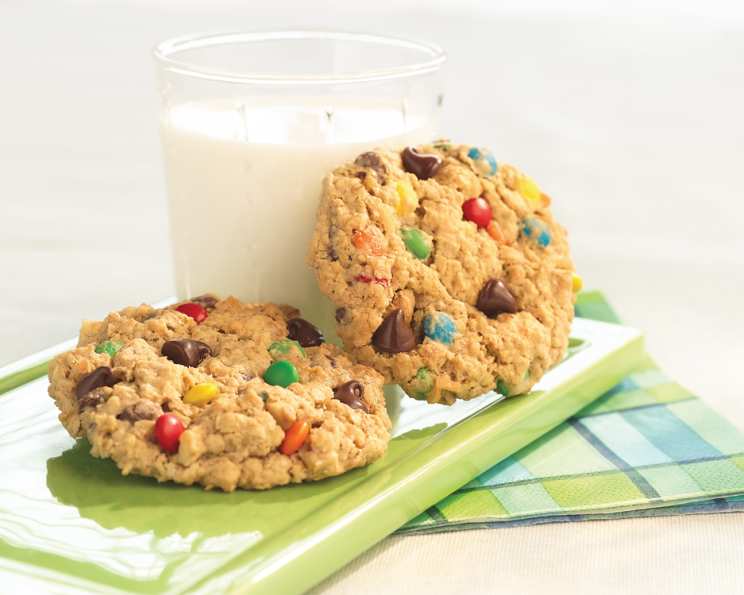
Peanut Butter Monster Cookies: A Taste of Childhood Fun
I’ll never forget the first time I saw a Peanut Butter Monster Cookie. It was at a school bake sale, and amidst the neatly arranged cupcakes and precisely cut brownies, these gloriously lumpy, colorful cookies stood out like a beacon. They were enormous, packed with everything imaginable, and looked like they had been baked by a particularly enthusiastic monster (a friendly one, of course). One bite, and I was hooked. The chewy oats, the salty-sweet peanut butter, the bursts of chocolate, and the vibrant crunch of candy-coated chocolates – it was pure cookie perfection and a joyful explosion of textures and flavors.
Recipe Overview
- Prep Time: 30 minutes
- Cook Time: 10-15 minutes
- Total Time: 45 minutes
- Yields: 5 1/2 dozen
- Dietary Type: Vegetarian
Ingredients
- 1⁄2 stick Crisco® Baking Sticks Butter Flavor All-Vegetable Shortening or 1/2 cup Crisco® Butter Flavor All-Vegetable Shortening
- 2⁄3 cup sugar
- 2⁄3 cup firmly packed light brown sugar
- 1 teaspoon vanilla extract
- 1 cup Jif® Extra Crunchy Peanut Butter
- 2 large eggs
- 1⁄4 cup water
- 1⁄2 cup Pillsbury BEST® All Purpose Flour
- 2 teaspoons baking soda
- 1⁄2 teaspoon salt
- 4 cups quick-cooking rolled oats
- 1 cup semi-sweet chocolate chips
- 1 cup miniature colorful candy covered plain chocolate candies or 1 cup regular colorful candy covered plain chocolate candies
- 1 cup flaked coconut (optional)
Equipment Needed
- Large mixing bowl
- Electric mixer
- Measuring cups and spoons
- Cookie sheets
- Wire rack
Instructions
-
Preheat your oven to 350ºF (175ºC). Ensure the oven rack is positioned in the center.
-
In a large bowl, beat the shortening, sugar, brown sugar, and vanilla extract together using an electric mixer on medium speed. Continue beating until the mixture is light and fluffy. This usually takes about 3-5 minutes. Make sure to scrape down the sides of the bowl periodically to ensure even mixing.
-
Add the peanut butter, eggs, and water to the mixture. Mix everything together until well combined. The mixture might appear slightly curdled at this stage, but don’t worry, it will all come together.
-
In a separate large bowl, combine the flour, baking soda, and salt. Stir in the rolled oats. Make sure the baking soda and salt are evenly distributed throughout the flour and oats to ensure proper leavening and flavor in your cookies.
-
Gradually add the dry ingredients (flour, baking soda, salt, and oats) to the wet peanut butter mixture. Mix until everything is well blended. Be careful not to overmix, as this can result in tough cookies. Stop mixing as soon as the dry ingredients are incorporated.
-
Stir in the chocolate chips, candy-coated chocolate pieces, and coconut (if using). Ensure that these ingredients are evenly distributed throughout the dough.
-
Cover the bowl with plastic wrap and chill the dough in the refrigerator for 30 minutes. This chilling period helps to prevent the cookies from spreading too thin during baking and allows the flavors to meld together.
-
Drop the chilled dough by heaping tablespoonfuls, about 2 inches apart, onto ungreased cookie sheets.
-
Flatten each cookie to a 2-inch circle. A damp hand or the back of a spoon works well for this.
-
Bake for 10 to 12 minutes, or until the edges are light brown. Keep a close eye on the cookies, as baking times can vary depending on your oven.
-
Cool the cookies on the baking sheets for 2 minutes before transferring them to a wire rack to cool completely. This prevents them from breaking apart while they are still soft.
-
For Jumbo Peanut Butter Monster Cookies: Prepare the cookie dough as directed above. Drop by 1/4-cupfuls, 3 inches apart, onto ungreased cookie sheets. Flatten to 3-inch circles. Bake 13 to 15 minutes or until light brown around edges. Makes 1 1/2 dozen.
Expert Tips & Tricks
- Creaming is Key: Don’t skimp on the creaming process of the shortening and sugars. This is where the air is incorporated into the dough, leading to a lighter, more tender cookie.
- Chill Out: Chilling the dough is crucial. It not only prevents excessive spreading but also allows the flavors to deepen and develop. If you’re short on time, even 15 minutes of chilling can make a difference.
- Even Baking: For consistent baking, use an oven thermometer to ensure your oven is accurately calibrated. Rotate the cookie sheets halfway through the baking time for even browning.
- Peanut Butter Power: While I love using extra crunchy peanut butter for the added texture, smooth peanut butter will also work well. You can even use a natural peanut butter, but be sure to stir it well before measuring.
- Add-ins Galore: Feel free to experiment with other mix-ins, such as chopped nuts, dried cranberries, pretzels, or even a swirl of Nutella.
Serving & Storage Suggestions
These Peanut Butter Monster Cookies are best enjoyed slightly cooled, when the chocolate chips are still melty and the oats are wonderfully chewy. Serve them with a cold glass of milk or a scoop of vanilla ice cream for the ultimate treat.
Store cooled cookies in an airtight container at room temperature for up to 3 days. For longer storage, you can freeze them for up to 2 months. To freeze, place the cooled cookies in a single layer on a baking sheet and freeze until solid. Then, transfer them to a freezer-safe bag or container. Thaw the cookies at room temperature before serving.
Nutritional Information
| Nutrient | Amount per Serving | % Daily Value |
|---|---|---|
| Calories | 903 kcal | N/A |
| Calories from Fat | 289 g | 32% |
| Total Fat | 32.1 g | 49% |
| Saturated Fat | 13.9 g | 69% |
| Cholesterol | 72.9 mg | 24% |
| Sodium | 733.5 mg | 30% |
| Total Carbohydrate | 145.6 g | 48% |
| Dietary Fiber | 9.1 g | 36% |
| Sugars | 91.6 g | N/A |
| Protein | 14.2 g | 28% |
Note: Nutritional information is an estimate and may vary based on specific ingredients and preparation methods.
Variations & Substitutions
- Gluten-Free Monster Cookies: Substitute the all-purpose flour with a gluten-free all-purpose blend. Be sure to choose a blend that contains xanthan gum for the best results.
- Dairy-Free Delight: Use dairy-free chocolate chips and ensure your candy-coated chocolates are also dairy-free.
- Nut-Free Monster Cookies: Replace the peanut butter with sunflower seed butter or tahini.
- Seasonal Twists: Add pumpkin spice and chopped pecans in the fall, or peppermint extract and crushed candy canes during the holidays.
FAQs (Frequently Asked Questions)
Q: Why did my cookies spread too thin?
A: This is often due to not chilling the dough long enough or using too much butter/shortening. Make sure to chill the dough for at least 30 minutes and measure your ingredients accurately.
Q: Can I use old-fashioned rolled oats instead of quick-cooking oats?
A: While you can, the texture will be different. Quick-cooking oats are smaller and softer, which helps create a chewier cookie. If using old-fashioned oats, consider pulsing them in a food processor a few times to break them down slightly.
Q: My cookies are burning on the bottom but still raw in the middle. What should I do?
A: This indicates that your oven may be running hot. Lower the oven temperature by 25 degrees and bake for a few extra minutes. You can also try placing a second cookie sheet underneath the first one to insulate the bottoms of the cookies.
Q: Can I make the dough ahead of time and bake it later?
A: Absolutely! The dough can be stored in the refrigerator for up to 3 days. Just be sure to bring it to room temperature slightly before scooping and baking. You can also freeze the dough for longer storage.
Q: What is the best way to keep my cookies soft?
A: Store the cooled cookies in an airtight container with a slice of bread. The bread will help to absorb excess moisture and keep the cookies soft.
Final Thoughts
Peanut Butter Monster Cookies are more than just a dessert; they’re a delightful reminder of childhood joy and boundless creativity. This recipe is incredibly versatile, allowing you to customize it to your liking with your favorite add-ins. I encourage you to try this recipe and share your own monster cookie creations with friends and family. Bake a batch, grab a glass of milk, and let the monster fun begin!