
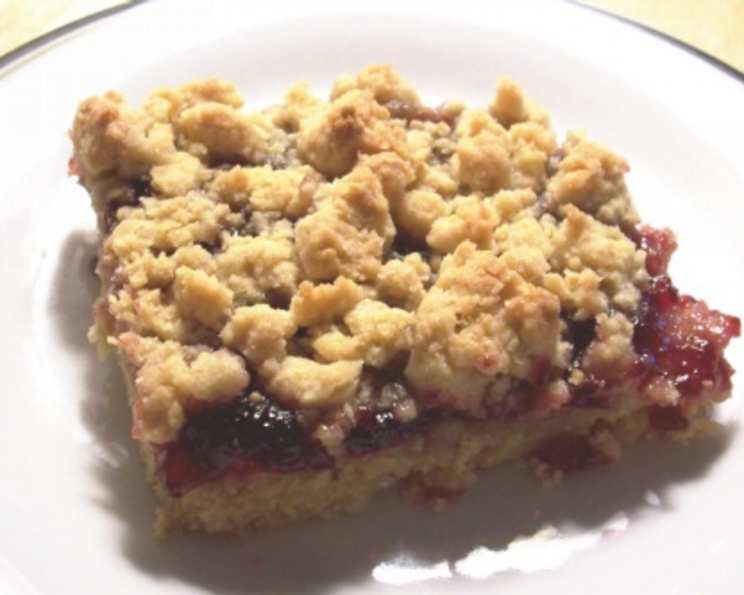
Peanut Butter ‘N’ Jelly Bliss Bars: A Nostalgic Treat Reimagined
There’s something undeniably comforting about the simple pleasure of a peanut butter and jelly sandwich. As a child, it was my go-to lunch, a symbol of carefree days and boundless energy. But sometimes, a sandwich just isn’t enough. These Peanut Butter ‘N’ Jelly Bars capture that same heartwarming flavor combination but in a chewy, satisfying bar that’s perfect for sharing (or, let’s be honest, keeping all to yourself!). The sweet and salty dance is simply irresistible.
Recipe Overview
- Prep Time: 15 minutes
- Cook Time: 30-35 minutes
- Total Time: 45-50 minutes
- Servings: 20-24 bars
- Yield: 1 (13×9 inch) pan
- Dietary Type: Vegetarian
Ingredients
- 3 cups flour
- 1 cup sugar
- 1 1/2 teaspoons baking powder
- 1/2 cup (1 stick) butter or margarine, softened
- 1/2 cup peanut butter
- 2 eggs, slightly beaten
- 1 cup grape jelly or jam (or your favorite flavor)
Equipment Needed
- 13x9x2 inch baking pan
- Mixing bowls
- Measuring cups and spoons
- Pastry blender or fork
- Oven
- Cooling rack
Instructions
-
Preheat your oven to 375 degrees F (190 degrees C). Grease a 13x9x2 inch baking pan thoroughly. This prevents the bars from sticking and ensures easy removal.
-
In a large mixing bowl, combine the flour, sugar, and baking powder. Whisk these dry ingredients together to ensure the baking powder is evenly distributed. This helps the bars rise uniformly.
-
Add the softened butter (or margarine) and peanut butter to the flour mixture. Using a pastry blender or a fork, cut in the butter and peanut butter until the mixture resembles coarse meal. This step is crucial for creating a crumbly yet cohesive base. If you don’t have a pastry blender, you can use your fingertips, but work quickly to prevent the butter from melting too much.
-
Pour in the slightly beaten eggs and stir well until all the flour is incorporated. The dough will be somewhat crumbly, but it should hold together when pressed. Avoid overmixing, as this can lead to tough bars.
-
Press half of the dough mixture into the prepared baking pan. Spread it evenly across the bottom, pressing firmly to create a solid base. A flat-bottomed measuring cup or the back of a spoon can be helpful for this.
-
Spread the grape jelly or jam evenly over the peanut butter mixture. Don’t worry if some of the crumbs get mixed in while you’re spreading the jam; it won’t affect the final result. The goal is to create a distinct layer of sweet, fruity goodness.
-
Crumble the remaining dough evenly over the jelly layer. Try to distribute the crumbles as evenly as possible to ensure a consistent topping.
-
Bake in the preheated 375 degree F (190 degrees C) oven for 30 to 35 minutes, or until the top is golden brown and the edges are set. A toothpick inserted into the center should come out with just a few moist crumbs attached.
-
Remove the pan from the oven and let the bars cool completely in the pan on a wire rack before cutting into bars. Cooling completely is essential for clean cuts and prevents the bars from falling apart.
Expert Tips & Tricks
- Soften the butter properly: Make sure your butter is truly softened, not melted. Softened butter will be pliable but still hold its shape. This is key for creating the right texture in the crust.
- Use parchment paper for easy removal: Line the baking pan with parchment paper, leaving an overhang on the sides. This creates a “sling” that makes it incredibly easy to lift the bars out of the pan after baking.
- Toast the flour (optional): For a deeper, nuttier flavor, toast the flour before using it. Spread the flour on a baking sheet and bake at 350°F (175°C) for 5-7 minutes, or until lightly golden, stirring occasionally. Let it cool completely before using.
- Make ahead: The dough can be made ahead of time and stored in the refrigerator for up to 2 days. You can also assemble the bars and freeze them before baking. Just add a few extra minutes to the baking time if baking from frozen.
Serving & Storage Suggestions
Once cooled, cut the Peanut Butter ‘N’ Jelly Bars into squares or rectangles of your desired size. Serve them at room temperature. These bars are perfect for lunchboxes, snacks, or desserts.
To store, place the bars in an airtight container at room temperature for up to 3 days, in the refrigerator for up to a week, or in the freezer for up to 2 months. To freeze, wrap the bars individually in plastic wrap and then place them in a freezer-safe bag or container. Thaw at room temperature before serving.
Nutritional Information
| Nutrient | Amount per Serving | % Daily Value* |
|---|---|---|
| Calories | 237.6 kcal | N/A |
| Calories from Fat | N/A g | 32% |
| Total Fat | 8.5 g | 13% |
| Saturated Fat | 3.8 g | 18% |
| Cholesterol | 30.8 mg | 10% |
| Sodium | 110 mg | 4% |
| Total Carbohydrate | 37.4 g | 12% |
| Dietary Fiber | 1.1 g | 4% |
| Sugars | 19.2 g | N/A |
| Protein | 4.3 g | 8% |
*Percent Daily Values are based on a 2,000 calorie diet. Your daily values may be higher or lower depending on your calorie needs.
Variations & Substitutions
- Gluten-Free: Substitute the all-purpose flour with a gluten-free all-purpose blend. Be sure to use a blend that contains xanthan gum for binding.
- Different Nut Butters: Experiment with almond butter, cashew butter, or sunflower seed butter for a unique twist.
- Jam Variations: Use any flavor of jam or preserves you like! Raspberry, strawberry, blueberry, or even apricot jam would be delicious.
- Chocolate Chips: Add 1/2 cup of chocolate chips to the dough for an extra decadent treat.
- Oatmeal: Add 1/2 cup of rolled oats to the dough for a chewier texture.
- Vegan: Substitute the butter with a vegan butter alternative and the eggs with flax eggs (1 tablespoon of ground flaxseed mixed with 3 tablespoons of water per egg, let sit for 5 minutes to thicken).
FAQs (Frequently Asked Questions)
Q: Can I use natural peanut butter?
A: Yes, you can use natural peanut butter, but make sure to stir it well before using. Natural peanut butter tends to be more oily, so you may need to adjust the amount of butter in the recipe slightly.
Q: How do I prevent the jelly from burning?
A: Make sure the oven temperature is accurate and don’t overbake the bars. The jelly may bubble and caramelize slightly, but it shouldn’t burn if baked properly.
Q: Can I make these in a different size pan?
A: Yes, you can use a different size pan, but you’ll need to adjust the baking time accordingly. A smaller pan will require a longer baking time, while a larger pan will require a shorter baking time.
Q: How do I know when the bars are done?
A: The bars are done when the top is golden brown and the edges are set. A toothpick inserted into the center should come out with just a few moist crumbs attached.
Q: Can I add a glaze to these bars?
A: Absolutely! A simple powdered sugar glaze would be a delicious addition. Whisk together powdered sugar with a little milk or lemon juice until you reach your desired consistency, and drizzle over the cooled bars.
Final Thoughts
These Peanut Butter ‘N’ Jelly Bars are a delightful twist on a classic favorite. Their ease of preparation and crowd-pleasing flavor make them perfect for any occasion. Whether you’re looking for a nostalgic treat or a simple dessert to share, these bars are sure to bring a smile to your face. So, go ahead, preheat your oven, gather your ingredients, and bake up a batch of these irresistible bars. And don’t forget to share your creations with us! We’d love to see your variations and hear your feedback. Happy baking!