
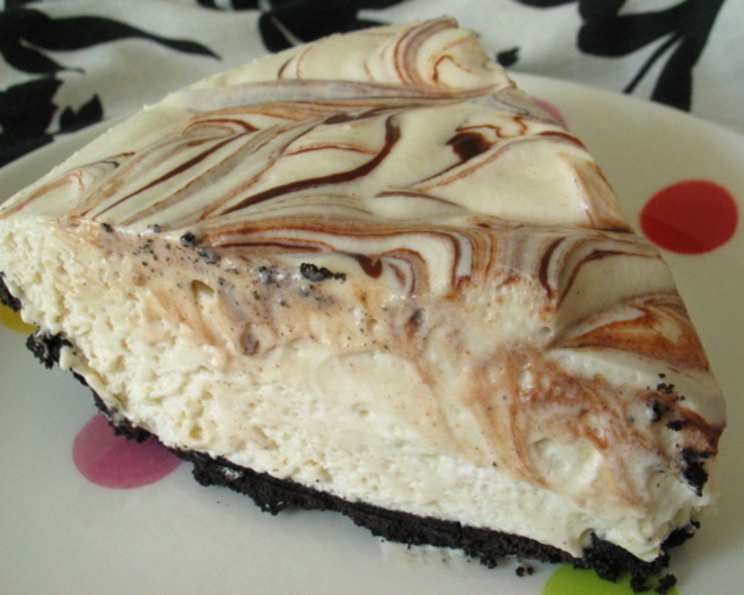
Frozen Peanut Butter Pie: A Slice of Sweet Nostalgia
I’ll never forget the first time I tasted a frozen peanut butter pie. It was at a church picnic when I was about 8 years old. Mrs. Henderson, known for her exceptional desserts, brought it, and after one bite, my world changed. The creamy, peanut butter filling, the subtle sweetness, and the fudgy swirls – it was pure dessert perfection. It became the highlight of every summer, and even now, the aroma of peanut butter instantly takes me back to those carefree days, sunshine, and that incredible frozen pie.
Recipe Overview
- Prep Time: 20 minutes
- Cook Time: 0 minutes
- Total Time: 5 hours 20 minutes (includes freezing time)
- Servings: 8
- Yield: 1 pie
- Dietary Type: Vegetarian (easily adaptable to vegan)
Ingredients
- 4 ounces cream cheese, softened (can substitute with vegan cream cheese)
- 1 cup powdered sugar
- 1/3 cup peanut butter (smooth or chunky, depending on preference)
- 1/2 cup milk (dairy or non-dairy alternative)
- 9 ounces non-dairy whipped topping (such as Cool Whip or a vegan alternative)
- Fudge sauce (for swirling)
- 1 (9 inch) graham cracker pie crust (store-bought or homemade)
Equipment Needed
- Medium mixing bowl
- Electric mixer (handheld or stand mixer)
- Rubber spatula
- Butter knife or skewer
- 9-inch pie dish
Instructions
- Begin by ensuring your cream cheese is properly softened. This will help it blend smoothly with the other ingredients. Place the softened cream cheese, powdered sugar, and peanut butter into the medium mixing bowl.
- Using your electric mixer, blend the cream cheese, powdered sugar, and peanut butter together on medium speed until the mixture is smooth and well combined. Be sure to scrape down the sides of the bowl periodically to ensure everything is incorporated evenly.
- Slowly add the milk to the mixture while continuing to beat on low speed. Adding the milk gradually prevents the mixture from becoming too thin or curdled. Increase the speed to medium and continue beating until the mixture is creamy and smooth.
- Continue beating the mixture on medium-high speed until it becomes light and fluffy. This usually takes about 2-3 minutes. The fluffier the filling, the better the texture of the frozen pie.
- Gently fold in the non-dairy whipped topping using a rubber spatula. Be careful not to overmix, as this can deflate the whipped topping and result in a less airy filling. Fold until just combined.
- Pour the peanut butter filling into the graham cracker pie crust, spreading it evenly with the spatula.
- Now for the fun part! Drizzle the fudge sauce over the top of the peanut butter filling. Use a butter knife or skewer to swirl the fudge sauce through the pie, creating a beautiful marbled effect. Don’t overdo it – a few well-placed swirls will add just the right amount of chocolatey goodness.
- Place the pie in the freezer and freeze until firm. This usually takes at least 4-5 hours, but overnight freezing is even better to ensure the pie is completely solid.
- When ready to serve, remove the pie from the freezer and let it sit at room temperature for about 5-10 minutes to soften slightly. This will make it easier to slice and serve.
Expert Tips & Tricks
- Soften the cream cheese properly: This is crucial for a smooth filling. If you forget to take it out ahead of time, you can microwave it in 5-second intervals until softened, but be careful not to melt it.
- Peanut butter choice: Use your favorite peanut butter! Creamy will give you a smoother texture, while chunky will add a little bit of crunch.
- Homemade graham cracker crust: For an extra-special touch, make your own graham cracker crust. It’s surprisingly easy and tastes so much better than store-bought.
- Fudge sauce variations: Get creative with your swirls! Use caramel sauce, chocolate syrup, or even a raspberry swirl for a different flavor profile.
- Prevent freezer burn: To prevent freezer burn, wrap the pie tightly in plastic wrap before freezing, and then wrap it again in aluminum foil.
- Easy slicing: Run a knife under hot water and dry it before each slice for clean, effortless cuts.
Serving & Storage Suggestions
Serve your frozen peanut butter pie chilled, straight from the freezer. A dollop of whipped topping or a sprinkle of chopped peanuts adds a nice finishing touch. This pie is best served within a week of making it, although it can be stored in the freezer for up to a month. After a month, the texture may start to deteriorate slightly. If you have leftover pie, store it in an airtight container in the freezer. There is no need to reheat this pie. Simply take a slice or two from the freezer whenever you would like to enjoy it.
Nutritional Information
(Estimates based on typical ingredients; actual values may vary)
| Nutrient | Amount per Serving | % Daily Value |
|---|---|---|
| Calories | 430 kcal | 22% |
| Total Fat | 27 g | 35% |
| Saturated Fat | 13 g | 65% |
| Cholesterol | 18 mg | 6% |
| Sodium | 278 mg | 12% |
| Total Carbohydrate | 45 g | 16% |
| Dietary Fiber | 1 g | 4% |
| Sugars | 35 g | 70% |
| Protein | 6 g | 12% |
Variations & Substitutions
- Vegan Pie: Easily make this pie vegan by using vegan cream cheese, non-dairy milk, and a vegan whipped topping alternative. Ensure your graham cracker crust is also vegan.
- Gluten-Free Pie: Use a gluten-free graham cracker crust for a gluten-free version.
- Chocolate Peanut Butter Pie: Add 2 tablespoons of cocoa powder to the filling mixture for a richer, chocolatey flavor.
- Different Nut Butters: Try using almond butter or cashew butter instead of peanut butter for a different flavor profile.
- Crushed Cookie Crust: Substitute the graham cracker crust with a crushed Oreo or chocolate chip cookie crust for a decadent twist.
- Add Chocolate Chips: Mix in 1/2 cup of mini chocolate chips into the filling for some added texture.
FAQs (Frequently Asked Questions)
Q: Can I use regular whipped cream instead of non-dairy whipped topping?
A: Yes, you can substitute regular whipped cream, but keep in mind that it may not hold its shape as well when frozen. The texture will also change.
Q: How long does the pie need to freeze?
A: The pie needs to freeze for at least 4-5 hours, but freezing it overnight is recommended for the best results.
Q: Can I make this pie ahead of time?
A: Absolutely! This pie is perfect for making ahead of time. In fact, it’s better if it has time to freeze completely.
Q: Can I use a different size pie crust?
A: Yes, you can use a different size pie crust, but you may need to adjust the amount of filling accordingly.
Q: My pie is too hard to slice. What should I do?
A: Let the pie sit at room temperature for a few minutes to soften slightly before slicing. Running your knife under hot water can also help.
Final Thoughts
This frozen peanut butter pie is more than just a dessert; it’s a journey back to simpler times. It’s a reminder of summer picnics, shared laughter, and the joy of a perfectly sweet treat. I encourage you to try this recipe and create your own memories with it. Whether you stick to the original or add your own twist, I’m confident that this pie will be a crowd-pleaser. So, go ahead, whip up a batch, and share the peanut butter love! Don’t be shy – let me know in the comments below how yours turned out! And, if you are feeling particularly decadent, try it with a scoop of vanilla ice cream on the side. You won’t regret it.